Very nice looking bench.


 Member
Very nice looking bench.
 Moderator
Outstanding work Jim. It will serve you well for many years!

Please help support the Creek.
"It's paradoxical that the idea of living a long life appeals to everyone, but the idea of getting old doesn't appeal to anyone."
Andy Rooney
 Member
That is really awesome. Beautiful execution. So, was there anything aside from wood that the package did not include? Would you be able to say total cost (wood, plans and anything else possibly required) for you to build this? (Not including time) Thanks for sharing. And great pictures, btw.
 [OP]
Member
[OP]
Member
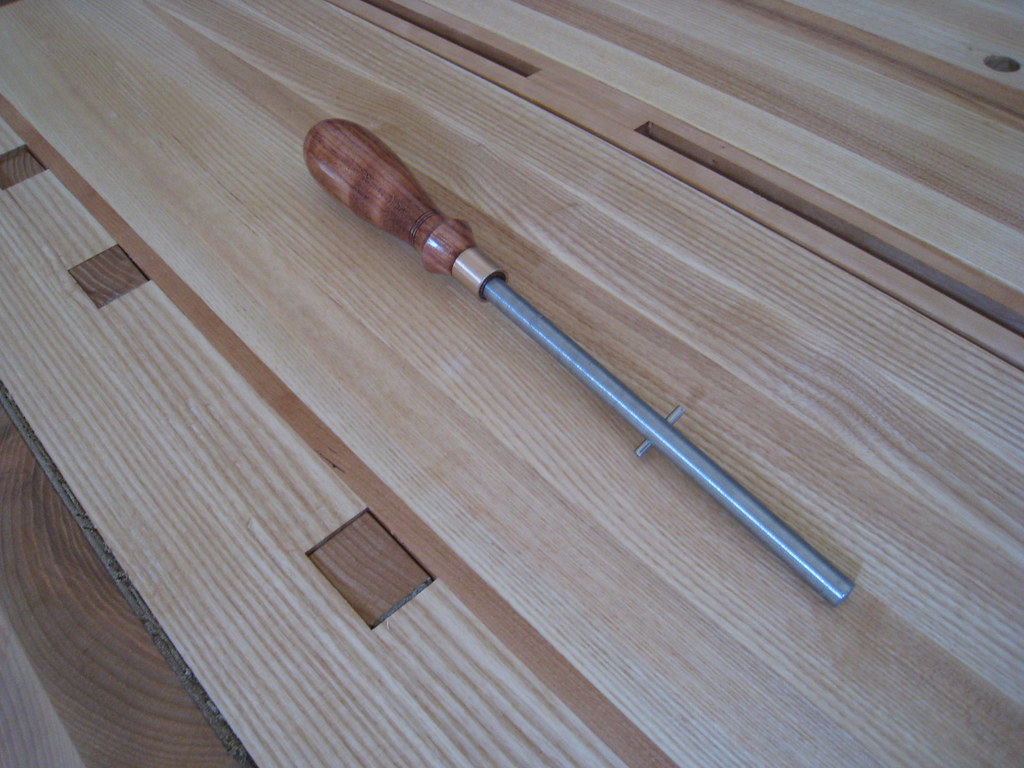
The "Benchmaker's Package" includes just about everything you need. They even included the little spring pin that acts as a stop for the parallel guide pin in the below picture. The handle was not included.Originally Posted by Jack Camillo

So my total costs were:
210 bf of 8/4 ash: $950
Benchmaker's Package (w/ shipping) $764
1/2X12X12" UHMW plastic for the feet(Grainger) $25
Turned handle: $25
Letter engraving: $75
Lee Valley Surface Clamp: $75
Add the glue, finish, wax I was right under $2k for materials.
I have a lot more detail over on TalkFestool. I'm not allowed to post a link here but you can head on over there and do a search for "Roubo" and you can find a lot of pictures of the package, etc.
Thanks for all the praise guys. It was a blast to build!
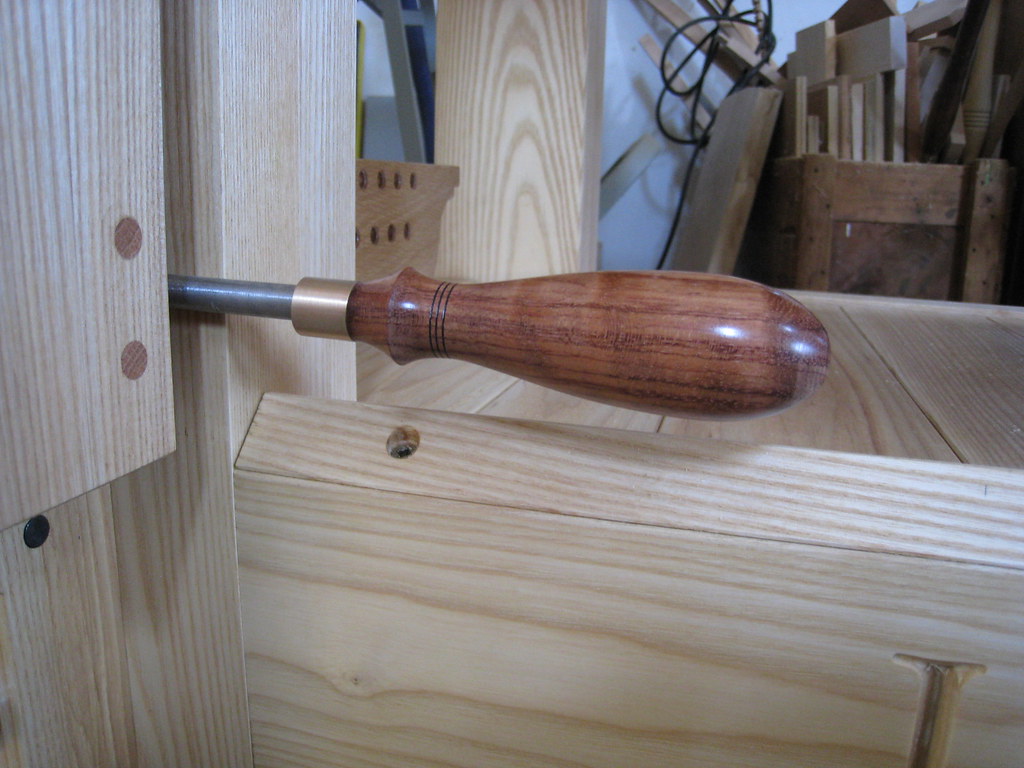
Here's some followup pictures of the parallel guide pin with the custom handle I hired someone to turn for me (I don't have a lathe):
Last edited by Jim Kirkpatrick; 07-11-2010 at 8:42 AM.
Member
Great job !!
MARK
 Member
Very nice, Jim. One of these days I'm going to get around to making a bench. I may have to check out Benchcrafted site when I finally get ready.
I keep looking at the damaged silver maple in my front yard and contemplating...
Where did I put that tape measure...
 Member
Well looks to be a great bench but having dial up connection it will take 20 minutes for the pics to load. Why can some post huge pics that take forever to load & some can only do small pics that are limited to a certain size. When I come across such big pics I don't even bother to wait for them to load. I wish I could tell you how nice it is but I'm not waiting......
 Contributor
Outstanding bench and really beautiful pictures. Nice execution. That looks like it was a LOT of work.
Really nice photography, as well. Clear, crisp and well framed shots. I'm not sure I want to know how you got that helicopter's eye view of the bench, though.
[OP]
Member
I have 24 ft. ceilings in my shop. It's a detached 3 car garage. I took the picture from the landing of stairs leading into the man-town room over the garage. Thanks Richard!
Member
Beautiful bench! I love the split top design. I believe that may aid in building the bench and making it somewhat manageable to slug around during the build. I like the center tool hanging tray that looks to be removable and then use the top to clamp a project if need be. Just not a fan of the front vise. Visually it is absolutely stunning, in my work if I have to dovetail a wide panel then I would have to pull out a clamp to secure the length of the piece like I have with my shoulder vise bench. I think I will make another bench, very similar to yours but try the double screw front vise for it.
Overall that is a stunning piece. Will give you years of satisfaction and pride. great work!!
[OP]
Member
Correct David, Not only does the split top benefit me when I want to slide a clamp in between there but it did indeed benefit me during the build. I was able to build it without any outside help. Additionally, I didn't have to be too fussy when locating the mortises for the underside of the bench top to accept the leg tenons. Only 2 mortises to line up at a time rather than all 4 at a time.
I think if you have hands-on access to the leg vise you will change your tune about using one on your next bench. For dovetailing wide boards you can use the right side of the vise then slide the deadman over and use the Veritas hold down clamp to secure the right side of your work piece.
Check out these videos on how effortlessly the vise operates. I can attest first hand that they will indeed hold a 250 lb. man with the same minimal clamping effort!
http://www.youtube.com/watch?v=o4kXn...os=q9STRJJ9fCw
http://www.youtube.com/watch?v=zWe32...os=WeSoZ5rI6sw
Thanks for the praise!
Last edited by Jim Kirkpatrick; 07-14-2010 at 5:26 PM.
It's so beautiful I'd hate to work on it. An absolute work of art. Time to get it dirty.
What you listen to is your business....what you hear is ours.
Member
Great bench, great workmanship. Isn't it wonderful what good crisp photography gives does when a project like this is shown. It is the photography that puts the final seal on it for me.
Chris
Everything I like is either illegal, immoral or fattening
[OP]
Member
It's just my lil' point-n-shoot Canon. Nuthin fancy. But I do have 4 large metal-halide lights lighting my shop. I think that makes a difference. Thanks Chris.")
Last edited by Jim Kirkpatrick; 07-18-2010 at 8:03 PM.
 Member
Jim, that is an amazing work of art! Incredibly, I just discovered the Roubo workbench myself yesterday while surfing the web, and saw that it was exactly the bench that I wanted to build. I ordered a book and DVD so I could drool for a while. You have certainly set the mark. If my bench ends up looking half as good as yours (when I get around to building it), I would be ecstatic. I actually discovered the Roubo bench via a link at http://www.lakeerietoolworks.com/ when I was looking for large wooden screw vises. Great job! The engraving really sets it off.
" Far better it is to dare mighty things, to win glorious triumphs, even though checkered by failure, than to take rank with those poor spirits who neither enjoy much nor suffer much, because they live in the grey twilight that knows not victory nor defeat." Teddy Roosevelt
 Posting Permissions

 Reply With Quote