Page 1 of 2 12 LastLast
Results 1 to 15 of 20

Thread: a couple questions about BLO

  1. #1
    Join Date
    Nov 2009
    Location
    Evansville, IN
    Posts
    1,191

    a couple questions about BLO

    I am making a cherry box. First time I really started any flatwork that needs to be nice.

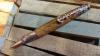
    I took a small piece of the cherry (cut off) and sanded it and put some blo on it. I like the color it gave the cherry but man it made the wood look like it was never sanded. So I figured maybe I need to ask some questions about this.

    The container did not saying about finishing. It just said to put on wood and wipe all around then wipe off any excess or the blo will not dry and harden properly. Makes sense to me...

    Now do you guys that use blo buff the final finish or ????
    Also is blo okay to use on a bathroom vanity or not. I am not looking for the vanity to last 5 years and I am sure I will be making something else. Actually if I get it to last a year or so Id be happy. I hate to spend alot of time into lacquer or poly etc for such a short period of time but then again I guess I could make it and then when i upgrade I could sell it for something...

    as alwasy any info appreciated..
    "To me, there's nothing freer than a bird, you know, just flying wherever he wants to go. And, I don't know, that's what this country is all about, being free. I think everyone wants to be a free bird." - Ronnie Van Zant

  2. #2
    Join Date
    Mar 2006
    Location
    SoCal
    Posts
    22,514
    Blog Entries
    1
    I'm not sure why the BLO would raise your grain(?). I generally sand such items to 320 - 400 with end grain to 600 to burnish it a bit. I wipe on the BLO and let it stand several minutes up to a a half hour and then rub it off like I changed my mind.

    Let it dry a few days and shellac or the top coat of your choice. I have not had it cause a return of roughness that required re-sanding so not having had the experience this may not be all that helpful.
    "A hen is only an egg's way of making another egg".


    – Samuel Butler

  3. #3
    Join Date
    Jul 2006
    Location
    San Jose, CA
    Posts
    276
    +1 with what Glenn said.

    I usually let the BLO cure for a week before moving on to either shellac and/or topcoat of choice which for me is usually a Target coatings product (water based).

    I don't know if you know this or not... but BLO-soaked rags are well known to spontaneously combust. I usually do one of the following with my used rags:

    1) rinse them out thoroughly with soap, put outside to dry
    2) in a hurry, I'll toss small ones in a small ziplock bag FULL of water, then toss in outside garbage can.

    There have been a few close calls posted here on SMC... Just thought I'd send that warning out in case you weren't familiar...

    Andy

  4. #4
    Join Date
    Nov 2009
    Location
    Evansville, IN
    Posts
    1,191
    It is not that the blo made it real rough it just made lines appear that look like sanding marks... but I used a ros on it and so therefor it should not have straight lines on it.. I did sand to 320 grit. Would actualy have sanded to higher grit if I had had it on hand..

    Using blo do you have to use another product to finish on top of the blow or can blo be used as the finish?
    "To me, there's nothing freer than a bird, you know, just flying wherever he wants to go. And, I don't know, that's what this country is all about, being free. I think everyone wants to be a free bird." - Ronnie Van Zant

  5. #5
    Join Date
    Mar 2005
    Location
    Raleigh, NC
    Posts
    888
    Karl, not only does BLO bring out the warmth and figure of the wood, it also brings out mill marks and sanding streaks; as you've just discovered! I always topcoat BLO as it's not a hard finish. But that's the good thing about oil finishes, just sand some more, wipe on some more BLO. But give BLO plenty of time to dry if you plan on a topcoat of shellac or varnish.

  6. #6
    Join Date
    Dec 2003
    Location
    SF Bay Area, CA
    Posts
    15,332
    Post some pics, Karl. I have a hard time understanding how you'd have milling marks ASSUMING you sanded well but it sounds like you have NOT sanded all that well. I can't think of anything else what would make such lines. How was the piece originally milled...did you do it?

    So BLO and cherry are very nice, I think. Most folks like to use BLO to warm up cherry and bring out any figure. Let that dry for a week...then lay down some shellac over it (can be clear, amber, garnet...whatever) and you're done...typically. Of course, it always depends on where the piece will live most of its life as to how you might want to finish it.

    BLO offers about zero protection of ANY kind to wood. Think of BLO as a dye or pigment if you want (a stain per se).
    Wood: a fickle medium....

    Did you know SMC is user supported? Please help.

  7. #7
    BLO is a poor 'topcoat'. It's used these days primarily as an aesthetic enhancer. It should certainly be covered with shellac at the least. For a bathroom vanity, I'd suggest either an oil or water based varnish for better repellancy.

  8. #8
    Join Date
    Mar 2006
    Location
    SoCal
    Posts
    22,514
    Blog Entries
    1
    Quote Originally Posted by Karl Card View Post
    It is not that the blo made it real rough it just made lines appear that look like sanding marks...
    Quote Originally Posted by Joe Scharle View Post
    Karl, not only does BLO bring out the warmth and figure of the wood, it also brings out mill marks and sanding streaks; as you've just discovered!
    Ah yes. I understand now. Agreed that the same characteristic that brings out the beauty in the different densities and figure in the wood will also accent mill marks. Finishing is often the tell tale of things the eye might miss. I always hand sand, scraper or hand plane to the final surface in prep for finishing.

    As to marks that look odd but are not due to tooling or abrasives. Here is some BLO on walnut without the topcoat yet. I will be using clear de-waxed shellac for that. At first I though I had marks left by a machine but, the hand shaping of this area was way past that surface level. It is just a part of the wood:
    Attached Images Attached Images
    Last edited by glenn bradley; 08-14-2010 at 11:48 AM.
    "A hen is only an egg's way of making another egg".


    – Samuel Butler

  9. #9
    Join Date
    Dec 2003
    Location
    SF Bay Area, CA
    Posts
    15,332
    crayon, Glenn, crayon...some 8 year old snuck into your shop....

    Wood: a fickle medium....

    Did you know SMC is user supported? Please help.

  10. #10
    thats bizarre .... I'd explain it as a character trait of non-production furniture?

  11. #11
    Join Date
    Nov 2009
    Location
    Evansville, IN
    Posts
    1,191
    Well at least others have seen and dealt with what I have seen with it...

    I assume what I need to do is get more sanding disk and run it up to 600 or 800 grit and see how that works..

    The cherry I have looks really good, some pinkish color to it but just on the start of getting a tad darker. So when I put the blo on it, it really made it kind of have a rich antiquish look.. Very nice anyway...

    if this box works out I will post some pics.
    "To me, there's nothing freer than a bird, you know, just flying wherever he wants to go. And, I don't know, that's what this country is all about, being free. I think everyone wants to be a free bird." - Ronnie Van Zant

  12. #12
    Karl-
    Sanding to 600 or 800 won't help. If what yr seeing truly is sanding marks, and yr using a ROS, then you'll see tight swirly scratches. Not straight ones.

    I've never seen scratchlike marks in walnut that were NOT scratches. My instinct is tht you need to back down a couple grits and then work up again.

    One of my favorite finishes on walnut (as if I've done this a million times) is mixing equal parts BLO / mineral spirits / varnish. You can wetsand it in with 400 and 600 and 800 grit (that's for pore filling - not for scratch removal). Just make sure you wipe off any excess during each application.

  13. #13
    Join Date
    Dec 2003
    Location
    SF Bay Area, CA
    Posts
    15,332
    I'm doubting the marks you're seeing are sanding marks. Can you feel them with your fingers or fingernails?

    Is it possible the wood has been edge-glued from smaller pieces to form a wider one and you're seeing the joint?

    Again, pics would help.
    Wood: a fickle medium....

    Did you know SMC is user supported? Please help.

  14. #14
    Join Date
    Mar 2003
    Location
    Southport, NC
    Posts
    3,147
    I don't know if the point has been made stronly enough but boiled linseed oil is not a finish. Think of it more as a grain enhancer. It provides no water, water vapor or abrasion protection. It has no long term durablility and will need frequent re-applicaion to maintain its appearance.

    As to your possible sanding marks, you should not do your finishing sanding by machine. For cherry, sand to 180 or 220 grit by machine Finishing sanding by hand using the highest grit you machine sanded with. Sand in the direction of the grain. Orbital sanders will almost always leave circular sanding marks unless hand sanding is used.

    The nicest finish for cherry is to sand to 180-220 grit as above. Wet a cloth and rub in a coat of BLO, let it set for 15-20 minutes and then wipe it as dry as you can get it. Let is fully dry for 12 hours. Apply a coat of garnet shellac which will further highlight the figure in the grain. You don't say what the box will be used for or its size but for non-abusive applications, I would finish off with a couple of coats of dewaxed clear shellac like Zinsser Seal Coat.

    For the future, to identify sanding miscues, glue drops you missed and to preview the look of finished wood, wipe the surface with mineral spirits.
    Last edited by Howard Acheson; 08-14-2010 at 11:52 AM.
    Howie.........

  15. #15
    Join Date
    Feb 2003
    Location
    Shoreline, CT
    Posts
    2,923
    Still looks like some kind of milling marks--perhaps some kind of burn mark when originally sawn or the like. Notice how they have been sanded away where the edges have been eased. There is another rough patch on the back rail that shows up well in the first picture. I'd drop back to 150 or so to get rid of them. No matter what they really are, they will look like milling marks that you missed.

Posting Permissions

  • You may not post new threads
  • You may not post replies
  • You may not post attachments
  • You may not edit your posts
  •