Page 1 of 3 123 LastLast
Results 1 to 15 of 34

Thread: Fine Tuning Dovetail Fit?

  1. #1

    Fine Tuning Dovetail Fit?

    I feel reasonably competent in the making of dovetails as functional joints, but I have problems fine tuning the fit. The advice you see everywhere is always along the lines "wherever it's tight, pare it down." That's pretty vague.

    The problem I have is figuring out just where it's tight. In a joint with 4 or 5 tails, that's 8 or 10 mating surfaces. What I've been doing is fitting it as much as it will go, then sighting along the length of the tails and in between them to see where there's contact. I scribble with a pencil by what appear to be the high spots, then pull it apart and pare on them from various directions, trying to avoid crumbling and tearout.

    While this mostly works, it invariably ends up with inconsistent gaps. Some of them can be ugly.

    I'm looking for a procedure or strategy that will give me consistent gaps. Maybe it just comes down to more practice, but if I'm doing something wrong, I'd like to be able to correct it.
    Last edited by Steve Branam; 09-05-2010 at 8:36 AM.
    Steve, mostly hand tools. Click on my name above and click on "Visit Homepage" to see my woodworking blog.

  2. #2
    Join Date
    May 2009
    Location
    cape cod
    Posts
    45
    sometimes you can see where the fibers are starting to compress when you are hammering the board home, if it is too tight. also, if you are leaving lines on your pin-board(assuming you are cutting tails first) put the pin board in your vise with a sacrificial piece behind it and pare to the line with a wicked sharp chisel. also the same can be done to the tails before marking the pin board. use epoxy instead of wood-glue on tight fitting joinery, it acts as a sort of lubrication whilst the wood glue will cause the wood to swell.

  3. #3
    Quote Originally Posted by Steve Branam View Post
    I feel reasonably competent in the making of dovetails as functional joints, but I have problems fine tuning the fit. The advice you see everywhere is always along the lines "wherever it's tight, pare it down." That's pretty vague.
    Steve, this is THE question that isn't addressed by those teaching dovetailing. Truth is, if you watch them, their 'secret' is that they are good at cutting to a line and don't use a lot of paring, if any, to fit their dovetails. It doesn't matter if you're watching Underhill, Klauz, or Cosman, they're methods are about sawing, not chiseling.

    Lots of saw practice is required to achieve this skill level, of course, and practice isn't something that most woodworkers want to do. They seem to believe that 'they'll get better with experience' and that's certainly true. The question is what can one do to speed up the experience? If you draw 100s of lines on a scrap board and cut to each of them, your saw precision will increase much more quickly than simply relying upon the dozen or so cuts you make each time you want to cut dovetails. You'll even be able to see and feel your improvement.

    You probably have thought about this but the problem with "fitting" dovetails is that fit isn't just about removing wood that prevents the joints going together. It's also about space between the surfaces. It's about the relationship between one dovetail and the other. And every bit of wood you remove by paring will change these two things as well as allowing the surface you pared to fit with its mate. And so, fitting by paring becomes a puzzle where removing a bit of wood has the potential to move the entire string of dovetails left/right and also to open a gap on the other side of the dovetail. You end up chasing your tail. I feel your pain :-)

    Cheers --- Larry
    Cheers --- Larry "aka Woodnbits"
    http://www.woodnbits.com/blog

  4. #4
    you can rub a little chalk on one side and see where it ends up on the other side. The bottom line, though, is the best way is to practice, practice and practice, saw to the lines, and chop away the waste precisely and accurately the first time. Going back and trimming to fit is by far the hardest way of doing it.

  5. #5
    I'd recommend either taking a class or picking up a good dvd for some tips on layout and cutting. While it is possible to "fine tune" errors, dovetail joints should be primarily sawcut to sawcut.

    Some others might be able to provide good advice if you're more specific about the kinds of problems your having and what the source of the inaccuracy is.

  6. #6
    Yep, practice is very important, or rather perfect practice is important.

  7. #7
    You can rub pencil on the sides of the pins. When you tap the joint together and pull it apart, the high spots on the tail board will have graphite on them so you know where to pare. As others have said, the shiny spots also reveal high spots.

  8. #8
    Join Date
    Mar 2007
    Location
    Fayetteville, GA
    Posts
    437
    Use a pencil to mark & examine for rubbing marks. It'd take forever if you've got a bunch of drawers to fit.

    It's all about sawing straight/square & transferring layout lines. The ability to saw to a line is critical in hand tool work, not just dovetail. It's not difficult but it does require a lot of practice as other have said.

    In the beginning, I was practicing with just a single board. Layout the lines, cut them, & examined my mistakes. Then I made practice joints...about 40 of them, once everyday. Now, I just use my hand saws whenever I have a chance instead of going for the miter/band saw. As I use hand saws more often, My sawing skill improves. I'm far from being an expert but I don't have to spend a lot of time fixing sawing mistakes either. I also learn to sharpen my own saws and that helps too.

  9. #9
    Join Date
    Mar 2009
    Location
    Chevy Chase, Maryland
    Posts
    2,484
    Alright, time for some heresy. I'm about to get pounded by the "just learn to saw" crowd.

    I will admit that sawing well is the best alternative, but who wants to wait until they can saw perfectly every time before making gap free dovetails? While you're getting there with the saw, you can adopt abother strategy, if you are willing to add another step or two to your dovetailing. First, spend some extra time in marking your dovetails with a knife line on every side and a wheel gauge at the bottom. Second, saw as close as you can to the line in the waste side. As you get better at sawing you will get to the point that you split the knife line most of the time along it's whole length and on both sides, but at the beginning, the back side may be out or the angle might be lost along it's length. Now just use the chisel to pare to the lines where necessary. Such paring is not that time consuming if you have sawn as well as you can. Indeed, paring the baseline areas, which even good sawers have to do takes as long or longer. These steps take some skill - skill in marking and skill in paring, but they offer an alternative while you work up to perfect sawing. Good luck.


  10. #10
    Join Date
    Mar 2007
    Location
    Stony Plain, Alberta
    Posts
    2,702
    Well said Sean.
    For me there is always paring. But pretty much all of the time I do half blind joints. The better the sawing the less paring...
    For me the layout has to be done with a good marking knife that will leave a crisp line. I use extra lights at my bench to help see the lines. Sharp tools, real sharp make the job a lot easier.
    One other thing I do to help the tight joint go together is to pare the corners off the back side of the tails. Fine line between to loose and see gaps or make it too tight and split the joint.
    I don't test fit my joints as I would do damage to the small pins taking it apart.

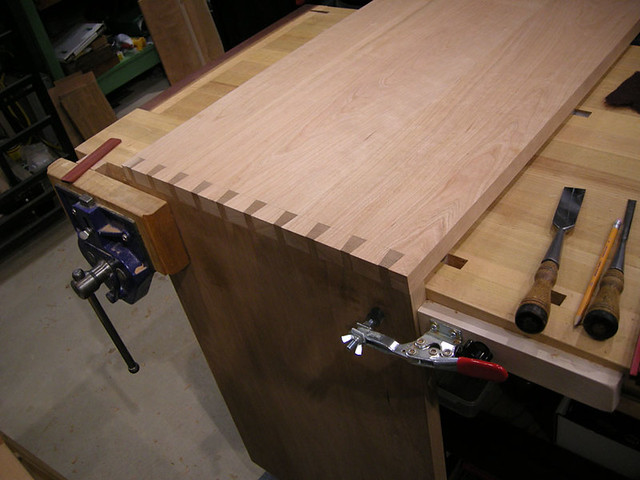
    IMG_5356.jpg


    .

  11. #11
    Thanks for the all hints! Larry, you've hit the problem dead on, you adjust here and it all goes out of whack elsewhere, like trying to solve a Rubik's cube.

    I think I can saw closer to the line. I've been following Roy Underhill's advice from the Woodwright's Apprentice. He doesn't stress the sawing so closely in that one, more the adjusting, so maybe I was taking too much liberty with the clearance.

    I fully agree with the sawing practice. I like Tom Lie-Nielsen's video where he's sawing repeated lines as practice. This may also help with my mortise and tenon joints, where I have much the same problem.

    I'm working on some dovetailed toolboxes, so they don't have to be perfect, but I was hoping to refine my technique on them. I have two more to go on the first box, so I'll try that this afternoon.
    Steve, mostly hand tools. Click on my name above and click on "Visit Homepage" to see my woodworking blog.

  12. #12

    A Tale of Two Tails

    Ok, here are some initial results. I had cut all the pins and two sets of tails yesterday. That left the tails on the two ends of one board for today.

    My first tail end, I knifed the pin outlines (difficult to keep the pin board in place while getting a deep enough knife line) then knifed them across the edge with a small square. Then I concentrated on sawing JUST to the waste side of the knife lines. The result was pretty good except for two tails that needed some paring, and two pins that needed paring where they weren't sawn perfectly straight down from the edge. This still took a while before I could fit it with only moderate taps from the mallet. Still a bit of gappage, but at least I was able to identify the problem spots fairly easily.

    The second tail end, I marked the pin outlines with pencil, then knifed across the end-grain with the square JUST to inside edge of the pencil lines (i.e. not the waste side). Then I used those as the kerf starts, so now I was cutting each tail side a pencil-line width's narrower. The result was a joint that fit together with hand pressure first try. Still roughly the same amount of gappage as the previous one, but without needing 30 minutes of fiddling to get there.

    So I'll call that incremental progress. I'll do some more practice cutting to lines. Once I can get my cuts to be more consistent, I'll use this method (knifing just inside the pencil line) to control the tolerance until I can get a hand-pressure fit with smaller gaps.
    Steve, mostly hand tools. Click on my name above and click on "Visit Homepage" to see my woodworking blog.

  13. #13
    Join Date
    Mar 2009
    Location
    Chevy Chase, Maryland
    Posts
    2,484
    That's what it's all about - finding what works for you.

    One thing, different woods have different needs as far as fit. The softer woods are forgiving as they compress easily, The harder woods are much less forgiving.

  14. #14
    Join Date
    Mar 2007
    Location
    Stony Plain, Alberta
    Posts
    2,702
    If your tail board is sliding around try this.
    I put a small ledge, with a skew block plane, on the back side of the tail board.
    This is done before the tails are cut.


    This will keep the tail board from moving around while one is scribing the pins.
    Very easy now to get clean scribe lines.


    I use my 4 1/2 as a block to hold the tail board up.


    .

    .

  15. #15
    Another idea for supporting the tailboard is a block of wood with fairly fine-grit sandpaper glued to opposite faces.

    I'm not sure I want to delve into the original topic here. You want to aim for a perfect fit off the saw, but getting to that point can be elusive. I've mostly gotten there, but I don't know how it happened other than that I practiced.

Posting Permissions

  • You may not post new threads
  • You may not post replies
  • You may not post attachments
  • You may not edit your posts
  •