Results 1 to 12 of 12

Thread: Awesome new way to make Beaded Face Frame w/pics & vid

  1. #1
    Join Date
    Apr 2003
    Location
    London, Ontario
    Posts
    302

    Awesome new way to make Beaded Face Frame w/pics & vid

    Hello everyone,

    I have been working on the design of this machine on and off for about two years.

    As of tonight, it is finally operational.

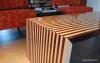
    It is a 1975 Delta RAS12 12" radial arm saw with custom notching head that has shear and negative rake. There is a digital height gauge on the side that is accurate to 1/200".

    Run the bead on the router table. Knock corner off bead with micro adjustable sled.

    Notch other end with pneumatically operated notcher.

    IT'S ALIVE!

    Video of running bead on router table

    Video of RAS12 removing bead

    Thanks for looking,

    David - Tool Guy
    Attached Images Attached Images

  2. #2
    Join Date
    Feb 2008
    Location
    Northwestern Connecticut
    Posts
    7,149
    Very interesting use of the RAS there Dave. I love the pneumatic control system, I fear the Rube Goldberg society may give you an award for that invention, but its a thing of beauty none the less. How doe the router table do with the power fed climb cut?

  3. #3

    David please explain a little further.

    I have been really interested in the beaded frames since Kreg came out with their jig for same. I'm not quite getting what shape or form you are running in the radial arm saw. I am probably going to be embaressed by the simplicity of the answer but I can't see the process. Wouln't this be the part where you are notching out the opening with a router bit? Hopefully you understand my question well enough to respond.
    Thanks,
    Larry R
    Seattle

  4. #4
    Join Date
    Apr 2003
    Location
    London, Ontario
    Posts
    302
    Here are some shots from today,

    Using a single bevel marking knife, I mark where the middle stile needs to go on the lower rail.

    Shot of middle rail now fitting into lower rail.

    I am switching widths of material, I am going from 4.684" to 4.130" wide material. Doing the math, I need to lower the RAS head 0.554". I reset the digital height gauge to zero and lower the head 0.555. Test cut shows height setting is bang on.

    I got most of both sides of the island frames made today. I expect to finish them tomorrow.

    This is just too Cool! Two years in my head, now a reality! Works awesome. This is going to make making all the beaded face frames for all my built ins sooooo much easier.

    Some final shots of the joints.

    Thanks for looking,

    David - Tool Guy
    Attached Images Attached Images

  5. #5
    Join Date
    Apr 2003
    Location
    London, Ontario
    Posts
    302
    One last shot,
    Attached Images Attached Images

  6. #6
    Join Date
    Apr 2003
    Location
    London, Ontario
    Posts
    302
    Quote Originally Posted by Larry Rasmussen View Post
    I have been really interested in the beaded frames since Kreg came out with their jig for same. I'm not quite getting what shape or form you are running in the radial arm saw. I am probably going to be embaressed by the simplicity of the answer but I can't see the process. Wouln't this be the part where you are notching out the opening with a router bit? Hopefully you understand my question well enough to respond.
    Thanks,
    Larry R
    Seattle
    I have done it with a router bit in a router, it is a PITA.

    Look at the test cut on the offcut, that is the profile of the cutterhead.

    Thank you,

    David.

  7. #7
    Join Date
    Dec 2007
    Location
    Battle Ground, WA.
    Posts
    594

    Beaded Face Frame

    Dave, Great job on with the radial arm saw. Tom

  8. #8
    Join Date
    Mar 2003
    Location
    SE PA - Central Bucks County
    Posts
    65,908
    David, the end result is outstanding!
    --

    The most expensive tool is the one you buy "cheaply" and often...

  9. #9
    David, you have built a very nice system, I like the automated operations shown in your videos. Just the other day I saw a similar system from Sommerfeld's advertised in a magazine. Their ad showed the cutter that removes the bead, mounted in a table saw and being used with a sled to hold the rail or stile being notched.
    http://www.sommerfeldtools.com/prodi...?number=01020B

  10. #10
    Join Date
    Jun 2007
    Location
    SCal
    Posts
    1,478
    David, you should get an ww ingenuity award :-)

    Question: When I look at the final face frame.... I am curious, why not just make a straight face frame and add bead molding? Seems easier, and same end result? I am sure I am missing something, please advise... thx

  11. #11
    David,

    Nice tooling and great results but wouldnt getting the kreg system be alot easier? I watched the kreg video and it seemed pretty easy to get the results you are achieving with the kreg setup.

    Will,

    adding the bead after is very time consuming and tedious. Think messy glue and filling of nail holes and that is after lots of miter cuts with tiny moulding.
    I will take Dave's way or the kreg way over adding the bead after any day.
    Fullerbuilt

  12. #12
    Join Date
    Dec 2003
    Location
    SF Bay Area, CA
    Posts
    15,332
    Eiji,

    I can see that...but it took David 2 years to get this far!
    Wood: a fickle medium....

    Did you know SMC is user supported? Please help.

Posting Permissions

  • You may not post new threads
  • You may not post replies
  • You may not post attachments
  • You may not edit your posts
  •