Page 1 of 2 12 LastLast
Results 1 to 15 of 17

Thread: How did they do it?

  1. #1
    Join Date
    Mar 2006
    Location
    Central Kentucky
    Posts
    196

    How did they do it?

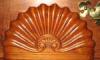
    I found this picture of a great looking table on another great website. Can someone tell me how the fancy trim at the top is connected to the table? It does not look like the corners of the top trim on the table are dovetailed at the corners. I do think the crossbrace at the bottom of the table looks like a different style than the rest of the table. It also would be neat to know the deminsions. Table4 (Medium).jpgBarry Bruner

  2. #2
    Join Date
    Jun 2007
    Location
    Clinton Township, MI, United States
    Posts
    1,554
    I believe that it is dropped into a mortise. Think of it as a 3D inlay.
    Mike
    From the workshop under the staircase, Clinton Township, MI
    Semper Audere!

  3. #3
    Join Date
    Mar 2006
    Location
    Central Kentucky
    Posts
    196

    How did they do it?

    Mike, thank you for the reply. Knowing that you have pretty good solutions to my problems. That is a lot more reasonable than the route that I was thinking. How would you secure the corners? Dovetail in each or brad or glue. Barry Bruner

  4. #4
    Join Date
    Jun 2007
    Location
    Clinton Township, MI, United States
    Posts
    1,554
    Since I cant see the fence design closely, I will generalize. I would make the corners mitered and effectively make small biscuits that glue inside. If that seems too difficult or the fence is too thin, then perhaps diagonal doweling with bamboo skewers. But, really, if there is some area for the miter, than glue alone should work. There should not be any great force applied to it, unless the floor it sits on is *really* sloped, and a teacup slides across and into it (grinnnn!).
    Dont make more of it than it is, the more I look at how the period guys built things, the more I think we over-engineer our work.
    Remember too, that the mortise the base drops into will provide a lot of support.
    Mike
    From the workshop under the staircase, Clinton Township, MI
    Semper Audere!

  5. #5
    Join Date
    Oct 2008
    Location
    Columbus, OH
    Posts
    3,064
    Hmm, my curiosity is getting the best of me... Can anyone tell if that top has breadboard ends? I can't really tell myself from the picture.

    I have a future project in mind that has sort of the same style, with an attached trim piece. My thinking to date has been to use breadboard ends to compensate for seasonal movement of the top. So, if one were to not use breadboard ends, how would you attach the trim across the grain? Would you glue the trim in the center and let the corners open and close as the seasons change? Or maybe add a little corner detail to cover the trim ends? ... Or not worry about it at all?

    Mike, thanks for suggesting the mortise. I had not considered that. Makes a lot of sense.

    Thanks, Brian

  6. #6
    What you have in your picture is a Chippendale Tea Table. Do an image search there are lots of pictures. I have seen them where the fret work has mitered corners also with small posts at each corner and the fret work mortised into the posts. Sometimes the fret work sits in a dado in the top, sometimes it is tacked to the top, often there are small moldings on both sides of the fret work. You can see miters in this one
    http://woodandhogan.designcentersear...n&itemID=73892

  7. #7
    Join Date
    Jun 2007
    Location
    Clinton Township, MI, United States
    Posts
    1,554
    Bryan,
    I think you will find that most of the period small tables did not have breadboard ends. The top is a single board. A breadboard end creates problems with seasonal movement due to cross grain construction, breadboard ends are to either conceal end grain or maintain flatness.
    A small piece like this, even if made from two boards would not need breadboard ends.
    The seasonal movement would be taken up by either nailing the top on (the nails bend with the movement) or ignored and the top glued on with glue blocks between the aprons and the top. Yes, *we* would not do that, but, in those days the idea was to make money not heirlooms.
    I would use buttons to attach the top.
    Mike
    From the workshop under the staircase, Clinton Township, MI
    Semper Audere!

  8. #8
    Join Date
    Dec 2008
    Location
    Holderness, NH
    Posts
    87
    It is a china table authenticated to John Townsend of Newport. Probably still in the Winterthur Museum. The open scroll work tray frame is indeed dovetailed in the corners. The skill and execution of John Townsend's joinery and carving is truely breathtaking. The dimensions are H - 27 1/4", W - 34 1/4", D - 21" of Mahogany. Construction details are well documented in "The Master Craftsmen of Newport: The Townsends and Goddards", Micheal Moses, MMI Americana Press, 1984. N.B. my avatar is my rendition of one of J.T.'s blockfront shells.
    ALL STANDARD DISCLAIMERS APPLY: IIRC. YMMV. IMHO. FWIW. SYOB. NO WARRANTIES, EXPRESSED OR IMPLIED, ARE MADE
    THAT INFORMATION CONTAINED IN THIS POST IS ACCURATE, RELIABLE OR APPROPRIATE FOR ANY PARTICULAR SITUATION.

  9. #9
    John, You either know that table quite well or you can see way better than I can, if you could identify that table from that picture.

  10. #10
    Join Date
    Jun 2005
    Location
    Overland Park, KS
    Posts
    200
    Barry,

    This table was built by my brother, Matt Hobbs, who does incredible work, by the way.

    He did a "play by play" on the Thomas MacDonald forum. Linked here: http://www.thomasjmacdonald.com/foru...hp?f=39&t=1912

    The fretwork was dovetailed, the gallery was attached to the table with screws, I think. The top is solid, no breadboards.

    You can see more of Matt's work at http://www.matthewhobbsfurniture.com/ , including some pictures, like this one.


  11. #11
    Join Date
    Feb 2003
    Location
    Lewisville, NC
    Posts
    1,360
    Not trying to hijack the thread, but I have seen tables similar to this with brass "fretwork"(about 1/8 - 1/4" thick). Anyone know where that type of material is bought?

    Thanks,
    Jim

  12. #12
    Join Date
    Dec 2008
    Location
    Holderness, NH
    Posts
    87
    Very beautiful work Mr. Hobbs!
    ALL STANDARD DISCLAIMERS APPLY: IIRC. YMMV. IMHO. FWIW. SYOB. NO WARRANTIES, EXPRESSED OR IMPLIED, ARE MADE
    THAT INFORMATION CONTAINED IN THIS POST IS ACCURATE, RELIABLE OR APPROPRIATE FOR ANY PARTICULAR SITUATION.

  13. #13
    Join Date
    Oct 2008
    Location
    Columbus, OH
    Posts
    3,064
    Thanks for the info Mike. I was concerned that the end fretwork would crack with movement of the top and was thinking that a breadboard would provide a stable base. I can see I got into "overthink" mode for this project.

    Also, my apologies to the OP for hijacking the thread to discuss my project. Didn't think enough before hitting the send button.

  14. #14
    Join Date
    Mar 2006
    Location
    Central Kentucky
    Posts
    196

    How did they do it ?

    Thanks for all the information. One thing is for sure, it is way out of my class. Calvin, that is one incredable piece of furniture. The close up really shows the great workmanship. Thank you and I will check out the play by play. BARRY BRUNER

  15. #15
    Join Date
    Feb 2003
    Location
    Shoreline, CT
    Posts
    2,923
    Fantastic job on the reproduction. I flipped open my copy of Moses to look at pictures of the original. (Figures 3.79 and 3.79a and 3.79b) Are my eyes screwy or what. I'd swear the detail of the bottom 3.79b shows the underside to the top with the grain running on the diagonal to the rails. Can anyone confirm whether I'm nuts or not?

Posting Permissions

  • You may not post new threads
  • You may not post replies
  • You may not post attachments
  • You may not edit your posts
  •