Results 1 to 8 of 8

Thread: Quadrant Hinges (Picture Heavy)

  1. #1
    Join Date
    Feb 2008
    Location
    Flowery Branch, GA
    Posts
    729
    Blog Entries
    1

    Quadrant Hinges (Picture Heavy)

    With all the boxes I've made... I have always shyed away from quadrant hinges.... The only thing I could find on the internet about them were all the horror stories....cuz they have to be lined up....just so, etc., etc., etc...

    Well.... I have a client that ordered 20 humidors and quadrant hinges were the hinge of choice... so, I had no option but to figure it out.....

    So, I thought I would share my experience and hopefully help somebody out who has been wondering about these things....

    As you may or may not know.... when you order these things, they come in a plastic bag... not one stitch of paper, let alone instructions.... So, after a lot of head scratching and procrastionaton..... Here is my first attempt.

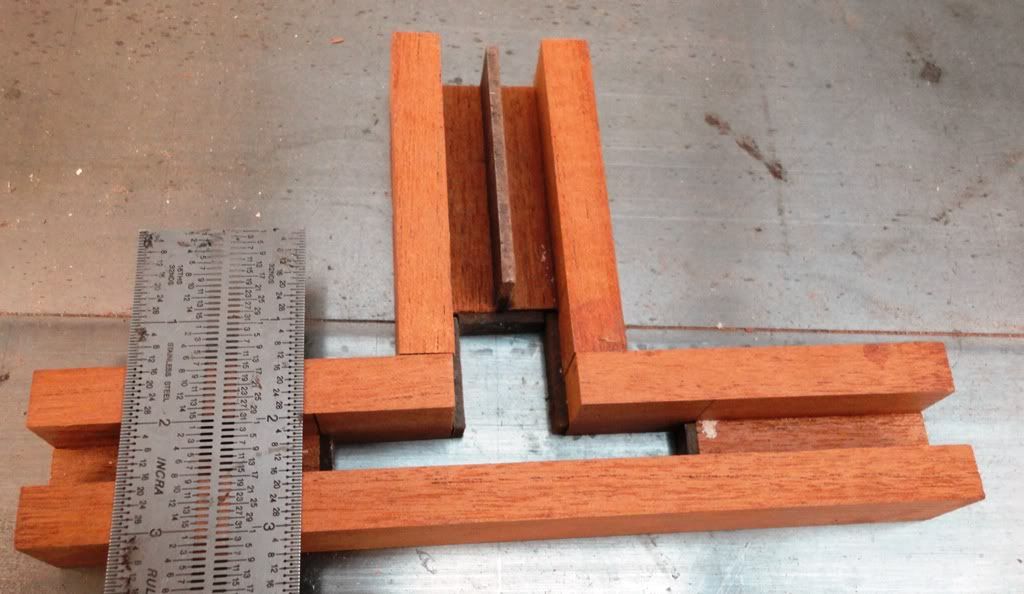
    First things first... the jig.

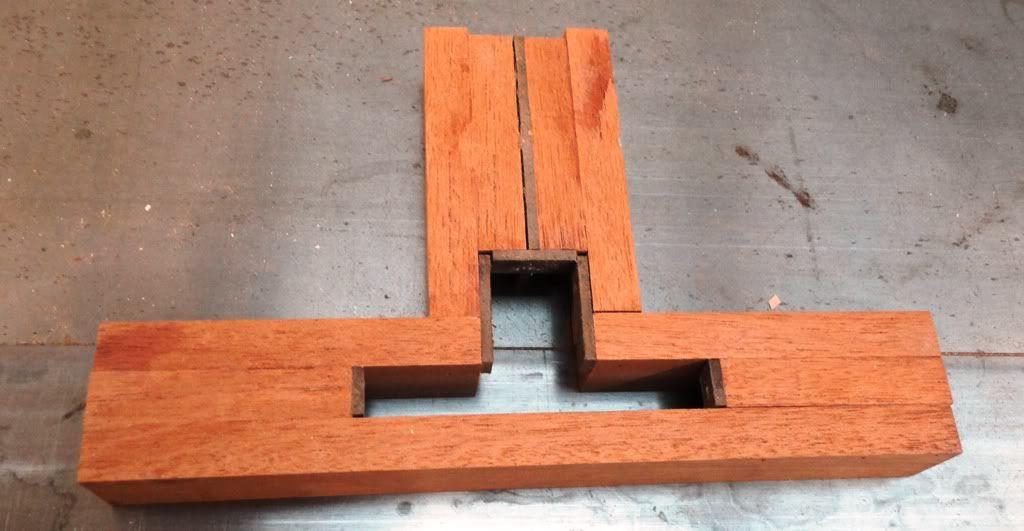
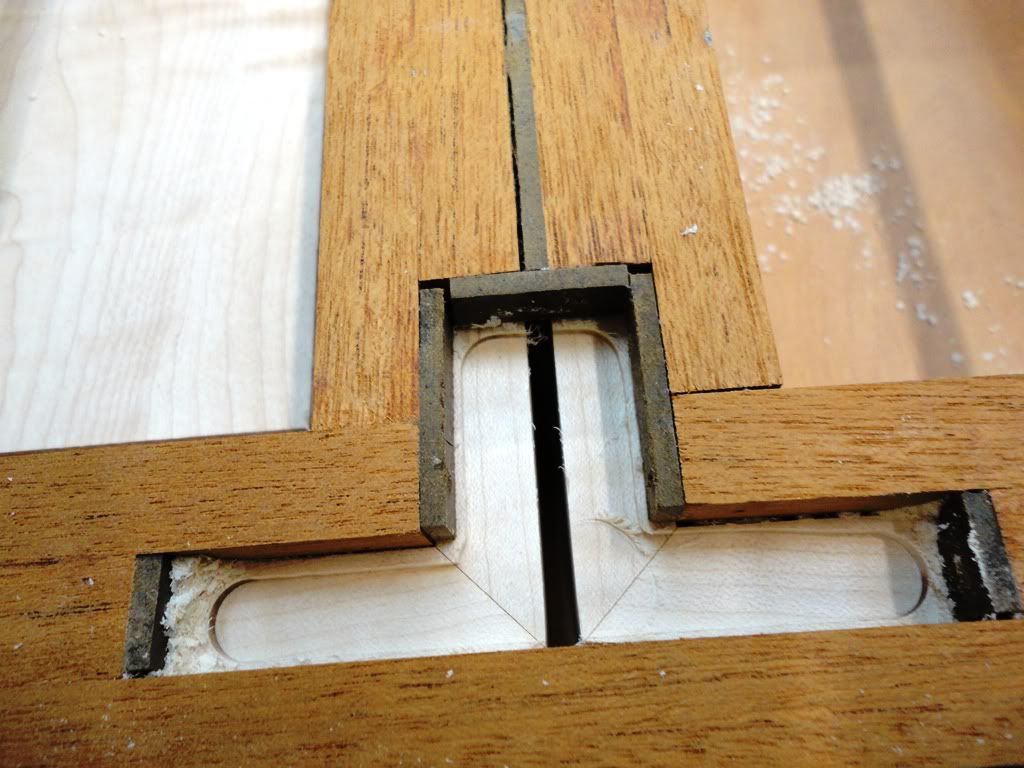
    I built this little jig. My boxes are mostly 1/2" stock. This quadrant hinge is 10mm, so I used a 1/2" OD collet for my router, leaving just enough room for the 10mm bit on the ID. If your hinges are 3/8" or 5/16", I think the process would be the same.....

    I used 1/2" stock throughout, except for the 1/8" hardboard. The hardboard basically separates the lid from the box and helps with "snapping" the jig in place.


    I built a little box using 1/2" stock out of scrap.... just four sides, really, to use as my test piece. After I tried it and made the adjustments (hardboard pieces glued on the inside of the jig), I tested it again and it seemed to be good to go.


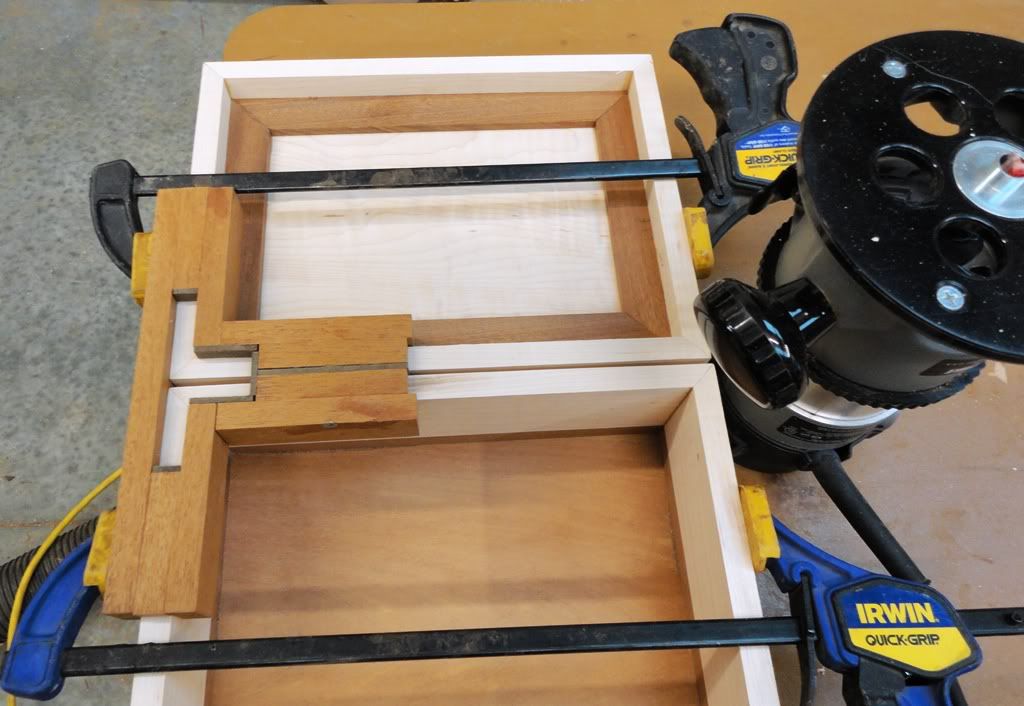
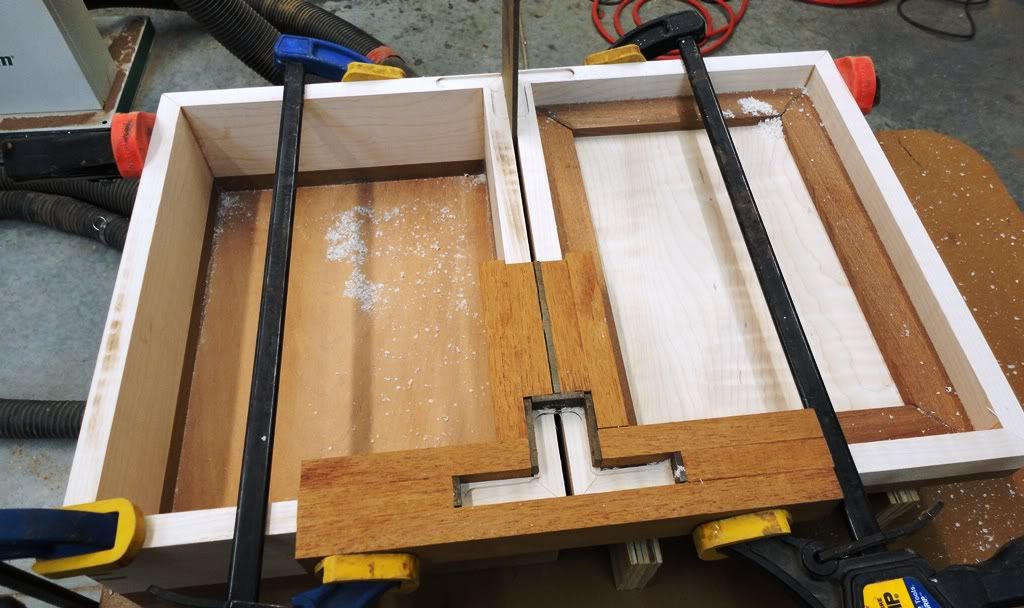
    So.... I "snapped" the jig in to place, adjusted my router depth to where I thought it needed to be..... clamped it all down..... and...


    ...decided I needed to have some support under the lid... so, I cut these spacers....


    Then, about 15 seconds later.....


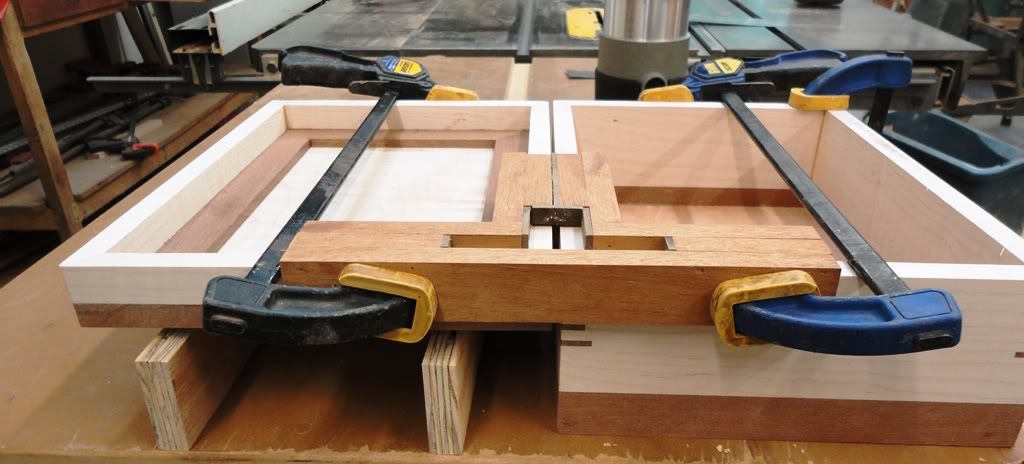
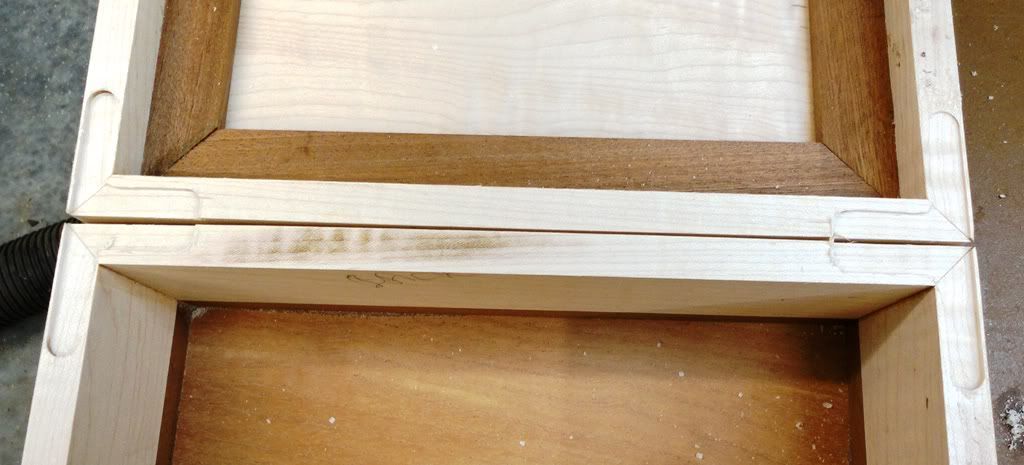
    Flipped the jig over to the other side and....this time, I figured I would put a piece of hardboard on the other end to equalize the spacing... I didn't do that on the first pass... but, will do from now on.


    ...about 20 seconds later (had to take off the clamps)


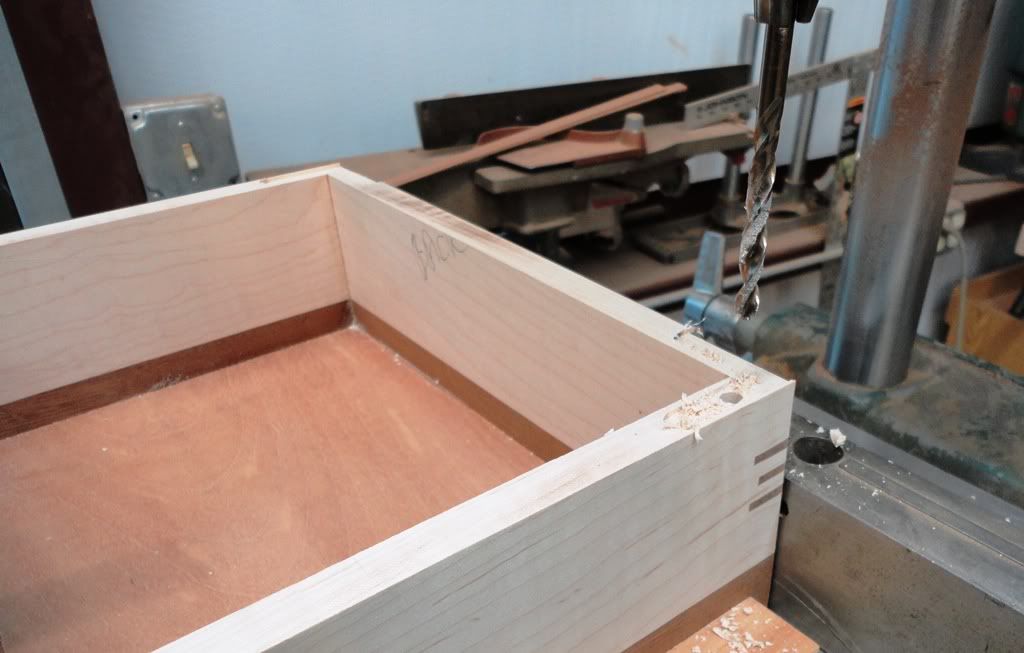
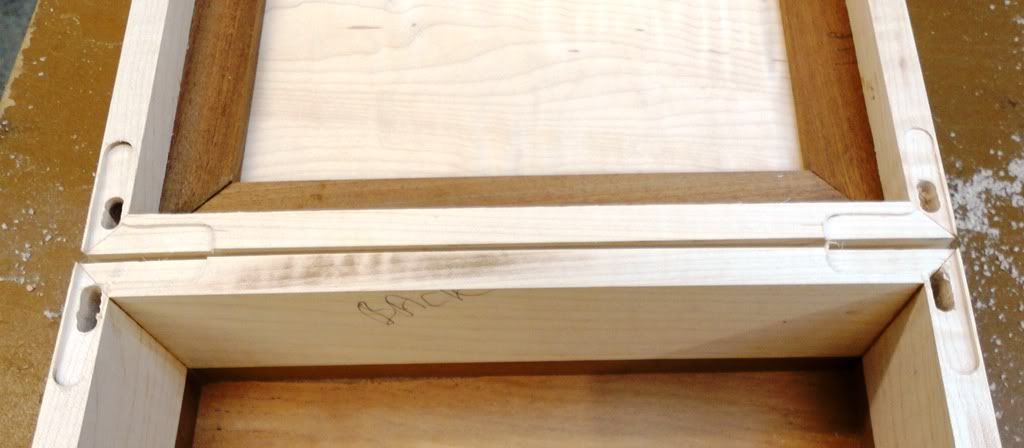
    Now, over to the drill press to make a hole for that swing arm thing..... Accuracy is not a biggie here, as the hinge will cover up the hole. Just make sure it's deep enough a wide enough for the hinge to work freely. I was back and forth a couple of times....


    ...but, I got it.


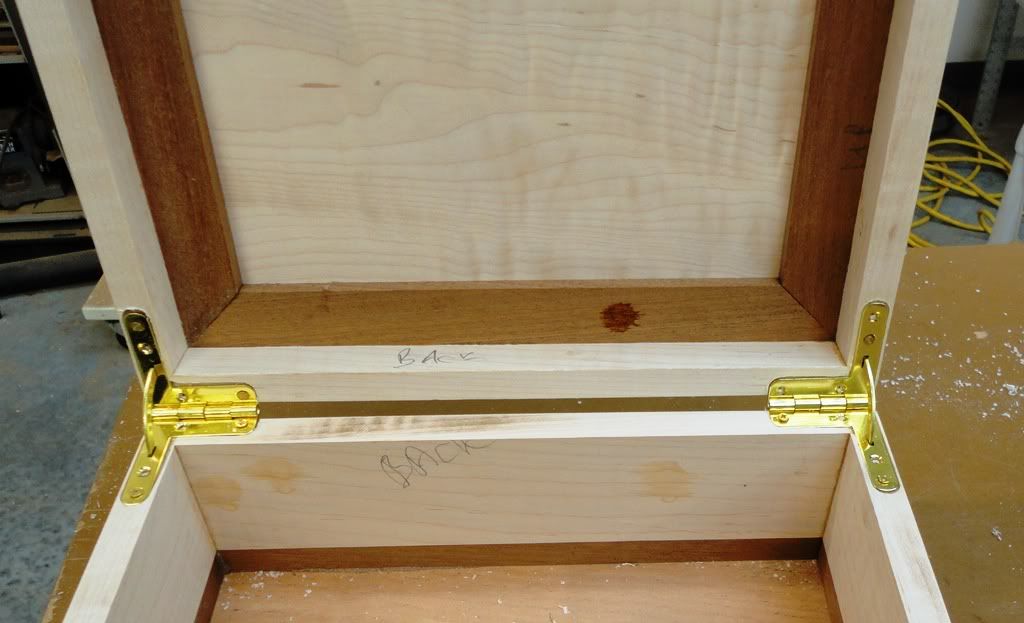
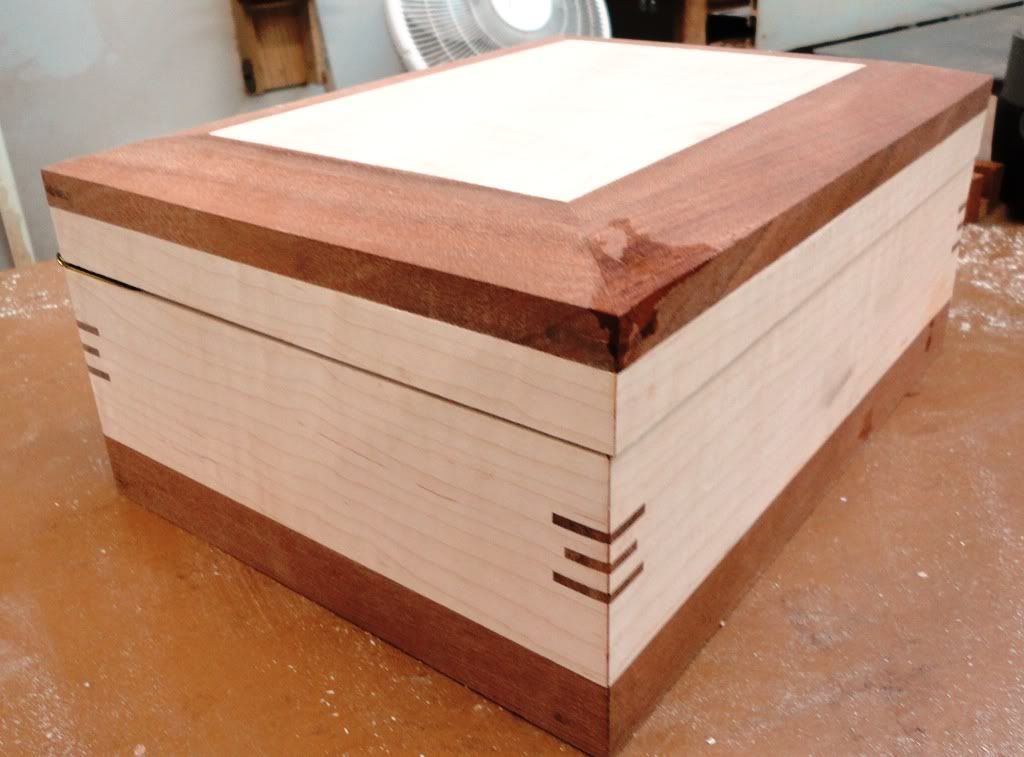
    So....there ya have it.... easy peasy.


    I will, however have to adjust the depth of the router and snap it all back together and make another pass... but, for the most part.... it worked like a charm.


    PS: Never mind all the sweat droplets on the wood.... it's 100 degrees at 9:30am in Charleston, SC today.... feels like double that in the shop.
    Last edited by Ed Sallee; 06-20-2011 at 10:13 AM.

  2. #2
    Ed, really nice help with those hinges. I have installed a few but I don't like doing it, this will help a lot.

    The ones I have done in the past were done just will the drill press and some stops, I like the use of the jig much better and I think it would be a lot easier and more accurate.

    Again, thanks
    Last edited by Bruce Page; 06-20-2011 at 11:24 AM.

  3. #3
    Join Date
    Dec 2009
    Location
    Florida Panhandle
    Posts
    513
    I too make boxes and I have enough trouble with butt hinges in lining up the tops, even after having done 500 of them. I tried quadrants once and vowed never again. I see that your top has substantial overlap in the front - precisely my problem, rarely a perfect alignment. So my question is, how you gonna deal with that? Does the mortise give you enough leeway to make adjustments?

  4. #4
    Join Date
    Feb 2008
    Location
    Flowery Branch, GA
    Posts
    729
    Blog Entries
    1
    Quote Originally Posted by Harvey Rabbett View Post
    I too make boxes and I have enough trouble with butt hinges in lining up the tops, even after having done 500 of them. I tried quadrants once and vowed never again. I see that your top has substantial overlap in the front - precisely my problem, rarely a perfect alignment. So my question is, how you gonna deal with that? Does the mortise give you enough leeway to make adjustments?
    That is just a screw adjustment. Only screwed half of them in... anticipating that issue. Will probably put a dab of epoxy to ensure alinement... then screw...

  5. #5
    Join Date
    Aug 2005
    Location
    Glenmoore, PA
    Posts
    2,194
    Quote Originally Posted by Ed Sallee View Post
    That is just a screw adjustment. Only screwed half of them in... anticipating that issue. Will probably put a dab of epoxy to ensure alinement... then screw...
    I don't know about that Ed. My experience with those blasted quadrant hinges is that once you drive the first screw they are where they are going to remain and there is absolutely 0 adjustability with them which is exactly what makes them a bugger to fit. However, once you get a set installed correctly they are wonderful hinges. That said, I have only used Brusso hinges so the ones you have might be different. If you do end up going with Brusso at some point they sell a routing template for installing them. While it is made of pretty stout brass and seems to be a precision piece my experience with it has been hit or miss. I think any shop-made jig that one comes up with to install them will have to be pretty precise to get an exact fit with no slop in the mortises and very precise spacing between the top and lid to avoid the underbite / overbite of the lid. They are a royal pain in my opinion.
    Sometimes I think the surest sign that intelligent life exists elsewhere in the universe is that none of it has tried to contact us.
    -Bill Watterson

    Reminds me of my safari in Africa. Somebody forgot the corkscrew and for several days we had to live on nothing but food and water.
    -W. C. Fields

  6. #6
    Join Date
    Dec 2009
    Location
    Florida Panhandle
    Posts
    513
    valet_box_VL8-2.JPG

    I make smaller boxes than Ed so the problem is even more acute. I could be wrong but it looks to me like you've got about 1/8" overlap in front and that's a heck of a lot of adjustment to make with a hinge. Epoxy in screw holes doesn't work for me because invariably the drill will run off to the side because wood is softer than the epoxy, so I use tiny dowels fashioned on the belt sander and set into the hole CA glue. That solves the drill run out problem. The other problem is time: when making a commercial product, I can't afford to spend several hours messing with those things. I now use a gold plated chain for stops instead (Yes, I know that the standard for humidors is quadrants).

    Good luck with the experiment Ed, hope it works out for you. Let us know after you've done several.
    Last edited by Harvey Pascoe; 06-20-2011 at 1:30 PM.

  7. #7
    Join Date
    Jun 2008
    Location
    So Cal
    Posts
    3,780
    Quadrant hinges are time thieves. I get good results by gluing the hinges down on the bottom of the box with some five minute epoxy.And carefully scribe the location with a knife.They pop back off with a chisel.It doesnt take alot of glue i just wait about 10 minutes for it to set.The brusso hinges very slightly so i mark them to be put back where they were scribed.To cut the depth i square a block to guide my chisel.With the hinges set into the mortice i mark the screw hole with my awl.I mark the hole inward a trifle so the screw pulls the hinge into the mortice.When thats done i set the lid ontop of the box with 5 minute epoxy on top of the leaf.Line up front and sides.After 10 minutes flip the box over scribe the leaf carefully.Same thing as before pop it off make a guide block cut away.I use my favorite chisels and a magnifier on my head to see the scribe lines.I finish the pockets on the drill press for the leaf.
    I also do the same with butt hinges.The quads take twice as long.One last thing for the round ends i ground a finger nail shape on a carving chisel and take my time.
    I believe eds jig will work.For my self i am more comfortable with chisels.After spending days working on a box i just dont like offering my work up to the spinning cutter on a router.
    Here are some pics of some brusso hinges on a walnut box.
    Attached Images Attached Images

  8. #8
    Join Date
    Oct 2008
    Location
    Champaign, IL
    Posts
    212
    Very cool, thanks for sharing!

Posting Permissions

  • You may not post new threads
  • You may not post replies
  • You may not post attachments
  • You may not edit your posts
  •