Page 1 of 3 123 LastLast
Results 1 to 15 of 39

Thread: Adventures in chairmaking

  1. #1
    Join Date
    Mar 2009
    Location
    Chevy Chase, Maryland
    Posts
    2,484

    Adventures in chairmaking

    So we ought to share our failures as well as our successes, right?


    In his book "Welsh Stick Chairs," John Brown descibes his process for assembly: "Hammering home the wedges ... and knocking the legs in requires a brutal approach and courage. I have split seats, particularly ones like this with a nice straight grain."

    You said a mouthful, John!

    David Pye, in his book, "The Nature of Art and Workmanship" draws a distinction between the workmanship of risk and the workmanship of certainty. That of risk involves activitities that at any moment could spoil the piece. Yep, David.

    "Once more unto the breach!"
    Shakespeare's Henry V, Act III, 1598

  2. #2
    Sorry Sean! What a bummer. It looks like the wedges were in the right orientation and everything. I hope you can salvage it. Looks to be beautiful chair.
    Salem

  3. #3
    Join Date
    Jan 2007
    Location
    West Simsbury, CT
    Posts
    384
    Bummer, Sean. What material is the seat and how thick? Can't tell from the photo, but are they tapered tenons or straight? Nice work on the undercarriage...I like the large bead. Stick chairs invite lots of experimenting...keep at it!

    Kevin

  4. #4
    Join Date
    Mar 2009
    Location
    Chevy Chase, Maryland
    Posts
    2,484
    Thanks, Salem. I may try some inventive fix just to see.

    Thanks, Kevin. The seat is elm. It's thickest portions are nearly 2" and thinnest maybe half that. The tenons are tapered, though next time, I may just go straght. The benefit of tapering as I saw it was that it allowed me to tweak the angles a bit with the reamer. The down side is that it made them more wedge like.

    I will definitely be getting back on the horse.

  5. #5
    Join Date
    Jul 2007
    Location
    Houston TX
    Posts
    548
    Sean,
    Would it be possible to salvage the piece using splines? The bottom surface appears to be flat and would provide for a reference surface for cutting spline grooves or (gasp) biscuits.

  6. #6
    Join Date
    Nov 2009
    Location
    Coweta County, GA
    Posts
    485
    wow... tough break... I too would think some dowels and every clamp you can fit on there would be worth a try.... the weight of the body will not be centered over the glue line or behind it...so It might hold... The base of that chair is really nice.

  7. #7
    Join Date
    Jan 2007
    Location
    West Simsbury, CT
    Posts
    384
    Great seat/thickness, so it must have been something else. Maybe a crack you didn't see, maybe the tenons. John Brown used straight round tenons, not tapered. While many excellent chairmakers use tapered tenons, my understanding is that plenty of old time chairmakers used straight ones, too. The taper is great when it is perfect, but can act as a wedge when it's off a bit. When I taper them I now "cheat" with a tapered tenon cutter to match my taper perfectly. You don't need to drive the tapered ones in so hard (not like the photo of John Brown pounding his in with a big mallet!).

    Get back on the horse like you said!

    Take care,
    Kevin

    P.S. Unfortunately, I don't think that seat can be salvaged given where the break is. The rear legs take a tremendous amount of stress.

  8. #8
    Join Date
    Mar 2009
    Location
    Chevy Chase, Maryland
    Posts
    2,484
    Thanks, Kevin. I agree with everything you said. Learning to be more competent in boring my splay and rake angles looks to be necessary s that I can go with straight tenons.

    I may take a crack (so to speak) at salvaging this by cuting the seat maybe three inches beyond the split and then gluing a new board - drilled to accept newly shaped, slightly smaller diameter and likely straight back leg tenons at the cut. My thought is that it should be as strong as a glued up seat at that point, but getting the thing fitted will be a trick. I'll also have to shape the saddle to blend and all that. We'll see. The whole thing is gonna need some milk paint too to hide all this mess!

  9. #9
    Join Date
    Mar 2009
    Location
    Chevy Chase, Maryland
    Posts
    2,484
    Thanks, Tom and John. As explained below, I've got some thoughts on a fix. If not, I can make more! ;-)

  10. #10
    Join Date
    Jan 2007
    Location
    West Simsbury, CT
    Posts
    384
    Sean,

    I meant to ask you where did you get a wide piece of 2" thick elm like that? Really nice wood. I have an elm plank large enough for two more seats, but then I've been using butternut a fair amount lately. Carves nice and takes a great finish (oil and wax) if you like natural chairs like John Brown. I also have some beautiful cherry slabs that I am not exactly looking forward to saddling...

    Take care,
    Kevin

  11. #11
    Join Date
    Mar 2009
    Location
    Chevy Chase, Maryland
    Posts
    2,484
    I often manage to find good sources for unusual stuff through ebay, but often not by looking for auctions of the stuff, but instead finding salvage and home mill type operations and sending inquiry e-mails (OhioWoodlands; Tree Farm Products; Smith Lumber; and many others). As I recall, I bought some maple or something from some nice folks and sent an e-mail telling them some other stuff I was looking for including wide elm. Turned out , they had a set of boards, and bought like 4 of them. The price was very fair, but shipping is steep, so it evened out. I found a great source for thick cherry in Michigan in a similar way. I think there are likely good mills around locally too, and I may investigate those further. I've really come to favor air dried wood, and wood that most any retail hardwood dealer either wouldn't have or would want a arm and leg for. Small family operations to the rescue.

  12. #12
    Join Date
    Mar 2009
    Location
    Chevy Chase, Maryland
    Posts
    2,484
    By the way, only the seat is elm. The rest of the undercarriage is hickory.

  13. #13
    I would use tapered tennons, or straight tennons with wedges, but never tapered tennons with wedges – the chances of splitting the seat are virtually guaranteed. I am very agressive with my wedging (in straight tennons) and have never split a seat.

  14. #14
    I too just read John Brown's book, as an intro into the new style and joints I made a little stool.

    Stick Stool.jpg

    The legs were tapered/octagonalized with a plane and the tops rounded, then I used a small gouge to relieve the entry side of the holes, making in effect tapered tenons and holes. The splay's are uneven, but it can so easily me distinguished. Maybe something this simple can help work out the particulars without potentially sacrificing the saddling time?
    Trevor Walsh
    TWDesignShop

  15. #15
    Join Date
    Mar 2009
    Location
    Chevy Chase, Maryland
    Posts
    2,484
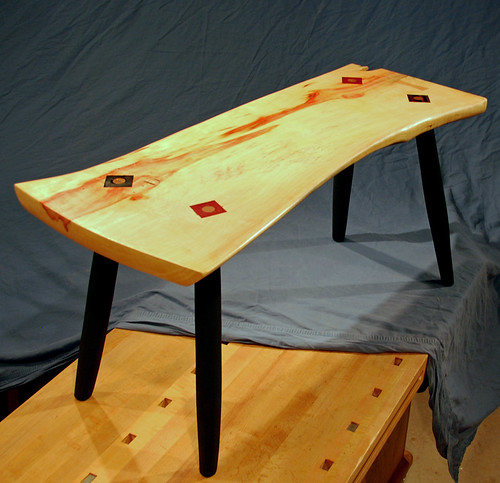
    I've made other legged items, including:


    so I thought I knew something about the particulars, but I guess there is always more to learn!

    Saddling doesn't bug me, but making all those legs and stretchers sure does - as they all have to be assembled simultaneously.

    As with most things througout my woodworking journey, I have ideas about how to do it better next time.

Posting Permissions

  • You may not post new threads
  • You may not post replies
  • You may not post attachments
  • You may not edit your posts
  •