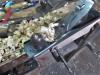
I had a #33 HF plane. Bought it as a "project" to see what I could make of it. I got it to take sub .001" shavings (measured with a calibrated micrometer, not calipers). Here is what all was done (I'm sure I posted all this sometime ago, maybe even in this thread): first, I bought a new blade, from a Woodnet guy, IIRC I paid about $35.00 for the blade, next, I had one of my machinists surface grind the sole and then square the sides to the sole, again, I think I may have assigned a cost of around $45.00 for labor and burden, then I cleaned up the blade bedding area and tuned up the chipbreaker/blade clamp so the edge bore on the blade correctly. For appearance, I stripped the knob and tote and applied BLO as a finish.
Pretty easy to get this plane to perform to sub .001" shavings (cherry). The casting was not bad and the sole, when stock, wasn't too bad either and probably could have been tuned easily with a granite plate and Sc paper. The stock blade could be made razor sharp, but I didn't try using it, so I can't comment on how long the edge would last. The Jim Reed blade I put in the plane was 1/8" thick and closed the mouth up pretty nicely. Think I paid $7.00 for the plane and had fun seeing what I could make it do. I ended up giving the plane away to an aspiring Galoot in need of some tools.
If the thunder don't get you, the lightning will.


Originally Posted by Jerome Hanby


 Reply With Quote