


I just finished installing this cabinet.
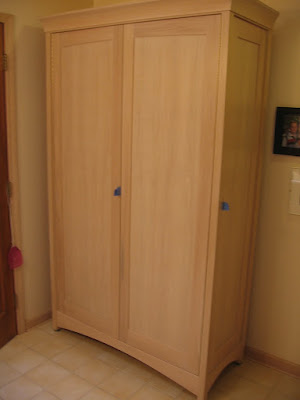
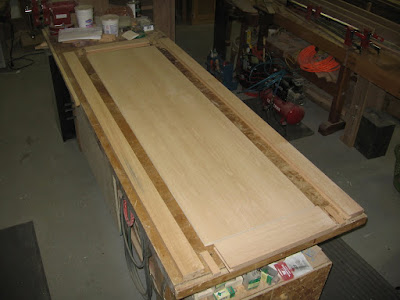
It is 82" to the top of the crown molding, 48" w x 20" deep. It was too large to move out of my basement shop in one piece or into the clients house, so I designed it with knockdown fittings, some dovetails, and some pocket screws. The sides were built as completed sub assemblies and were joined primarily with loose tenon joinery. The plywood panels were glued into the left side assembly and the doors, so there wasn't a need to make deep M&T tenon joints for the frames, just a simple spline was sufficient. Here's a photo of one of the doors to show what I mean.
Assembling the cabinet on site was pretty straight forward. Here's the detail of the bottom section showing the cams of the knockdown fittings and mortises for the unglued loose tenons.
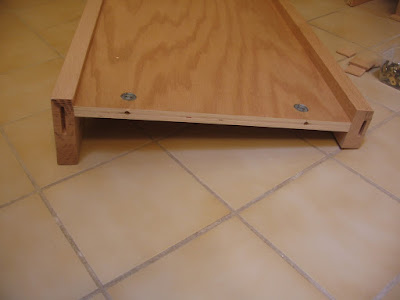
Here's the side with the knockdown fitting bolts installed and ready to mate with the bottom section.
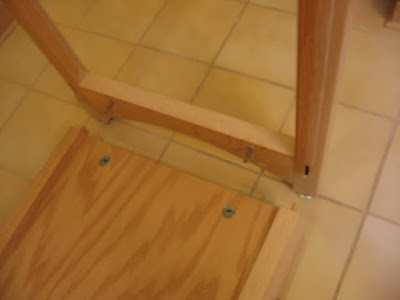
In back of the bottom cross members I cut a pocket screw hole, and drove in a screw after the sides were connected and the cams tightened. This improves the stiffness and assures the joint can't loosen over time.
After the cams were tightened and the pocket screws driven home.

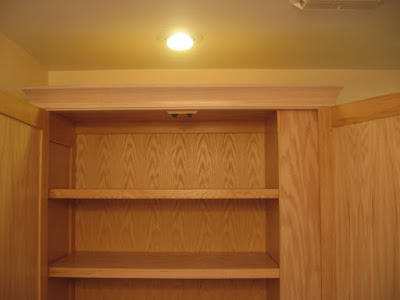
Next I installed the inner partition and fitted the front and back upper cross members into their dovetails in the top of the corner posts.

Here's what it looks like at the top of the right corner post. The side rail was glued into the posts during assembly of that sub-unit with a twin tenon, as shown. The dovetailed cross members are dry fit with no glue, so that the cabinet can be taken apart and moved in the future.

The back was fit in a rabatt cut in the back corner posts. I used 1/2" ply for this to increase the stiffness of the assembly. Whether or not it was needed is debatable.

The top was screwed to the top side rails and cross members. I added a stiffening member on top, at the front, to make sure the top was flat and to prevent it and the top cross member from sagging over time. The doors are inset so I felt this was critical. Note that the edges of the top are beveled. This was done to provide clearance for the crown molding. The bevel was 20 deg., the same as the crown molding.

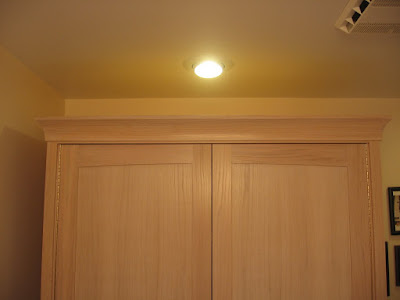
The crown molding was made as a sub assembly. I added splines in the corners (saw that in a Woodsmith article), and installed glue blocks during pre-assembly so that it could be screwed to the top. This worked great. BTW, I made the crown molding using the table saw method and it was pretty easy. To cut the corner joints I clamped a fence on the base of my miter saw table, in front of the back fence a distance equal to the horizontal projection of the molding. Then I just had to set the molding in place, upside down of course, and cut the 45 deg angles. Perfect, the first time. The whole assembly slide onto the top of the cabinet from the front.

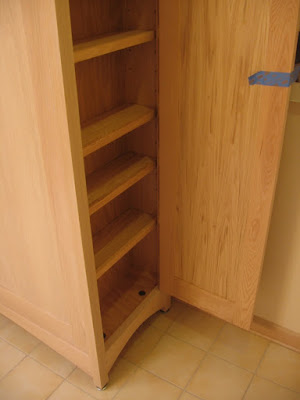
Here's the right side door open with 6 shallow shelves for cleaning supplies, etc.
The bottom front.

and top.
You can see that I used full length piano hinges, and a 1/4" spacer to the corner posts so that the doors can open more than 90 deg. Thanks again, Big Frank for the idea. The top rails of the doors have a gentle curve to carry through the theme of the base. That was done not just for asthetics, but to allow heat from a register behind the cabinet to flow more easily into the room.
The shelves in the main cabinet and the inner partition.
Here are the latches I used at the top. I also installed bumpers at the bottom of the doors to help keep them in alignment and make them feel solid when closed.

The leveling feet in the corner posts aren't all that pretty, but they were needed to get the cabinet dead level and plumb, otherwise those large, inset doors would not fit correctly.
The finish was GF Hi Perf. Poly - satin inside and Zar Coastal Boards (essentially white) oil based stain followed by the GF satin top coat on the outside to match the vanity and trim in the room. Funny, but Zar claims the dry time for this stain is 3 hours, both on the can and their website. I don't know what condtions that would make that possible, but certainly not mine. GF recommends 48 hours before putting their WB products over oil based stains and I can attest that is the minimum, from the test samples I made. I let the stained parts dry 4 days before spraying on the GF topcoats.
For time concious types, like me, it took me about 44 hours to build the cabinet, 13 hours to stain/finish, and 5 hours to install it, which included drilling most of the final hinge holes and there were a lot of them.
Here is a link to a SketchUp drawing of the cabinet, minus the internals.
SketchUp drawing
Thanks for looking.
John

 Reply With Quote
