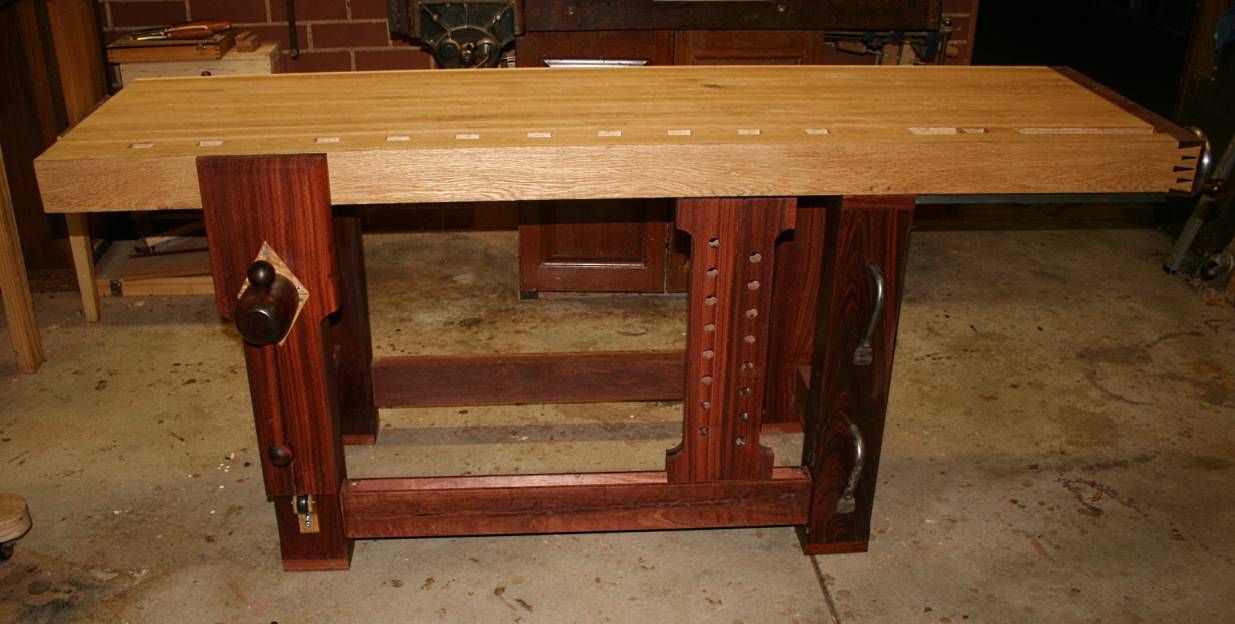
The bench is basically done. Just a few lesser pieces to build - the dogs (well, you cannot use the tail vise without them), the parallel guide pin (made one in steel ... hated it, and will turn one from Wandoo, a very hard timber), and the tool shelf.
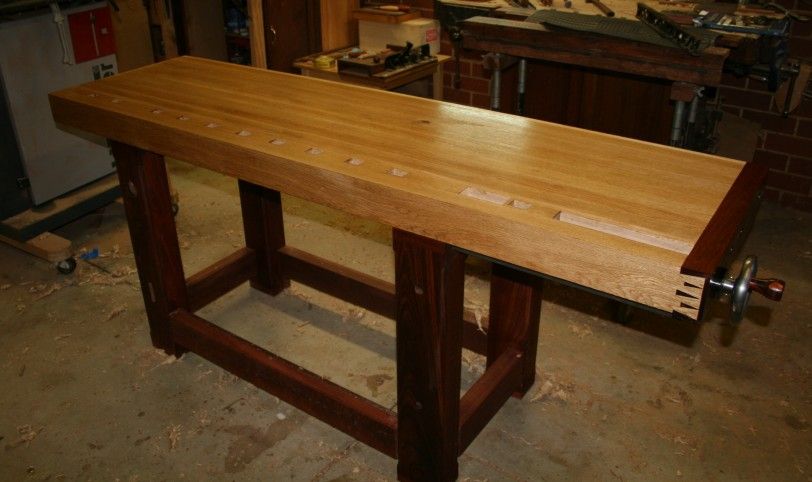
I left off last weekend with the new dog strip installed. First chance I had on Saturday I chopped the last mortice (that the new strip had removed), and drilled the holes for the pegs to attach the top to the legs. I am not draw boring the top as this would make it very difficult to undo should I ever need to break the bench down.
And then I grabbed Jamie, my 19 year old son, and we lifted the top off the old bench, turned it over, and placed it on the base. A little wiggle ... a jiggle ... and the mortices dropped over the legs tenons. I had a bench.
Man, this is one solid construction! Even without the pegs being driven home, it was impossible to move. The pegs, by the way, were made from Oak. I thought that Jarrah would look too busy.
I slapped on a couple of coats of oil ...
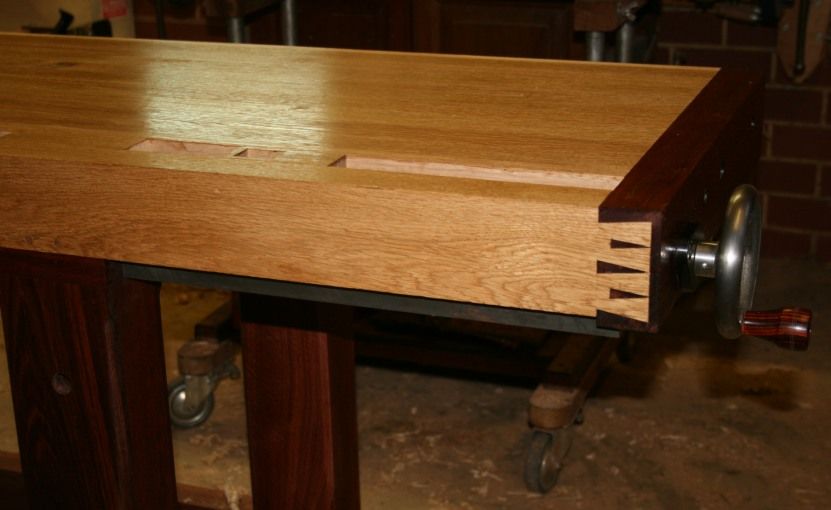
The top is flat .. flat .. flat ..
The Benchcrafted tail vise (wagon vise) ...
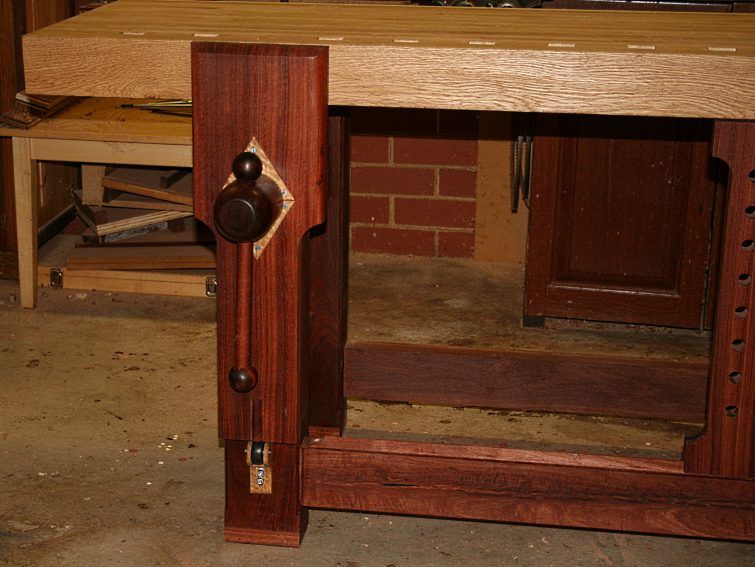
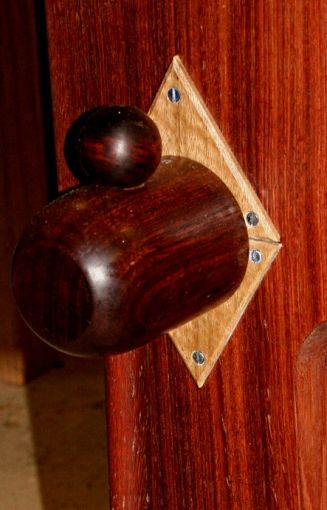
Hey Wilbur, this bit is for you. First of all, another Thank You for the vise screw.
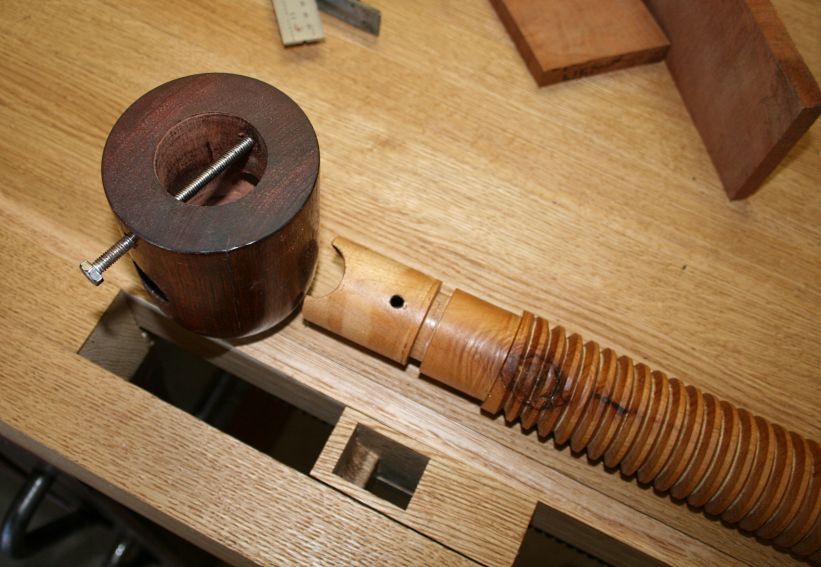
For the information of others, Wilbur purchased a pair of screws from "someone", who made them for him. This was not one of the current vendors, such as Big Wood Vise. The main differences were that the diameter of the screw is 2" and that it is a two-piece construction (the screw and the hub are separate). I decided to personalise the screw by turning my own hub from Jarrah to match the chop. In one of his emails to me, Wilbur pointed out that glueing the hub and screw together did not work well, and that he had added a dowel through the hub. Great idea! I needed to make my dowel removable (to dissemble the legvise), and so I drilled through the hub and screw shaft, then threaded the screw shaft for a bolt ...
The bolt head was removed and a slot sawn for a screwdriver ...
Here is the legvise complete ...
The garter is made from a stunning piece of curly Myrtle, which links to the Oak top.
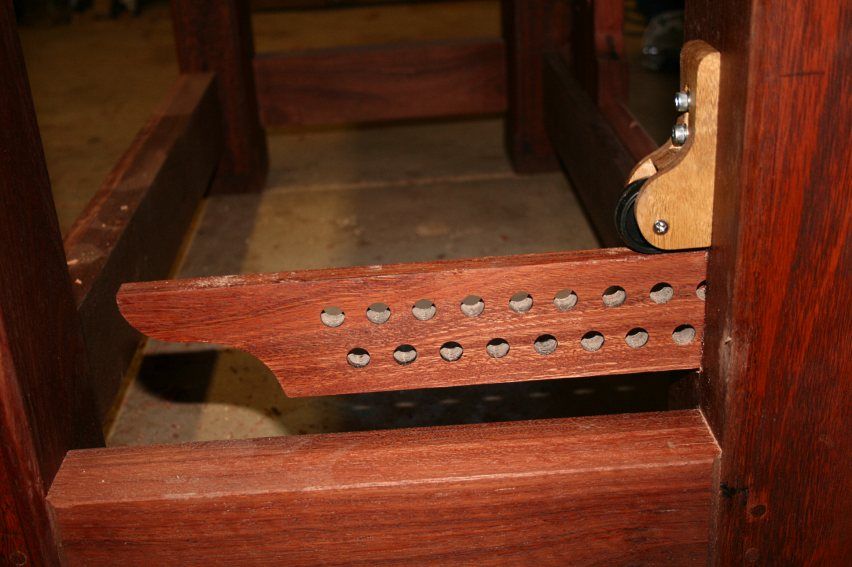
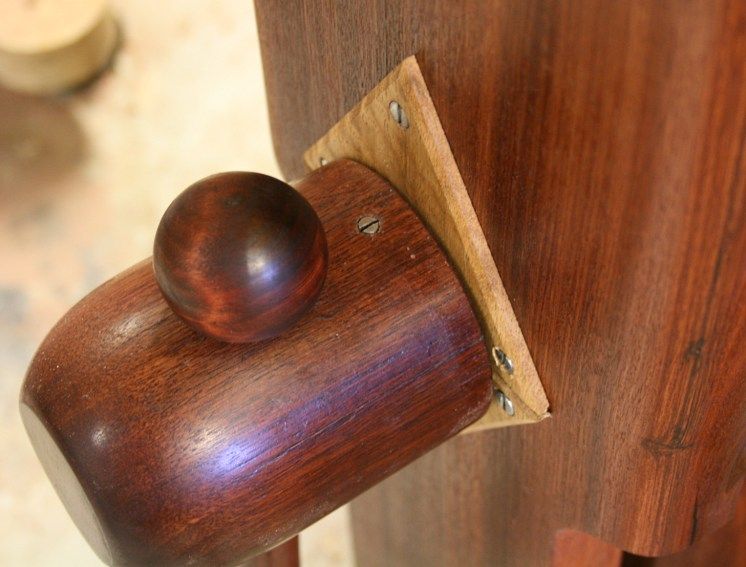
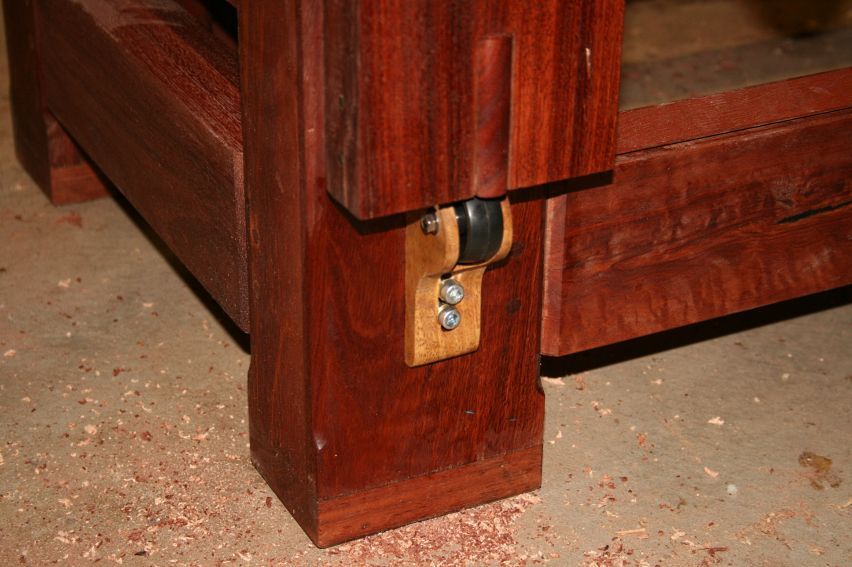
This was also used for the leg glide rollers (I cannot praise highly enough this idea from Jameel. Until they were added, the leg vise was struggling. The rollers transformed the construction. It now slides back-and-forth with ease, and holds thin boards tightly with little force) ..
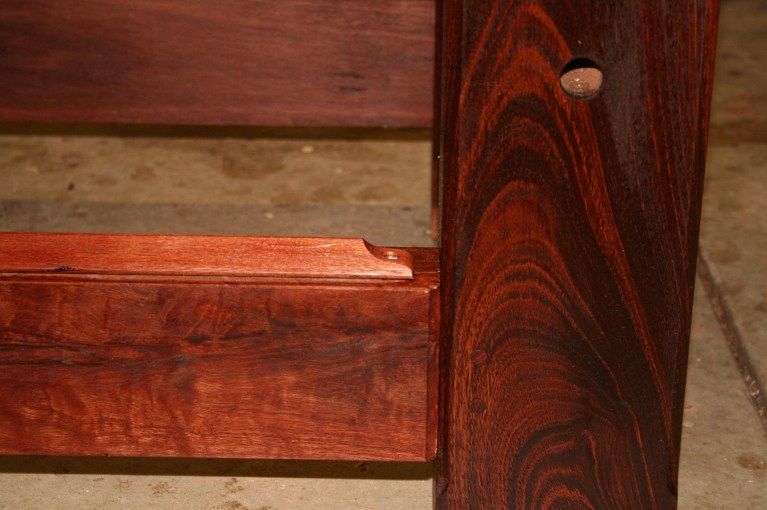
The leg glide begins as a through tenon. This is rounded at the front of the chop ..
The leg glide (from inside the base) ...


 Reply With Quote