Page 1 of 3 123 LastLast
Results 1 to 15 of 38

Thread: No 51 - The Ant Pool

  1. #1
    Join Date
    Dec 2009
    Location
    Mount Sterling, KY
    Posts
    2,504

    No 51 - The Ant Pool

    What do you do with a piece of walnut full of Ant caverns and tunnels?
    Edit: This pic shows the other half of the block I made the Ant Pool from.
    IMG_4093.jpg

    Well if you are really impressed with Alan Trout's pressure casting of burls with voids as I am, you try to imitate his process. Here is hoping that the imitation is flattering. I only have a standard paint type pressure pot, 2 gal I believe. This pretty much maxed it out as far as being able to get it into the pot.

    Black Walnut with major ant tunneling and caverns. Finished it stands 8.5" tall and is just over 4" wide at its widest point. Hollowed to about 3/16" and full 8" depth. I was afraid to go thinner walled because some areas of the casting resin were starting to "rise" above the outer surface at 3/16. I was afraid it might come out. And yes I know that the curve has flat spots. I consider this one a prototype and paid most of my attention to the molding and casting process. The opening is 1-3/8" and the hollowing rig used was the Minnie Monster.

    Here it is rough turned.
    IMG_4033.jpg

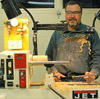
    Here I am making the mold from old pine scrape. Then after the molding and casting process cutting the mold away.
    IMG_4040.jpgIMG_4065.jpg

    This is the result. You might want to critique the photos of the finish vase also. I just upgraded my Paint Shop Pro from Version X2 to X4. The X4 version has HDR(High Dynamic Range) built into it. I set my camera to take a series of 3 photos, 1@-2 stops, 1@normal and 1@+2. The HDR function combines the best parts of the three shots. I let it use it's auto settings on these but in the future I think I will use fixed presets. Each of these are a little bit different in color but not bad for a first effort. The closest to what my eyes see is picture 1 but even it is a little warm.
    IMG_4088_7_9_Detail.jpgIMG_4073_2_4_Detail.jpgIMG_4076_5_7_Detail.jpgIMG_4082_1_3_Detail.jpg

    As always C&C welcomed.
    Last edited by James Combs; 03-08-2012 at 9:47 PM.
    ____________________________________________
    JD at J&J WoodSmithing
    Owingsville, Kentucky

    "The best things in life are not things."

  2. holy smokes JD...........now you are cooking with gas! That turned out well........congratulations!
    Remember, in a moments time, everything can change!

    Vision - not just seeing what is, but seeing what can be!


  3. #3
    Join Date
    Aug 2009
    Location
    Prairie Village, KS
    Posts
    62
    Absolutely stunning. Great job.
    "a noble spirit embiggins the smallest man"

  4. #4
    Join Date
    Apr 2007
    Location
    Georgetown,KY
    Posts
    1,106
    Way cool! I think the color combination is outstanding as well!

  5. #5
    Join Date
    Dec 2008
    Location
    Chesterfield, VA
    Posts
    1,332
    That turned out great! I'm putting this info in my brain to do this some day. Did you use the Alumalite? And, what do you use to color it with? And you mention a pressure pot. Is this put under pressure? Or is there a vacuum in the process? Sorry for all the questions, but I'm really trying to wrap my mind around this cause its such a cool looking process.

  6. #6
    Lookout Alan! This turned out very cool. I love that swirling blue color. The form itself is a little different but works with the color.
    -------
    No, it's not thin enough yet.
    -------

  7. #7
    Join Date
    Sep 2010
    Location
    Clinton Il
    Posts
    174
    Blog Entries
    2
    Great job Alan really nice piece

  8. #8
    Join Date
    Jan 2009
    Location
    sLower Delaware
    Posts
    5,464
    Great color combo! Congrats on getting the prototype so well done JD!

  9. #9
    JD, I think you have done a fantastic job with this!! Great work, and for a prototype it is excellent.

  10. #10
    Join Date
    Jan 2005
    Location
    Goodland, Kansas
    Posts
    22,605
    James that is a beauty. Really nicely done.
    Bernie

    Never put off until tomorrow what you can do the day after tomorrow.

    To succeed in life, you need three things: a wishbone, a backbone and a funnybone.


  11. #11
    Join Date
    Sep 2009
    Location
    Enid, Oklahoma
    Posts
    6,741
    Pretty cool, JD! The colors work quite well together, and the finished turned out nicely. The form is a bit off for me with the low waist and straight collar, but overall, it's a really cool piece!

  12. #12
    Join Date
    May 2009
    Location
    Intl Falls, MN.
    Posts
    141
    Nice!!!! Very cool process,, that is unbelievable... Thanks for sharing....
    [SIGPIC][/SIGPIC]
    Show them how, and you too, will learn
    Sole proprietor, Up North Burls
    Secretary, Rainy River Area Woodworkers
    Journeyman Steamfitter, Local 589

  13. #13
    Join Date
    Mar 2008
    Location
    Spring City, TN
    Posts
    1,537
    Fantastic job JD. Unbelievable what you did with that wood.

  14. #14
    Join Date
    Apr 2009
    Location
    Palm Springs, CA
    Posts
    1,085
    Now that is...COOL...not to mention ingenious !
    Dick Mahany.

  15. #15
    Join Date
    Nov 2009
    Location
    Alpine, WY
    Posts
    434
    Very nice. This is a good color combination. James, you did good.

Posting Permissions

  • You may not post new threads
  • You may not post replies
  • You may not post attachments
  • You may not edit your posts
  •