Page 2 of 3 FirstFirst 123 LastLast
Results 16 to 30 of 35

Thread: Pine Lap Desk

  1. #16
    Quote Originally Posted by Harold Burrell View Post
    Wow...it is rather hard for me to imagine a world without pine.
    Perhaps I slightly misspoke, Harold - out here on the left coast, eastern white pine is durn near impossible to get (reasonably). What pine is here is often fast-growth sugar pine, which doesn't make for such nice projects. When I was living out east, I had much easier access to nice pine lumber, and I miss that.


    daniel
    Not all chemicals are bad. Without hydrogen or oxygen, for example, there would be no way to make water, a vital ingredient in beer.

  2. #17
    Join Date
    Mar 2012
    Location
    Mid coast Maine
    Posts
    479
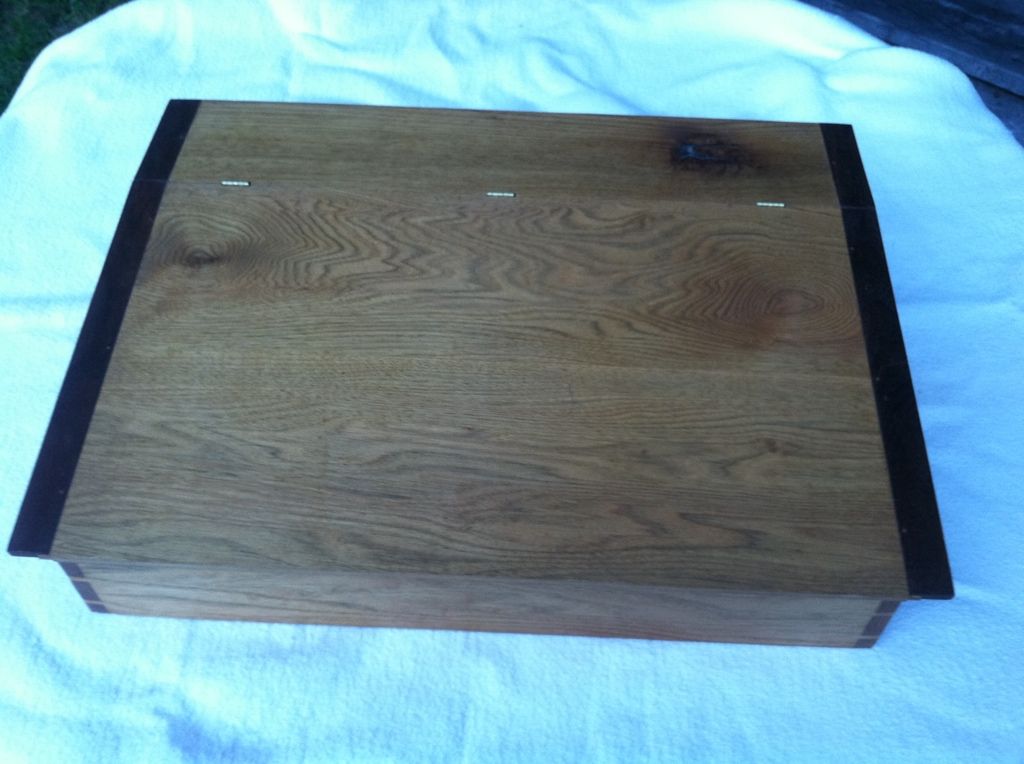
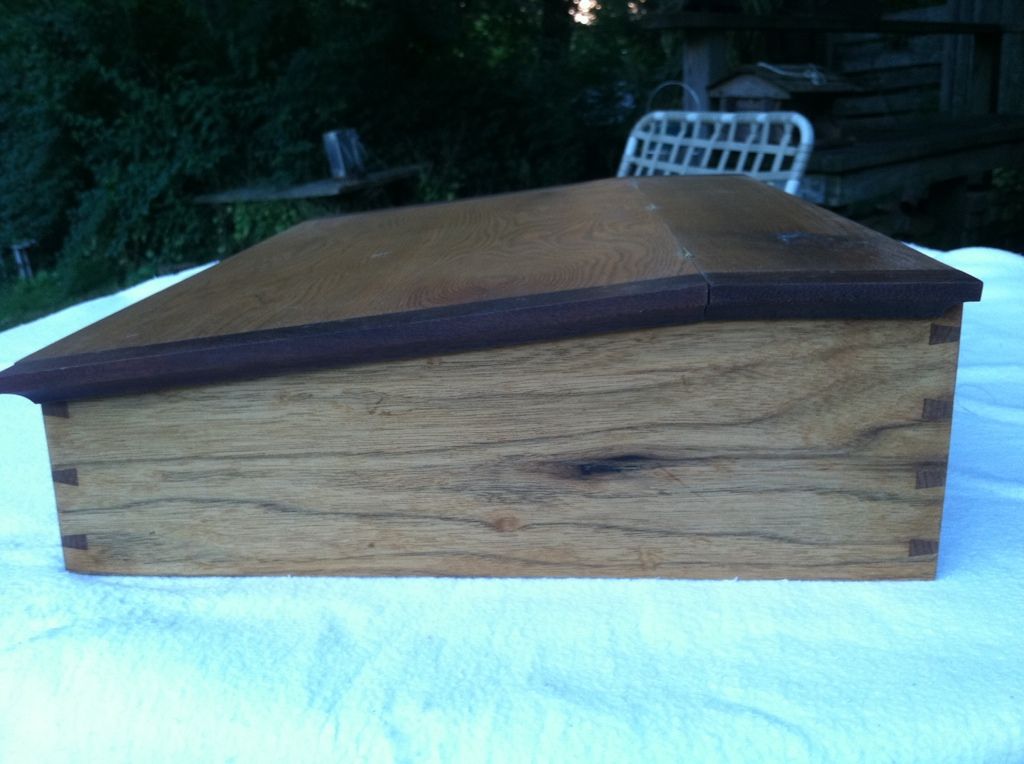
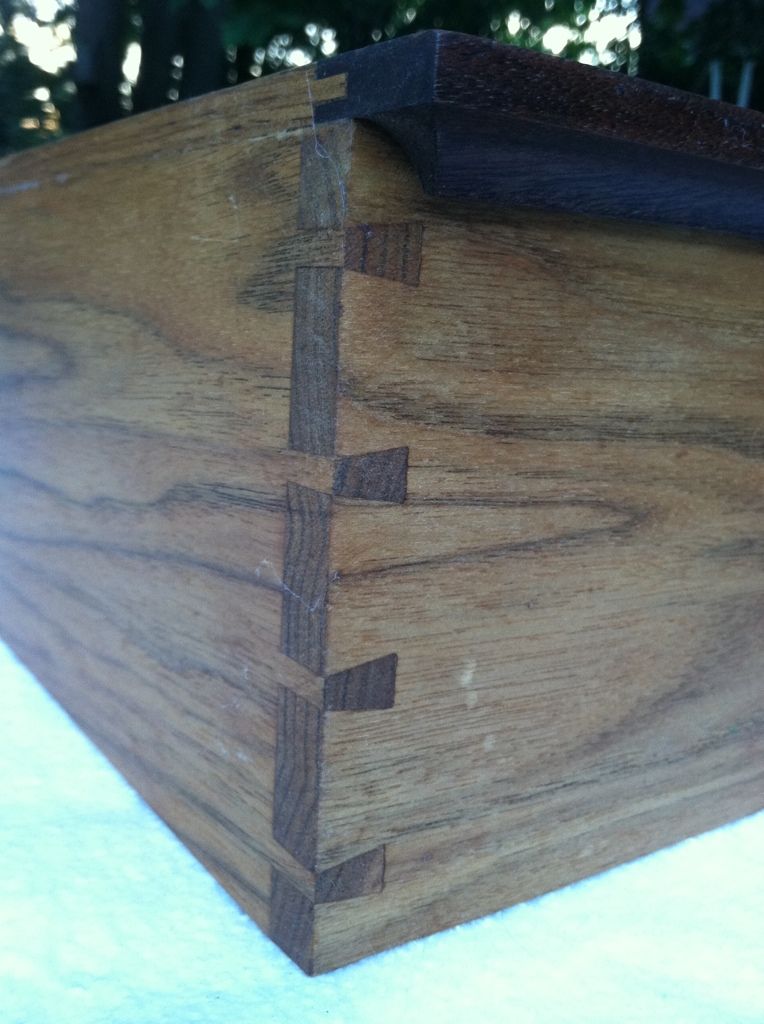
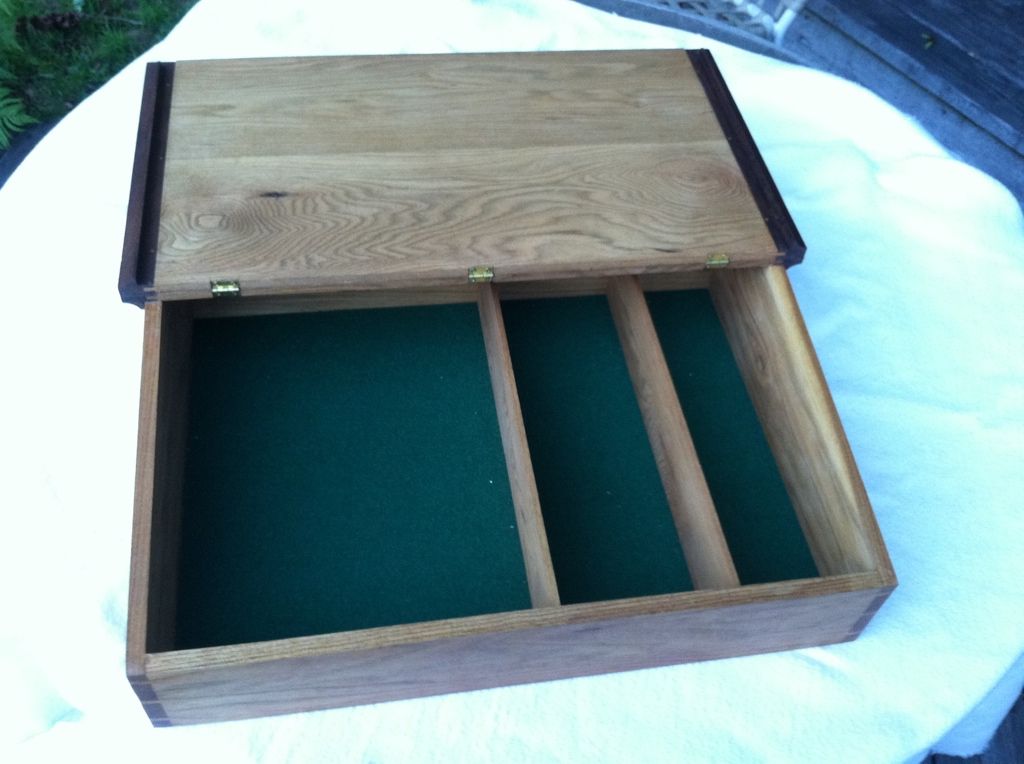
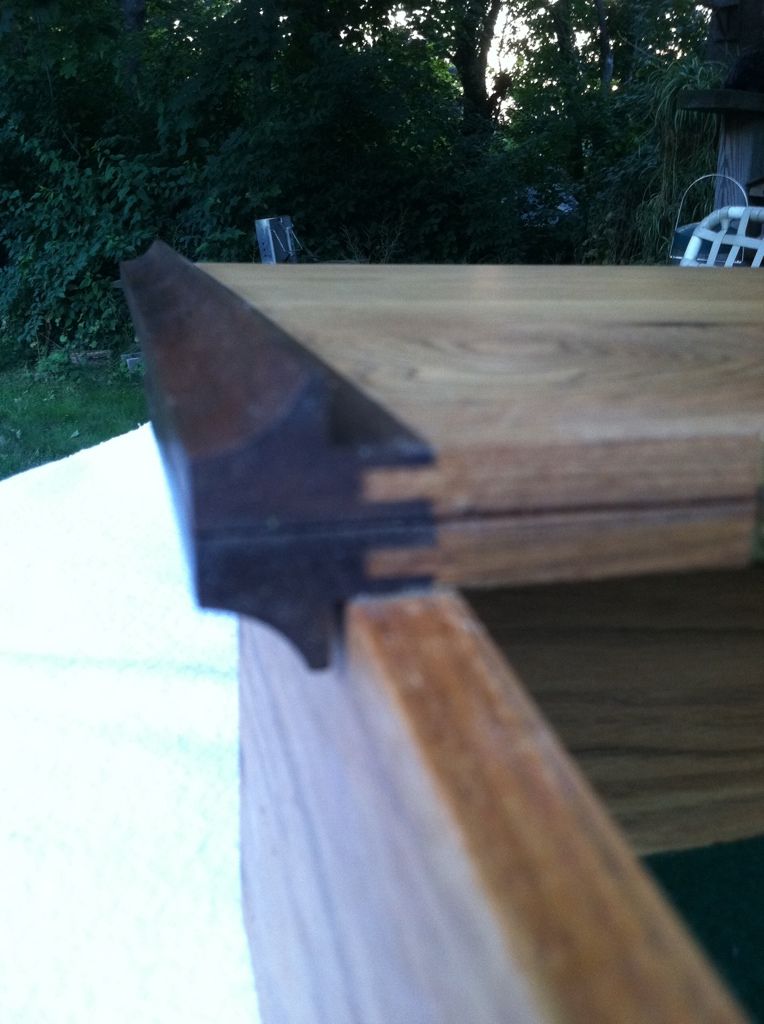
    As requested here are some photos of the lap desk I made out of Butternut and walnut trim. The box is 15"x20" and at the back it is 5" high. The top at the back has some "character" and I like it, almost didn't use the piece but I'm glad I did.


    Sorry just realized some photos were out of focus, and it's too dark outside to redo them. I still need to find what mag the plans were in. They had another version that had a drawer in the side like Jeffersons desk, I have Butternut pieces cut for that one but need to make time to finish it.

  3. #18
    Join Date
    Nov 2009
    Location
    Philadelphia, PA
    Posts
    727
    Isn't butternut a joy to dovetail? I really like the profile of the walnut breadboards, it's a nice touch.

    Tony, should I do up several of the brass hasps? Post some drawings talk about it and do a tutorial?
    Trevor Walsh
    TWDesignShop

  4. #19
    Join Date
    Mar 2012
    Location
    Mid coast Maine
    Posts
    479
    Thanks, I do like Butternut, but as a wood it is pretty soft. These pieces were left over from a boat interior I was rebuilding. I would not mind a tutorial if you have the time.
    Jim

  5. #20
    Looking good!

  6. #21
    Join Date
    Mar 2012
    Location
    Mid coast Maine
    Posts
    479
    I found the article. It was from Woodworker's Journal May/June 1986. I am really dating myself now. They did a whole series on Shaker pieces and this was one of them. It is a measured drawing of a desk in the collection at Hancock Shaker Village in Massachusetts. As I said the original has a drawer on the right side that I chose to eliminate on mine.

  7. #22
    Join Date
    Nov 2009
    Location
    Ellsworth, Maine
    Posts
    1,810
    Yeah Trevor I'd love to see your design of small brass hasps and see how you make them. Like I said, many of my small boxes or similar projects would be better suited with a hasp instead of a small lock. Small box locks can be a pain in the butt to install and are not always neccessary.

  8. #23
    Join Date
    Nov 2009
    Location
    Philadelphia, PA
    Posts
    727
    I just ordered some silver solder paste, I have to draw up a plan and get back from vacation to work on it. Expect a post mid-post 4th July week.
    Trevor Walsh
    TWDesignShop

  9. #24
    Join Date
    Nov 2009
    Location
    Philadelphia, PA
    Posts
    727
    Here's the first drawing for the hasp, it measures 1" wide and about 1 3/8" long. What do you guys think about it?
    Attached Images Attached Images
    Trevor Walsh
    TWDesignShop

  10. #25
    Join Date
    Nov 2009
    Location
    Philadelphia, PA
    Posts
    727
    Here is a picture of the underside of the lid, with my first carved monogram.
    Attached Images Attached Images
    Trevor Walsh
    TWDesignShop

  11. #26
    That carving looks amazing. Nice touch!
    Jamie Bacon

  12. #27
    Join Date
    Nov 2009
    Location
    Ellsworth, Maine
    Posts
    1,810
    My biggest issue in finding hasps for the boxes that I make is the length of the top half of the hasp. Most of my boxes have a lid thickness of 1/2" or less as I like a frame and panel style lid. I'm not much of a fan of clamshell type lids that have plenty of space to apply a hasp on. So the top half really needs to be at most 1/2" long, and 3/8" being a bit more ideal. That is for my application though. How do you plan on actually making these Trevor?

  13. #28
    Join Date
    Nov 2009
    Location
    Philadelphia, PA
    Posts
    727
    Thanks Jamie, I really need to practice the lettercarving if I'm hoping to get it into a wedding gift, the pine was a pain. I can't wait to get into something like cherry or mahogany. BTW how is the shop progressing?

    Tony, is the top half the part morticed into the lid? That would probably be doable. As for the fabrication, I've got some thin brass strip that I will jewelry saw, and drill into shape, then I will turn some round rod into thick wall tubing on the lathe and hard solder them to their respective leaves, one barrel on top, two on the free leaf. If I've done everything right they will swing properly and I'll be able to rivet a steel pin into the barrel. It's fairly simple bench work, as a jeweler would call it and doesn't take many tools, the clearances and fits are just critical.

    The front "lock bar" screwed to the front face will be a little trickier. I will saw out the outside shape and drill two small holes and two CS screw holes. Into the smaller holes a bent piece of brass rod with two necked down ends will be inserted and again riveted into the plate. I'm hoping to rough out some of the pieces tomorrow so I can start working on it.
    Trevor Walsh
    TWDesignShop

  14. #29
    [QUOTE=Trevor Walsh;1953493]Thanks Jamie, I really need to practice the lettercarving if I'm hoping to get it into a wedding gift, the pine was a pain. I can't wait to get into something like cherry or mahogany. BTW how is the shop progressing?

    Looks like you have a pretty good knack for letter carving to me. What tools did you use for this carving?
    The shop is still moving forward, albeit slowly now. The heat has made it tough to get much accomplished. I have the walls painted and am starting to trim the windows and doors. It's taking longer than I thought it would, but it's been enjoyable.
    Jamie Bacon

  15. #30
    Join Date
    Nov 2009
    Location
    Philadelphia, PA
    Posts
    727
    Tools used were a 1" BEC, a 1/2" BEC, a #5/12 gouge, and a knife a tiny bit.
    Trevor Walsh
    TWDesignShop

Posting Permissions

  • You may not post new threads
  • You may not post replies
  • You may not post attachments
  • You may not edit your posts
  •