Page 1 of 2 12 LastLast
Results 1 to 15 of 24

Thread: Mt. Pisgah Wooden Bridge--86' Trestle

  1. #1

    Mt. Pisgah Wooden Bridge--86' Trestle

    I hike quite a bit on a mountain called Mt. Pisgah. Mt Pisgah is a non-profit organization that maintains over 75 acres with over 16 miles of trails on a shoestring, donated budget.

    At a fund raising event I was talking with the manager and offered to volunteer to help on some limited project. Brad said there was an upcoming bridge project and I anticipated a 20 ft. bridge over one of the small streams. "I think I can do that," I responded.

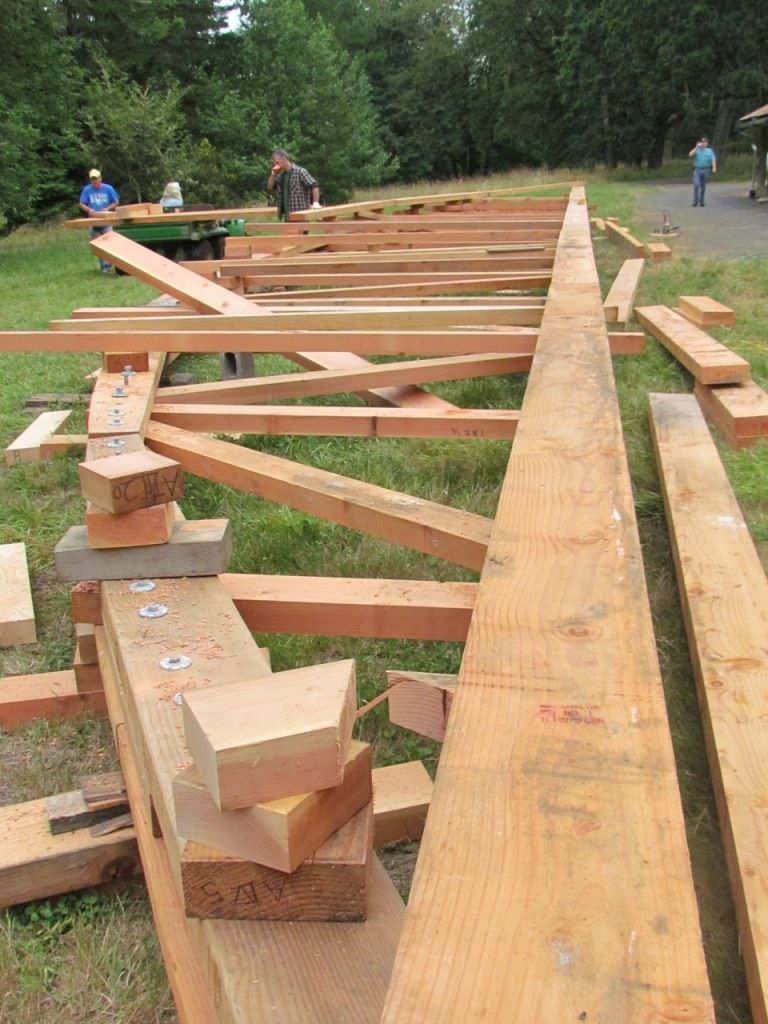
    Well, here is the bridge project, all 86ft. of it. I worked almost continuously six to seven days per week for three weeks with one to three volunteers on building the bridge. Below is level one. It was built on a grassy slope (somewhat short of ideal conditions) with the bottom laid out.

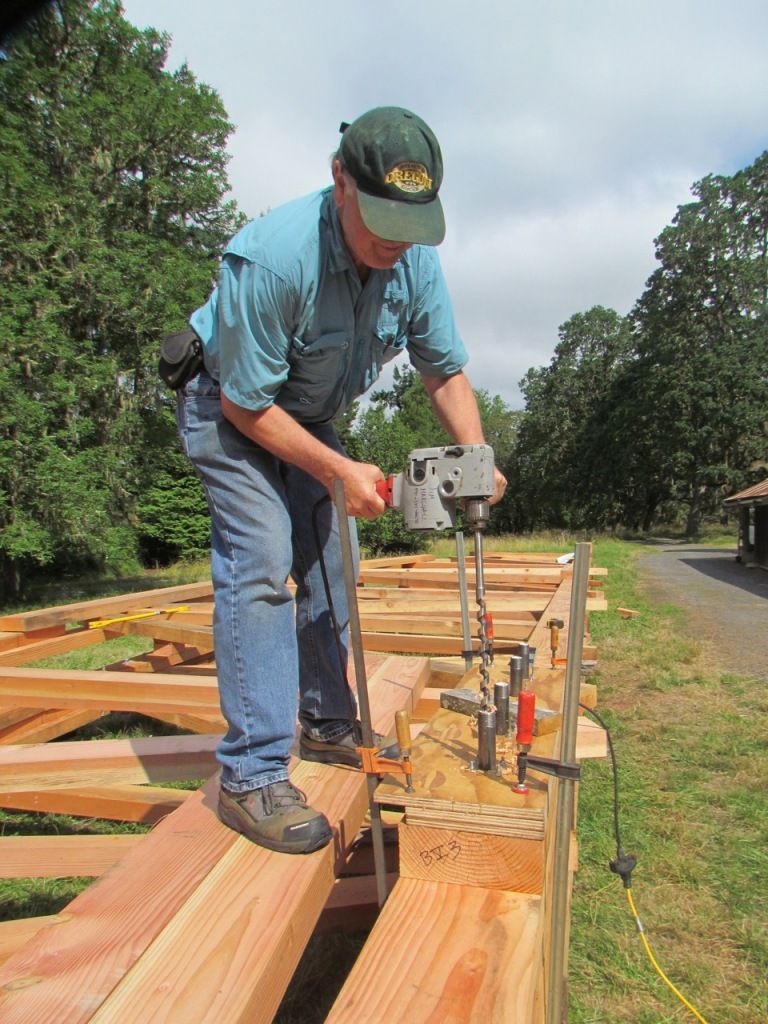
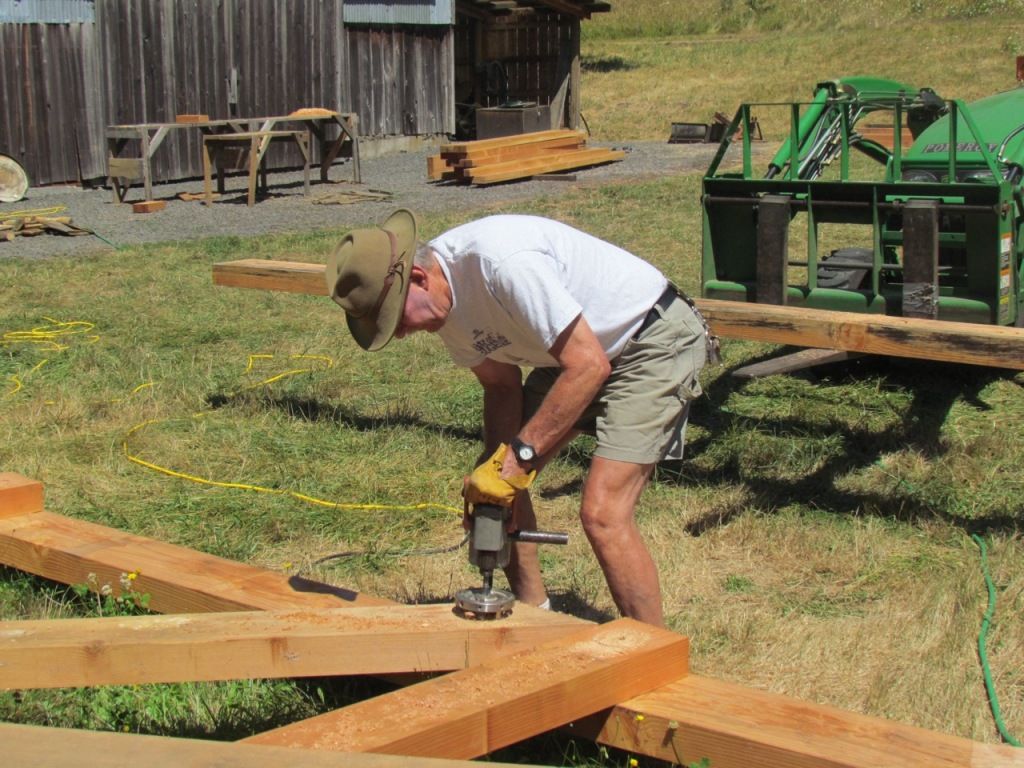
    We started with some of the nicest donated fir lumber. The logs were milled at a steam driven mill in Philomath, Oregon. I missed this part, unfortunately. When I arrived on the scene there were a set of engineer/architect plans and that was it. Having a construction background I pitched in and we started from a stack of lumber.


    Above shows one side completed. A second side was assembled on top. All holes were drilled and all pieces were labeled and off it went to be pressure treated.


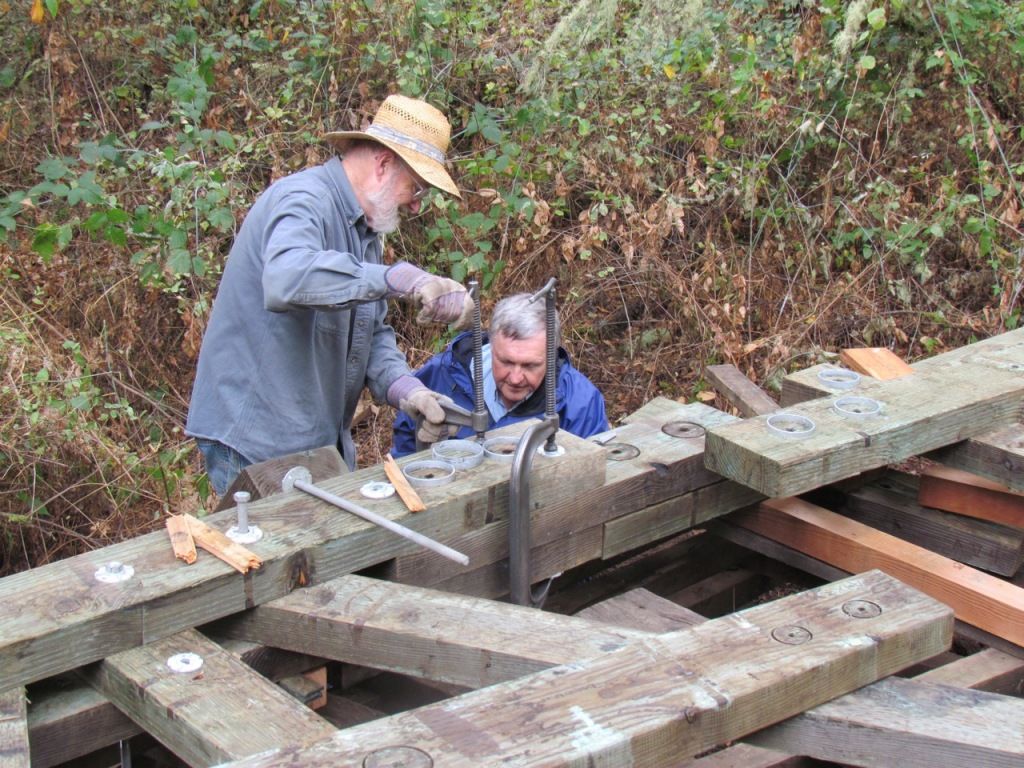
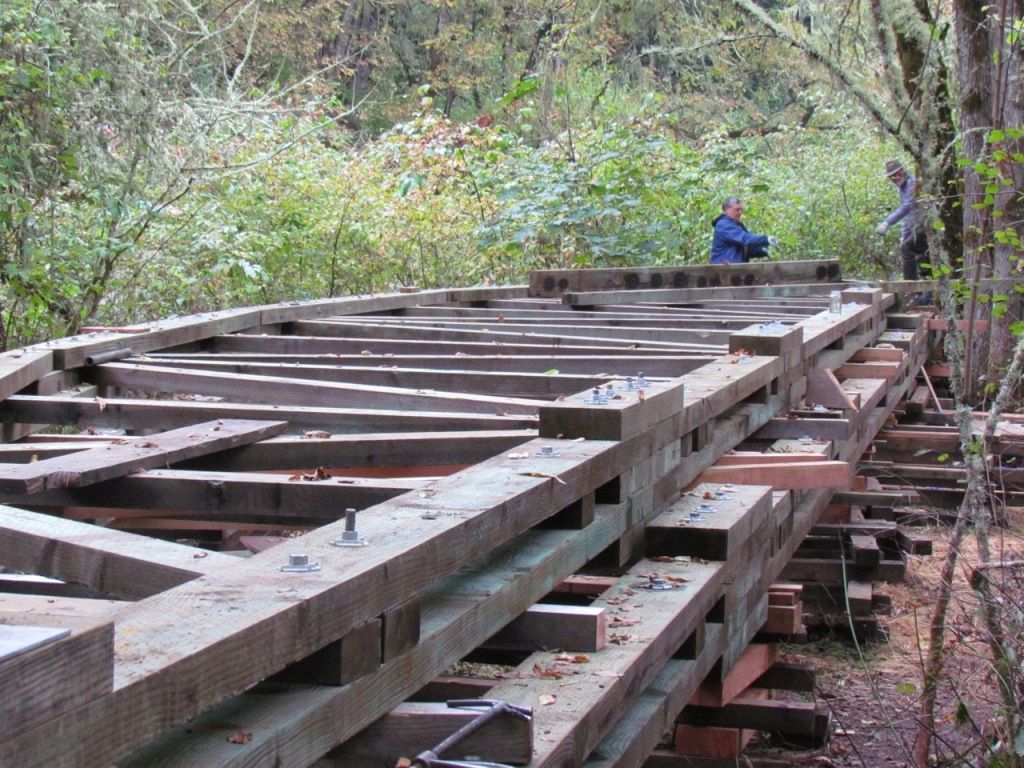
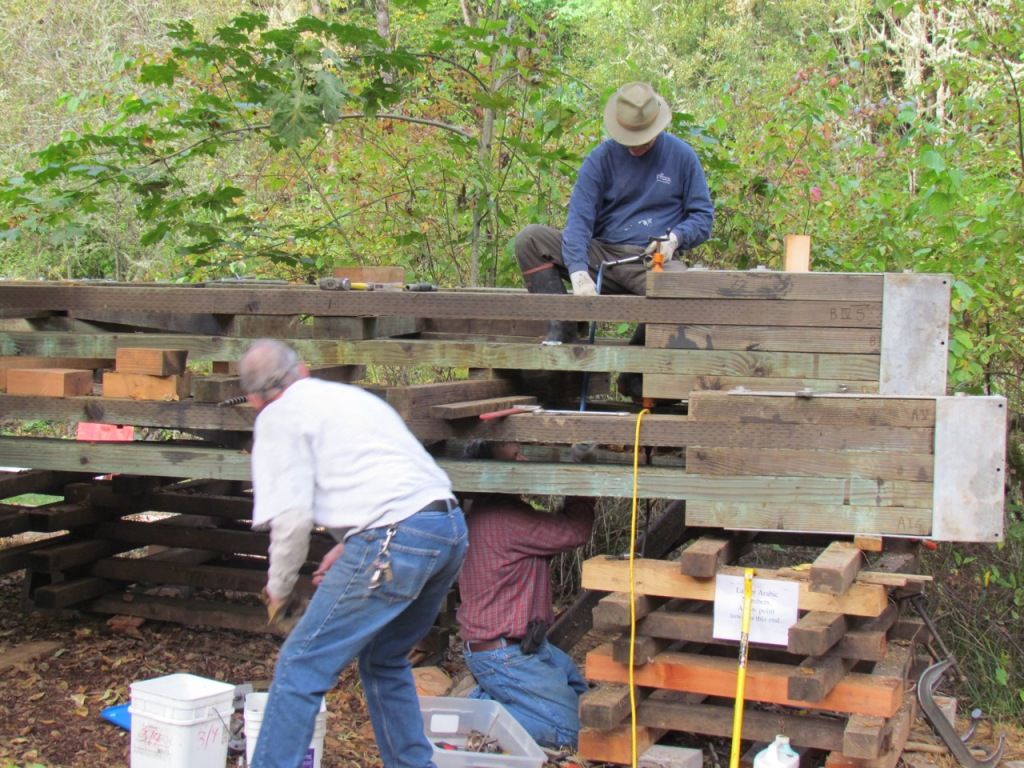
    The pressure treating took longer than we thought because it had to be a specially run batch and the wood had to be then kiln dried to prevent the chemicals from leaching into the pond. Back from pressure treating the bridge was assembled adjacent to the pond it was to span. This was a more remote area with a steeper slope. Notice the color change with the pressure treating. I am in the background.

    It is a real challenge working with part time volunteers. Fortunately, a friend of mine returned from his months in Europe to help out (on top). I drew the bottom position here attaching the shoes on the ends of the bridge trying to get the holes to line up.
    Notice the cribbing supporting the stacked sides. The other end was flat with the ground. We periodically had to level the whole thing as the cribbing was slowly sinking in the mud of the encroaching Oregon winter rains.

    Our next job to start this summer (June) is to have a crane lift the two sides, stabilize it and attach the cross bracing and decking. Currently we are working with a crane company to erect the bridge.

    Jim

  2. #2
    Nice project!

    I picked up some lumber at Hull-Oakes Lumber Mill it was a steam operated plant too, may be the same your lumber came from
    here is a neat article on it post 112 has a pic of the load I hauled out of that valley
    http://www.thisiscarpentry.com/2011/...-oaks-sawmill/
    Carpe Lignum

  3. #3
    Quote Originally Posted by phil harold View Post
    Nice project!

    I picked up some lumber at Hull-Oakes Lumber Mill it was a steam operated plant too, may be the same your lumber came from
    here is a neat article on it post 112 has a pic of the load I hauled out of that valley
    http://www.thisiscarpentry.com/2011/...-oaks-sawmill/
    Yes, that is the one in Philomath, Oregon.

    Jim

  4. #4
    Join Date
    Apr 2007
    Location
    Mebane NC
    Posts
    1,019
    James, that's a nice project to be working on. Many will benefit from your knowledge and hard work. Please keep us posted on the progress.

    Phil, thanks for posting the link to Hull-Oakes Lumber Mill. It was a very interesting article.

  5. #5
    Join Date
    Jun 2004
    Location
    Middleton, Idaho
    Posts
    1,018
    James,

    That is some project. I would not know where to start. Please make sure you post photo's as you continue. Great job.

    Sam

  6. #6
    Sam,

    When we started all we had were the architect and engineers drawings. I would have rather started on a flat concrete surface but the only place available at the arboretum was one that they held weddings and special events. So, we built it on a grassy hillside, disassembled it, had it pressure treated and moved it to the remote site.

    When we started I looked at the plans and just started at the bottom cord, leveling it with a laser level and making it straight with a string line. I found that there were few on-site tools so I provided a great deal of my own including my beam saw, Hole Hawg drill, and many other tools. I also built many jigs for the project, the most useful being a jig that kept the holes straight and aligned. It was kind of like a model kit but on a larger scale.

    One of the bigger challenges was labeling all the pieces before pressure treating so we could figure it out and see them. When we assembled them on site we had to carry them by hand part of the way and assemble them on a steeper hillside. It was raining then and periodically the cribbing would settle and we would have to drag out the laser level and re-level it. It wasn't much fun working with the pressure treated wood in the rain but we got it together.

    We are currently awaiting the erection plan, working with the crane people. I will try to round up some more pictures. It was a lot of work but I did receive a volunteer of the year award for my efforts.

    Jim

  7. #7
    Join Date
    Jun 2004
    Location
    Middleton, Idaho
    Posts
    1,018
    James,

    You are doing an amazing job, especially in such a poor environment. I can only imagine the work involved. Will you have to carry the rest of the bridge to the install location? If you have more photo's please post them. Congratulations on the volunteer of the year. You sure deserve it. They should name the bridge after you.

    Great job, Sam

  8. #8
    Join Date
    Jan 2010
    Location
    LA & SC neither one is Cali
    Posts
    9,447
    Thanks for posting, very cool!
    Of all the laws Brandolini's may be the most universally true.

    Deep thought for the day:

    Your bandsaw weighs more when you leave the spring compressed instead of relieving the tension.

  9. #9

    SOME JIGS AND OTHER TOOLS.

    One of the challenges of the Pisgah project was drilling sets of four holes at the joints. There were from one to four 3/4" bolt holes that had to be drilled through five layers of 4x material (18") using a 13/16 bridge auger. The proposal was to drill them individually but I knew that with my drilling the likelihood of them coming out straight was pretty unlikely. I proposed making a jig. My fellow workers thought it was a waste of time and the idea was met with some resistance. It was Friday afternoon and no work had begun so I decided to build the jigs on my own that weekend.

    The Jig is made of three layers of 3/4" plywood laminated together. You can see four 1" x 6" black pipe nipples sticking up. These are anchored from below to inset pipe flanges that bolted from the back side. This meant that I had to re-tap the tapered threads from the back side of the flange so that the pipe nipples could stick up through the jig. As a bearing I found that 3/4" PVC pipe would just drive tightly into the 1" black nipple. This meant the drill bit was guided by the close fitting plastic. (see picture where I am drilling the first hole).

    The nipple shortened up the depth the auger went in to about 12" deep. We could drill all the holes, remove the jig and bore through the rest of the way. With 12" of straight hole the rest went right through. It amazed me how accurate the holes came out. Some of the joints were only 10 1/2" thick and we could bore through completely using the jig.

    In addition I made a 1/2", 4 bolt jig for the upper sections of the bridge

    The Ring Boring Tool


    I thought I might provide some tools and techniques I picked up in building the Pisgah Bridge. When you bolt beams together the bolt doesn't give you much contact with the material. For the Pisgah Bridge we used rings to get better contact. The pictures above show how the rings are cut (Milwaukee Hole Hawg and special bit). You can see how they are matched both sides. This is 1920's technology, by the way.

    The bit was specially made costing over $900. Fortunately we borrowed it. I sharpened the drill bit three times. It had the oddest configuration of cutting tips. Even more fortunate it had directions and a setting block with it which made it easy to reinstall the sharpened blade.

    In operation you really had to watch it because it had a lot of torque. The end of the bit was a guide that kept it straight in the previously drilled 3/4" bolt hole. There were an incredible about of rings to drill. Rob was one of the more skilled volunteers. I was always glad to see him show up. Here he is shown below drilling the holes.


    The end of the bit was a guide that kept it straight in the previously drilled 3/4" bolt hole. There were an incredible amount of rings to drill. Rob was one of the better volunteers. I was always glad to see him show up. Here he is shown below drilling the holes.

    In the assembly picture you can see in a more detailed way how the joints went together. The joint pictured had eight rings with sixteen grooves cut into the matching pieces. My welding clamps came in handy here. Pressure treating caused a bit of twisting and slight changes which made it a bit harder to assemble. Fortunately we had a good marking system that we etched into each piece with a small Dremel tool.

    I think I supplied about three quarters of the tools here, including my beam saw, the Hole Hawg drill, and other hand tools. In addition, I built several jigs including the jig that let us drill four holes at a time with a bridge auger bit.

    We just pinned the bridge together through the bolt holes when we first assembled it. The true test came when we had it pressure treated before final assembly. Pressure treating the wood swelled it and we had to go back and ream all of the holes out. There was some twisting and warping of the wood that made some joints a bit difficult. It also made the assembly more critical. Delays in pressure treating forced us into the rainy season.
    Last edited by James Marshall; 08-01-2012 at 10:38 AM.

  10. #10
    Join Date
    Jun 2004
    Location
    Middleton, Idaho
    Posts
    1,018
    James,

    I just noticed that you are new to the Creek. Welcome.

    Thanks for the additional photo's. I like your design of the drilling jigs. It is obvious that some sort of jig is necessary to drill a series of holes that deep, and keep them straight. It is a good thing you were persistent in the necessity of the jigs. Not to mention how much easer the job would be. No measuring, and figuring, just clamp the jig in place and drill... I have seen many of those rings on bridges.

    It is still amazing how so few people can build such a large bridge. Especially, some being unskilled. If the bridge is not properly constructed, it could be dangerous. When you continue, with the crane, make sure you get photo's.

    Sam

  11. #11
    I must admit, it was my first volunteer project like this. Fortunately, I have done commercial building projects and still have a bunch of remaining tools like the old beam saw that would cut through the wood in one pass. I also have a nice shop.

    The people around who do bridges have been impressed with the quality of the work, in fact it was pretty obvious that the crane company wouldn't touch it until they saw it.

    It was interesting to organize volunteers because we had a range of skills, times and commitments. I used to tell my daughter that the people who succeed are the ones who care most. It took a lot of shepherding to keep this project on track from day to day. I typically would work from 7:00 to 1:00 and then work on little things, build jigs, repair tools. There were a couple of other people who would extend themselves on things that needed to be done. I think most of the people took pride in what they were doing. After all, how many times do you get to build a bridge as a volunteer?

    I don't know if you saw it, but I do a range of things for Mt. Pisgah. I have a post on rebuilding two DR mowers. My friend Lynn and I did that this winter. We also end up fixing numerous things and sharpening dull tools. It would be a full-time job if you let it.

    This summer we are off to a slow start, captive to the Crane people. I built a jig to attach the decking pieces, some 170 of them. The jig attaches to the deck piece, the bracket is clamped to the jig and three simpson fasteners attach it. We are attaching them with Simpson angle brackets so we don't have to bolt downward through the decking. With the jigs one of the volunteers accomplished that quickly and all we will need to do is attach them into the base.
    Pisgah jig 002.jpg

    Now we are waiting on the crane operators. I donated the money to hire a contractor and his crew of six to stabilize the bridge when it is set into place. I just felt that we needed to hire a crew familiar with one another for that task. Besides, I didn't want to assume the liability. When that is done we will have to attach all the decking and the permanent bracing. That, we can handle and there will be plenty left for us to do.

    Believe me, I would not have even attempted this if the bridge hadn't been designed by an architect and engineer and build just as laid out. I also made sure that things like the welding was handled by a qualified welder working for a stable firm. I had worked with this steel company in the past.

    We have another bridge coming up when this is done. It is smaller but supposedly was built without any mechanical fasteners. It is only twenty feet long, however, and my friend and I plan to build it in my shop.

    Jim

  12. #12
    Join Date
    Jun 2009
    Location
    Milltown Indiana
    Posts
    300
    Very, impressive. Where did you get the hardware?

  13. #13
    This is so interesting and a wonderful project. You are to be commended for your public service as well as the great job you are doing. Looking forward to seeing the finished product.
    Best Regards,

    Gordon

  14. #14
    Thanks to John Green who passed along this http://www.nastillamook.org/construction/const1.htm. It shows the rings and how they are used in large wooden structures.

    Jim

  15. #15
    Quote Originally Posted by James Marshall View Post
    Thanks to John Green who passed along this http://www.nastillamook.org/construction/const1.htm. It shows the rings and how they are used in large wooden structures.

    Jim
    I was there 2 years ago i was more fascinated with the building than the aircraft there (the airplanes were pretty neat too!)
    Carpe Lignum

Posting Permissions

  • You may not post new threads
  • You may not post replies
  • You may not post attachments
  • You may not edit your posts
  •