I have just posted a review on my website of the kit for this really excellent leg vise add-on.
http://www.inthewoodshop.com/ToolRev...nAdjuster.html
Regards from Perth
Derek


 [OP]
Contributor
[OP]
Contributor
I have just posted a review on my website of the kit for this really excellent leg vise add-on.
http://www.inthewoodshop.com/ToolRev...nAdjuster.html
Regards from Perth
Derek
Contributor
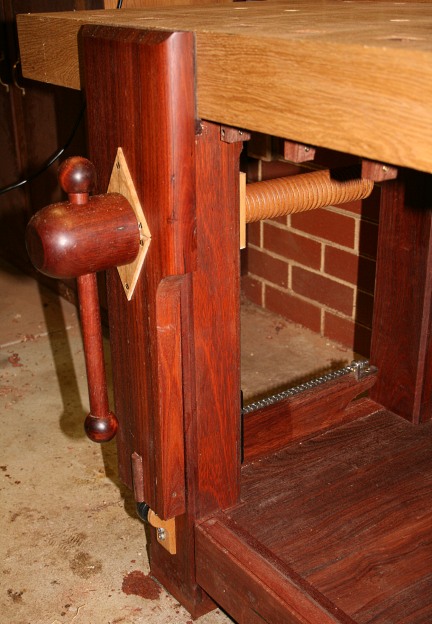
Thanks Derek, nice presentation. Now I need to put up some photos of how I installed it on my new bench with no metal brackets. That will have to be tonight.
Ancora Yacht Service
 Contributor
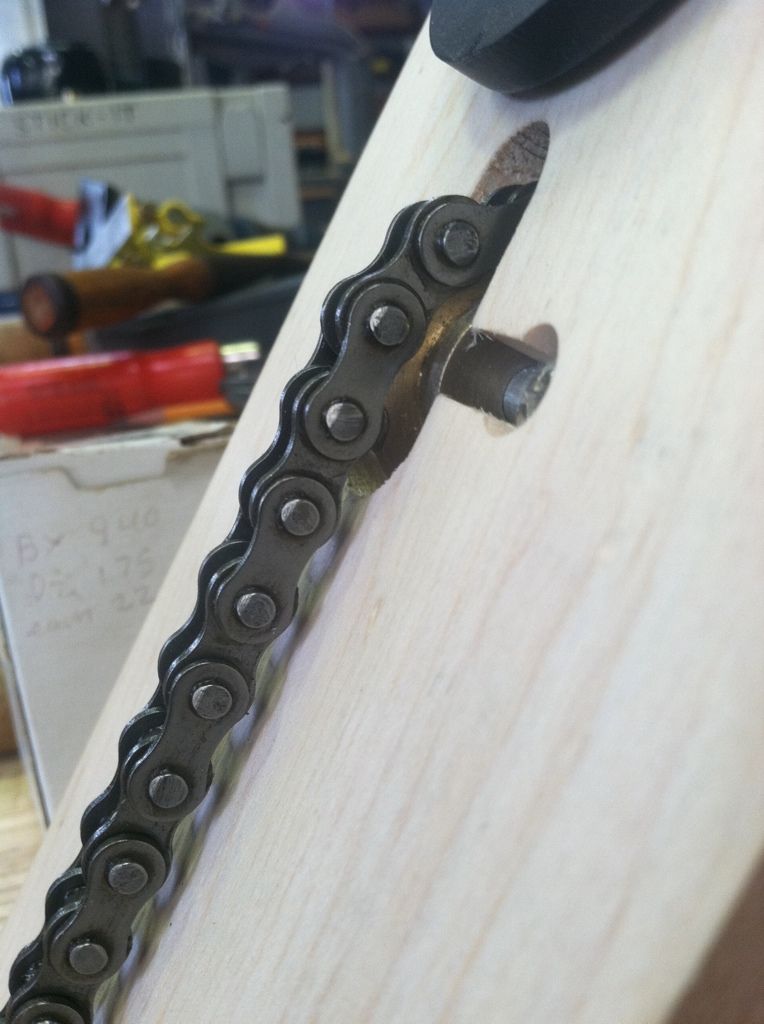
This looks cool. Two questions though. 1) How much load can the two ends of the chain withstand. Seems like the most likely places to fail are the plug end into the wood of the front vise plate. Won't that pull through with loading? Also the other end. Looks kind of undersized for how much force can be applied thru that screw (which is beautiful). 2) Love the idea, but wouldn't a cable work just as well and be much cheaper? Anyway, thats my thoughts - great work though.
[OP]
Contributor
Hi Pat
Jim has measured the loads. He can supply actual figures. In all practical terms the vise works normally - it is still the same vise. The chain mechanism only maintains equilibrium.
The plug is hugely strong on my chop. But I use Jarrah. I am sure any other hardwood would be the same. Frankly, I cannot see even most softwoods being weakened.
A cable is not practical: (1) it has to then be sized to each bench/vise combination, where a chain can be adjusted by removing links. (2) the ends of a cable must be swaged, which is difficult to do and unwieldy.
Regards from Perth
Derek
Contributor
Derek, those are good answers. I hadn't thought that much about how to complete the ends on the cable but I was thinking there was a connector that could be crimped to form the cable loops. Downside is they would take more space. I would still want a variable tension - length adjustment similar to what you have on the lower connector. Great project. Glad to see you and Jim illustrate it so well.
Last edited by Pat Barry; 08-21-2012 at 9:22 PM.
Member
You guys just love to torture us.
This would be like Rob Lee coming on the board and telling us how great the new Veritas Tenon Saw is, but not telling us when it will come available.
Contributor
Sorry, not trying to torture you...think of it more as anticipation. Hoping for a mid September launch. Don't worry I'll keep you informed.
Jim
Ancora Yacht Service
 Member
Love the idea! Jim, will the kit come with a front wheel, too? Or is that a proprietary Benchcrafted concept? I am not opposed to getting the rollers from Bencrafted, but it feels a little wasteful since they sell them in pairs whereas only one roller is needed (recommended?) with your design. And I would imagine one stop shopping is always preferred when thinking about marketing a product.
Contributor
Thanks Augusto,I had not even thought of offering a wheel. I will have to look into that. But I'm sure one could find a wheel from Mcmasters or some place. I have quite a bit of that UHMW plastic, I could make a bunch like I used on mine. Not ball bearing but still very slippery. I will look into some wheels and at the very least list some sources where they can be found. Thanks for the input.
Jim
Ancora Yacht Service
 Member
That is just way too cool! An awesome engineering solution to the problem. I especially like the idea of continuous adjustment. The parallel guide is the most annoying part of using my leg vise.
Steve, mostly hand tools. Click on my name above and click on "Visit Homepage" to see my woodworking blog.
Member
Watch Jim's video of one in action at http://ancorayachtservice.com/?page_id=196. If that doesn't convince you to have your credit card in hand, nothing will. I'm definitely getting one of these once they're available. And they only need to be shipped from NY, not Oz! Thanks, Jim and Derek!
Steve, mostly hand tools. Click on my name above and click on "Visit Homepage" to see my woodworking blog.
Contributor
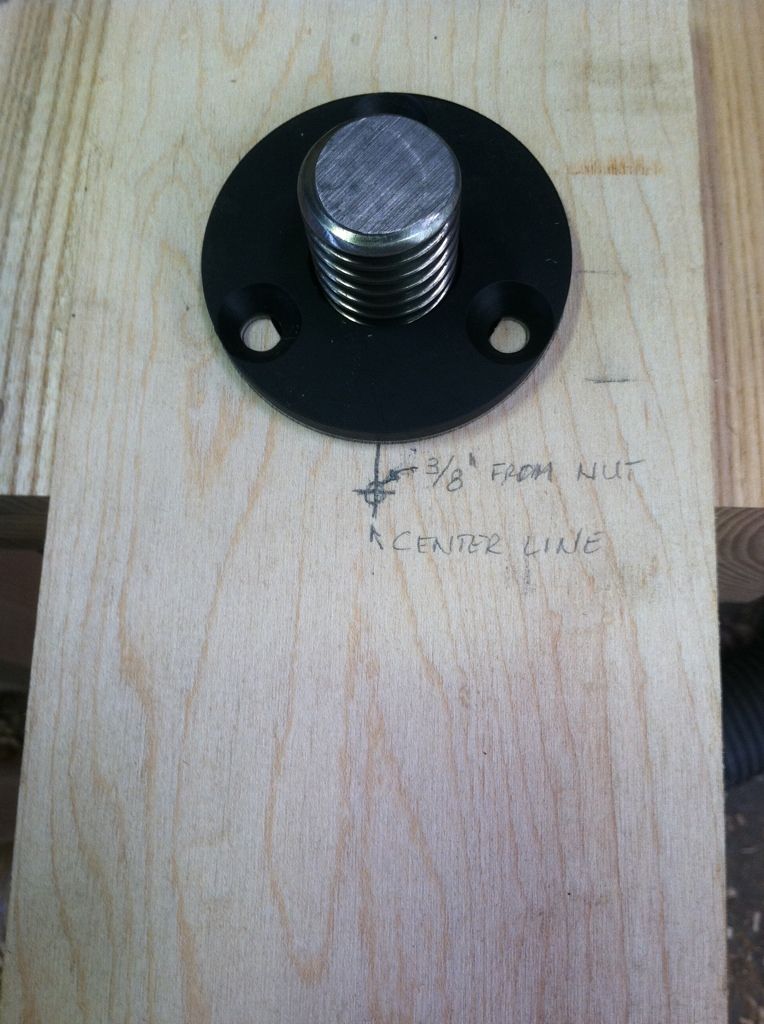
I just got the installation instructions up on the web for mortising in the upper sprocket. Please give it a look and see if it all makes sense. You'll find it here. Instructions
It will take you from here.
To here.
Ancora Yacht Service
Member
The instructions look very clear. One minor thing is that a wheel turns about an "axle". The figure skating jump is an "Axel", so spell check won't catch it.
Contributor
Thanks, someone else typed it and when I reread it it didn't look right but couldn't put my finger on why.
Ancora Yacht Service
 Posting Permissions

 Reply With Quote