Page 6 of 6 FirstFirst ... 23456
Results 76 to 90 of 90

Thread: How would you saw the lid for this box?

  1. #76
    Join Date
    Feb 2004
    Location
    Perth, Australia
    Posts
    9,497
    Hi George

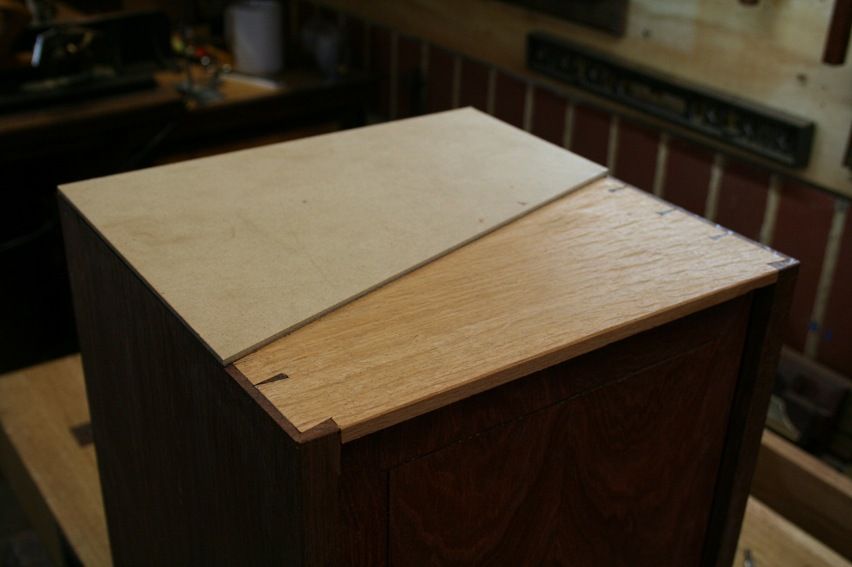
    I figured that a ogee would be impossible to do with a single router "cut" having glued the box together, that is, the two sides would not fit. Anyway I decided that I preferred the simplicity of a straight line ... and later I think that you will agree with me.

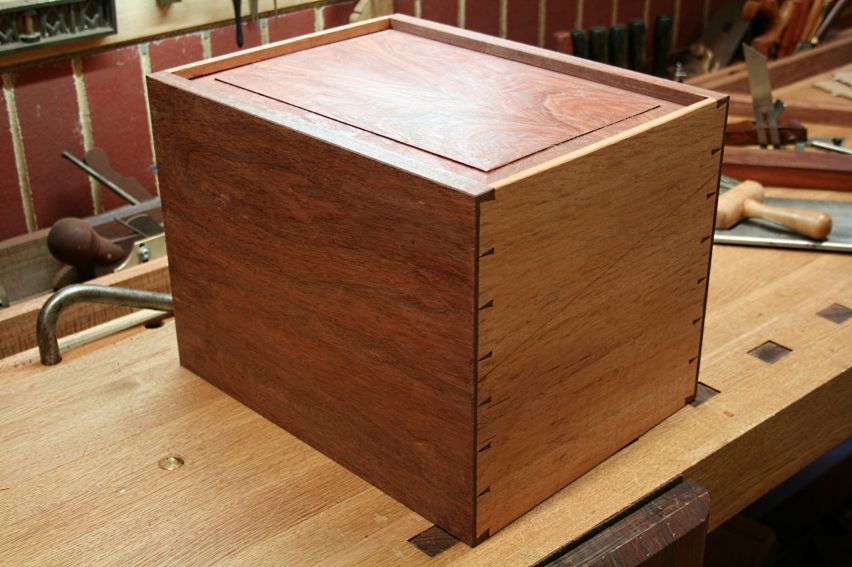
    OK, so the box needed to be cleaved in two. It always looks straightforward when looking back, but this was a reasonably complex task.


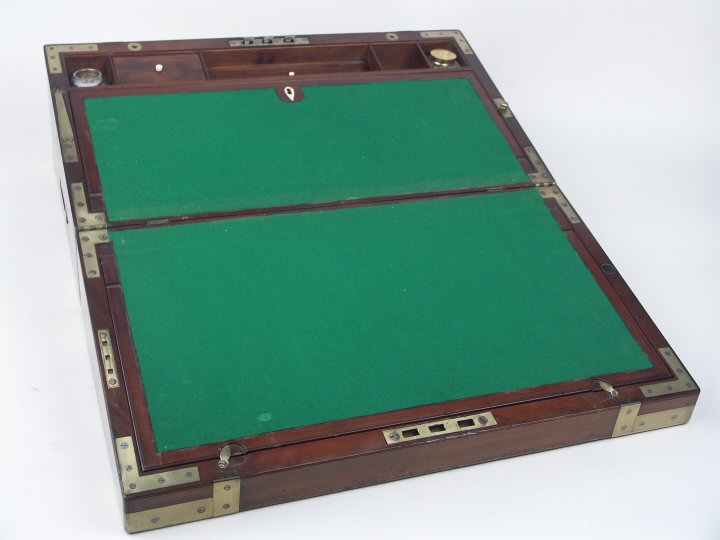
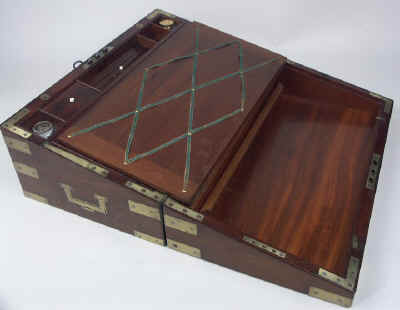
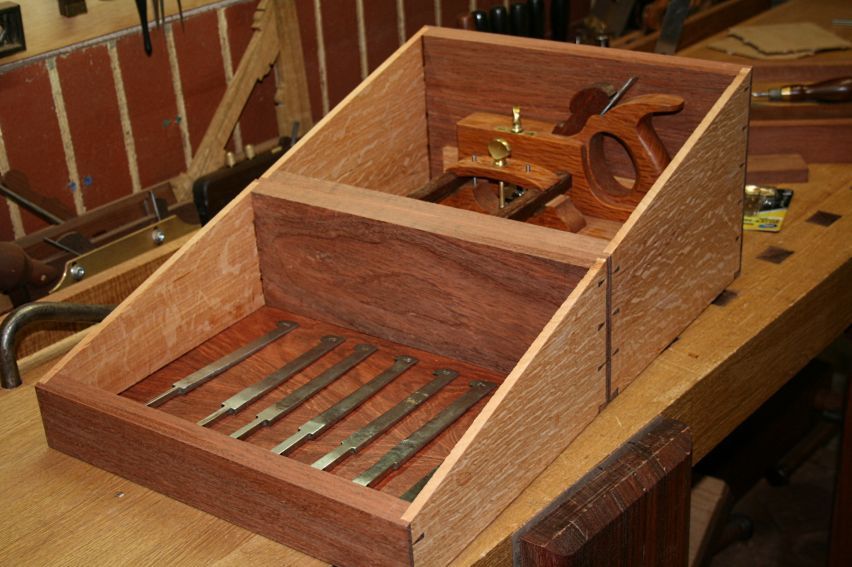
    The inspiration for the design came from a campaign writing desk ...


    I've been wanting to build one of these writing desks for a few years. Perhaps you have been as well. If so, my experience may help you a little.


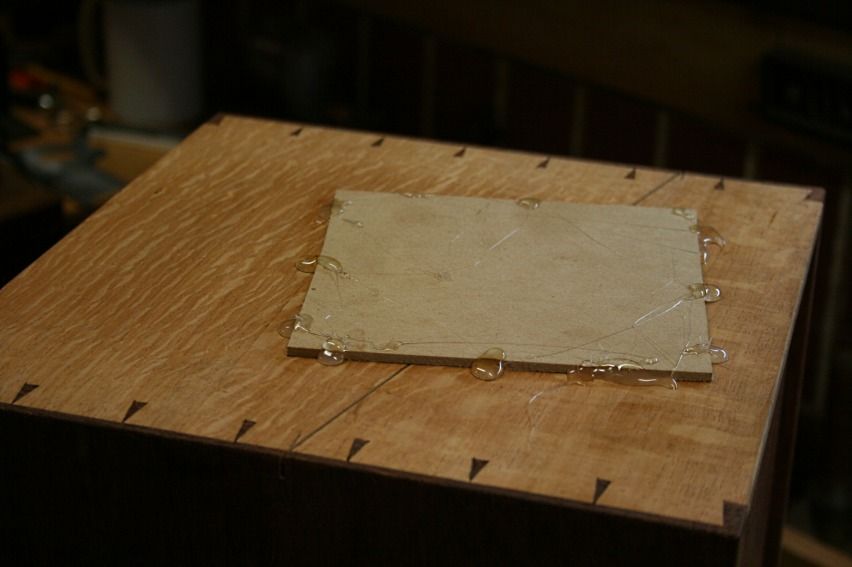
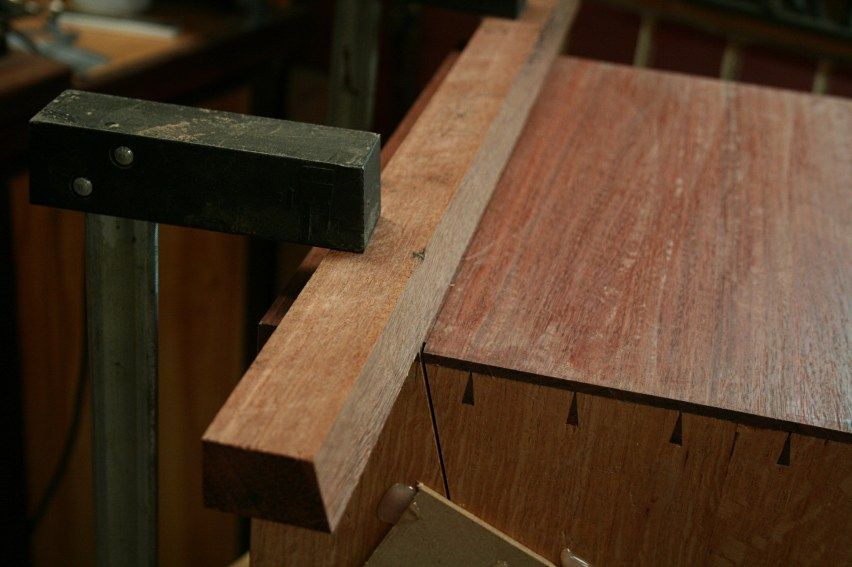
    The box had been glued up at the last post to ensure that the sides remained coplanar after sawing off the lid. Now it was time to do this. A template for marking the sides was made out of thin MDF ..


    Sawing on the bench was difficult owing to the extra height created. I could have done with a platform, or platform shoes!


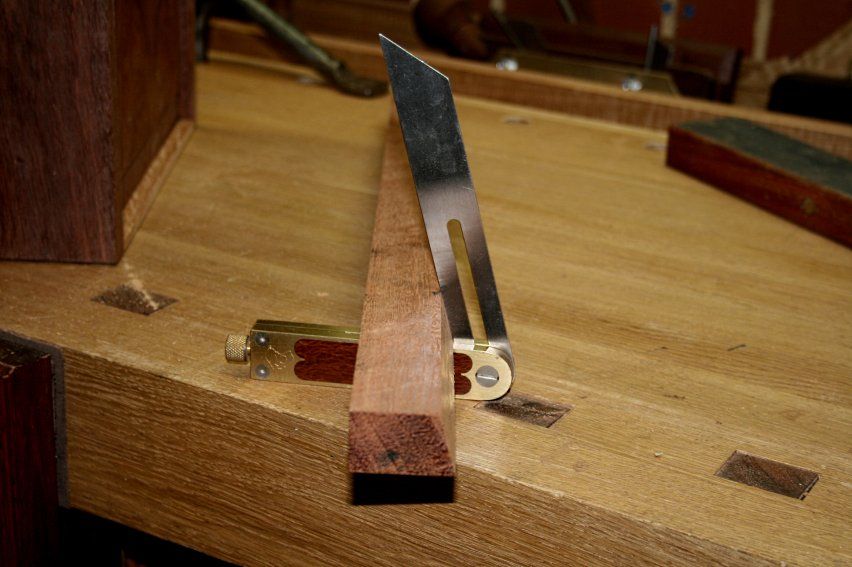
    I have a guide that does triple duty: one side is angled for siding dovetails, the other is at right angles for a dado plane. I added a few rare earth magnets to the latter for a saw ...


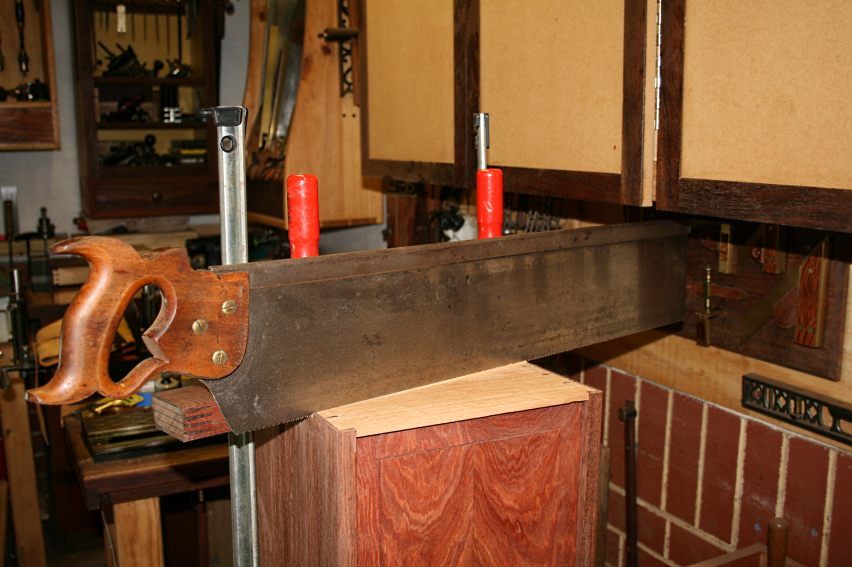
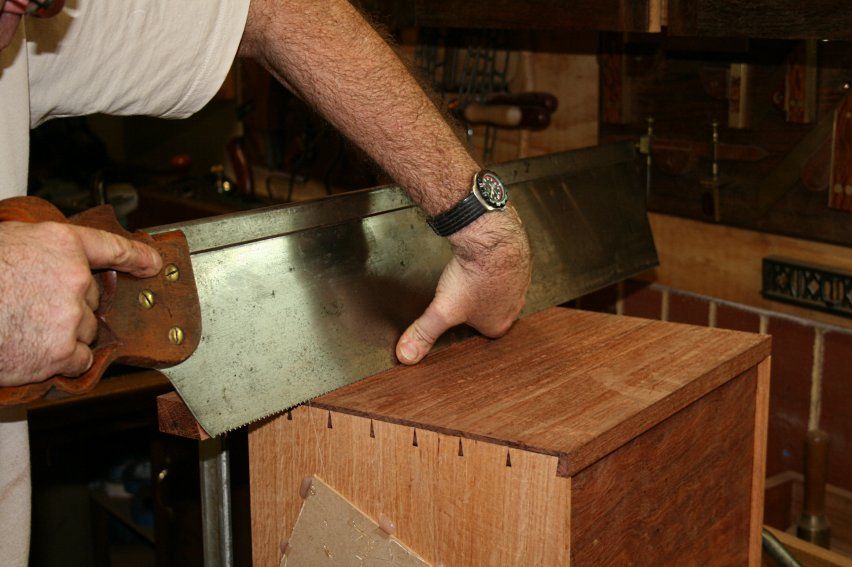
    ... and brought out "The Beast", a 28" x 5" Disston mitre saw.


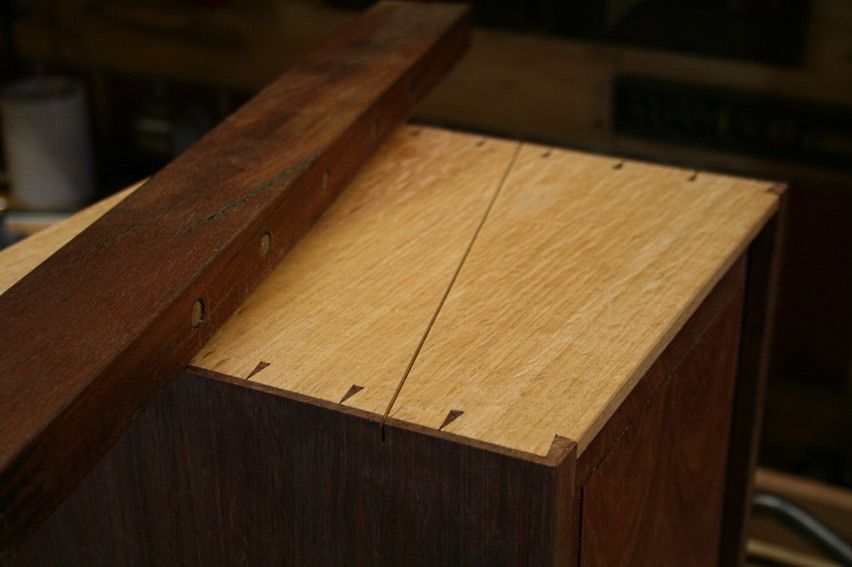
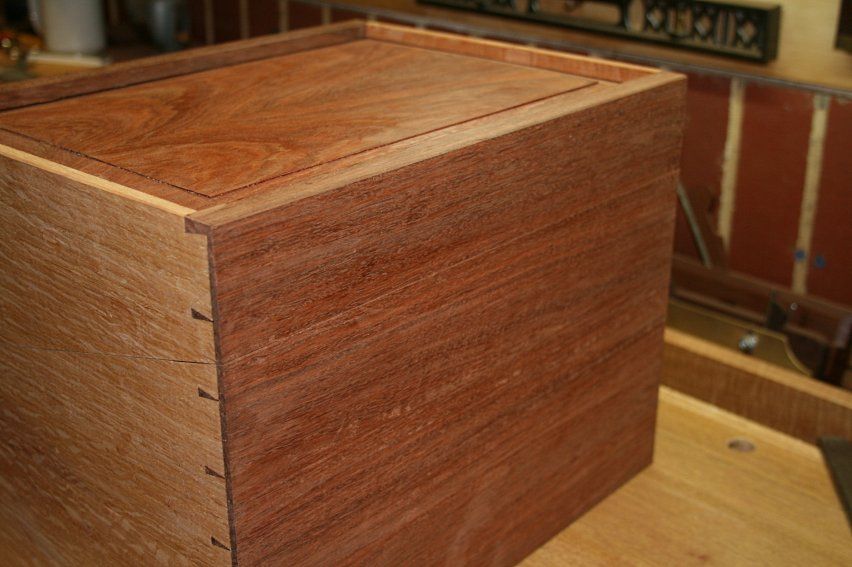
    The sides of the box were sawn until just through the side thickness.


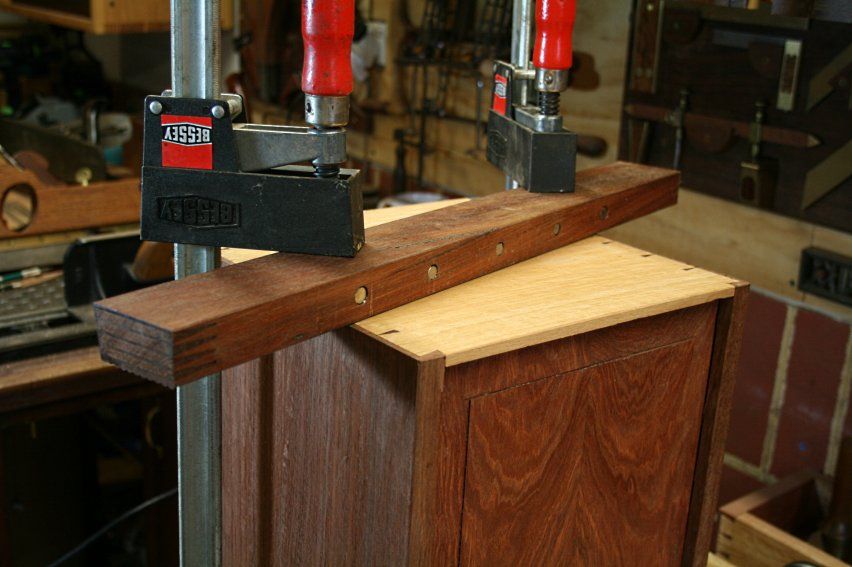
    Before sawing the front and back I hot glued scrap MDF over the sides to hold them in place ...


    A new guide for the front and rear sides was quickly made up on the tablesaw. This was to maintain the angle of the side saw cuts.


    No magnets, so you just need to hold the saw against the fence.


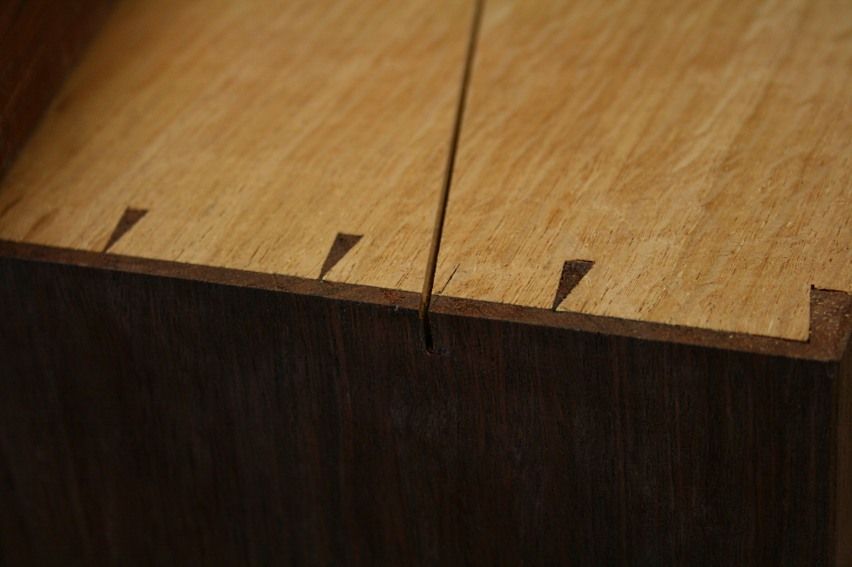
    I did not saw all the way through on the first end, stopping just short. Then completely sawed the second end, before returning to finish off the first end.


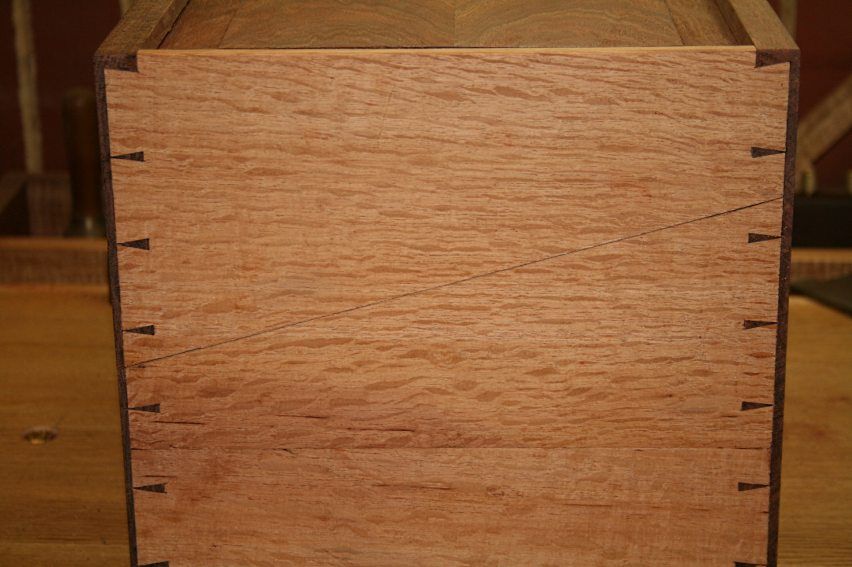
    The result was pretty good. There is a tiny amount that will benefit from being lapped smooth. That is for tomorrow.


    A side ...


    Rear ..


    Front ..


    Sides together ...


    And a preview of what I am after ..


    Regards from Perth


    Derek

  2. #77
    Join Date
    Dec 2010
    Location
    Burlington, Vermont
    Posts
    2,443
    Not bad for a "hack", Derek. . .

    My old Disston mitre saw isn't nearly as long, (16" blade) and I've been thinking of selling it, but every now and then I see you pull yours out for something like this and I figure maybe I ought to sharpen it up and hang onto it. Then it gets in the way again.

    Thanks for sharing, this is looking good.

    Really love the plough, by the way. Just jealous enough I'm tempted to have a go at one. Of course, some nice irons need to fall into my hands, first.
    " Be willing to make mistakes in your basements, garages, apartments and palaces. I have made many. Your first attempts may be poor. They will not be futile. " - M.S. Bickford, Mouldings In Practice

  3. #78
    Join Date
    Jan 2009
    Location
    Williamsburg,Va.
    Posts
    12,402
    Very accurate saw cut,Derek. But you should have used a HACK saw!! The box is looking good.

    Joshua,not long ago I saw a set of those irons on Ebay.

  4. #79
    Join Date
    May 2008
    Location
    MA
    Posts
    2,260
    It's just that easy.........

  5. #80
    Join Date
    Dec 2010
    Location
    Burlington, Vermont
    Posts
    2,443
    yeah, I've seen 'em on eBay too. I bid every now and then, but get outbid. Money's always tight right now, unless I start pulling more overtime, but then the time is tight, so I can't do anything with the stuff I'd use the money to buy. Rather have the time in the "shop" and with the wife and just make do with what I've got.
    " Be willing to make mistakes in your basements, garages, apartments and palaces. I have made many. Your first attempts may be poor. They will not be futile. " - M.S. Bickford, Mouldings In Practice

  6. #81
    Join Date
    Feb 2004
    Location
    Perth, Australia
    Posts
    9,497
    Hinges.

    I do have decent brass butt hinges, on a par with Brusso, but I am not happy with this style.


    The problem with butt hinges is that they will be very apparent from the front of the box. I really want as little to show as possible.


    The ideal type of hinge would be an internal strap hinge, such as the one here ..


    The problem is that the sides are about 3/8" wide (the front and back are 3/4") , and so I need to find something with a strap around 1/4" wide, in brass. Anyone have a contact? I've looked at several sites.


    Or an alternate idea?


    Regards from Perth


    Derek

  7. #82
    Join Date
    Dec 2010
    Location
    Burlington, Vermont
    Posts
    2,443
    You could maybe use some of those SOSS hinges LV sells, either the barrell ones, or the "invisible" ones. Won't see a thing when the box is closed, but they'd look a little garish when open.

    What about using the quadrant hinges LV sells, but removing the floating quadrant stays?

    You say butt hinges would be very evident from the front of the box - but wouldn't those strap hinges you show also be evident from the front of the box? You'll still be seeing the hinge knuckle, won't you? Why would tiny butt hinges mortised into the front and back pieces be any worse?
    " Be willing to make mistakes in your basements, garages, apartments and palaces. I have made many. Your first attempts may be poor. They will not be futile. " - M.S. Bickford, Mouldings In Practice

  8. #83
    Join Date
    Feb 2004
    Location
    Perth, Australia
    Posts
    9,497
    Thanks Joshua. I have just found the hinges I want: http://www.whitechapel-ltd.com/produ...h/247HV12.html

    These will minimise the amount of brass at the front of the box.

    Regards from Perth

    Derek

  9. #84
    Join Date
    Jan 2009
    Location
    Williamsburg,Va.
    Posts
    12,402
    Be careful with those narrow hinges. They have very little metal left around the screw holes,and might break if stressed. When the box is opened,I'd be sure to not try moving it around. Cast brass is weak. If I had to use such a narrow hinge,I'd make them from 01 tool steel tempered to a blue spring temper,and leave the blue(heat blue) surface on the hinge. Would be very pretty and much stronger. I'd also make the hinges thicker if I couldn't make them wider,to help build up metal around the screw holes with countersinks.
    Last edited by george wilson; 11-11-2012 at 12:28 PM.

  10. #85
    Derek,

    You did a nice job of cutting the lid but you must have spent more time taking photos of it and posting about it than the job took ...

  11. #86
    Join Date
    Dec 2010
    Location
    Centralia, WA
    Posts
    175
    Documenting any process takes far longer than just doing it, but by doing so you increase the knowledge base for everyone. Now the next guy has one more solid, reliable method for making an angled cut.
    The free sharing of knowledge and ideas is what makes these forums so good.
    Rodney

  12. #87
    Join Date
    Jan 2009
    Location
    Williamsburg,Va.
    Posts
    12,402
    I always fail to sufficently photo document my progress,and usually make BAD pictures anyway. I regret not doing this better many years ago,as well as currently. Keep it up,Derek.

  13. #88
    Join Date
    Feb 2004
    Location
    Perth, Australia
    Posts
    9,497
    Quote Originally Posted by Sean Richards View Post
    Derek,

    You did a nice job of cutting the lid but you must have spent more time taking photos of it and posting about it than the job took ...
    Hi Sean

    Actually photographing work alongs is second nature to me. Takes no time at all (although it did bring out the sweat once when I photographed a glueing method while putting together dovetailed panels!). What takes up time is the obsessing what/how to do things!

    Regards from Perth

    Derek

  14. #89
    Join Date
    Jan 2011
    Location
    Montana
    Posts
    157
    George,
    You have me curious now, who is the short named writer/woodworker that you referenced above?

    Randy

  15. #90
    I would cut that joint with handsaws.

    First the perpendiculars, then the slopes with a japanese azebiki(saw for cutting in the center of a panel) I would saw from the middle of the cut.

    Maybe a bit late responce to the thread but oh well..

Posting Permissions

  • You may not post new threads
  • You may not post replies
  • You may not post attachments
  • You may not edit your posts
  •