Page 1 of 2 12 LastLast
Results 1 to 15 of 21

Thread: Sliding Table Shapers

  1. #1
    Join Date
    Oct 2006
    Location
    Bloomington, IL
    Posts
    6,009

    Sliding Table Shapers

    Big Saw Joe and 3" Dave and many others have been helping me learn about sliding saws.

    What I need help with as well is sliding shapers. So combo guys and big shaper guys weigh in with pictures please - any kind of sliding table or other awesome shaper setups I want to see.

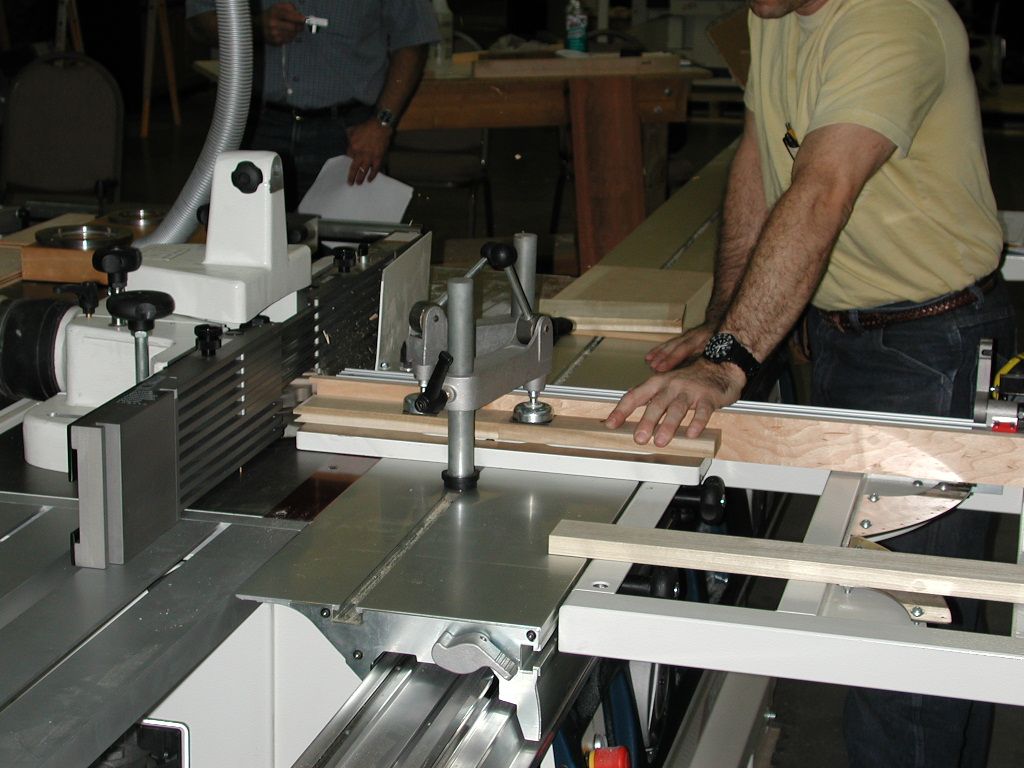
    I have a T1002S. It has a 1' thick big tenoning plate with fence and another seperate T fence that is like the hammer fence in style. They have stops D and spring loaded stops as well.

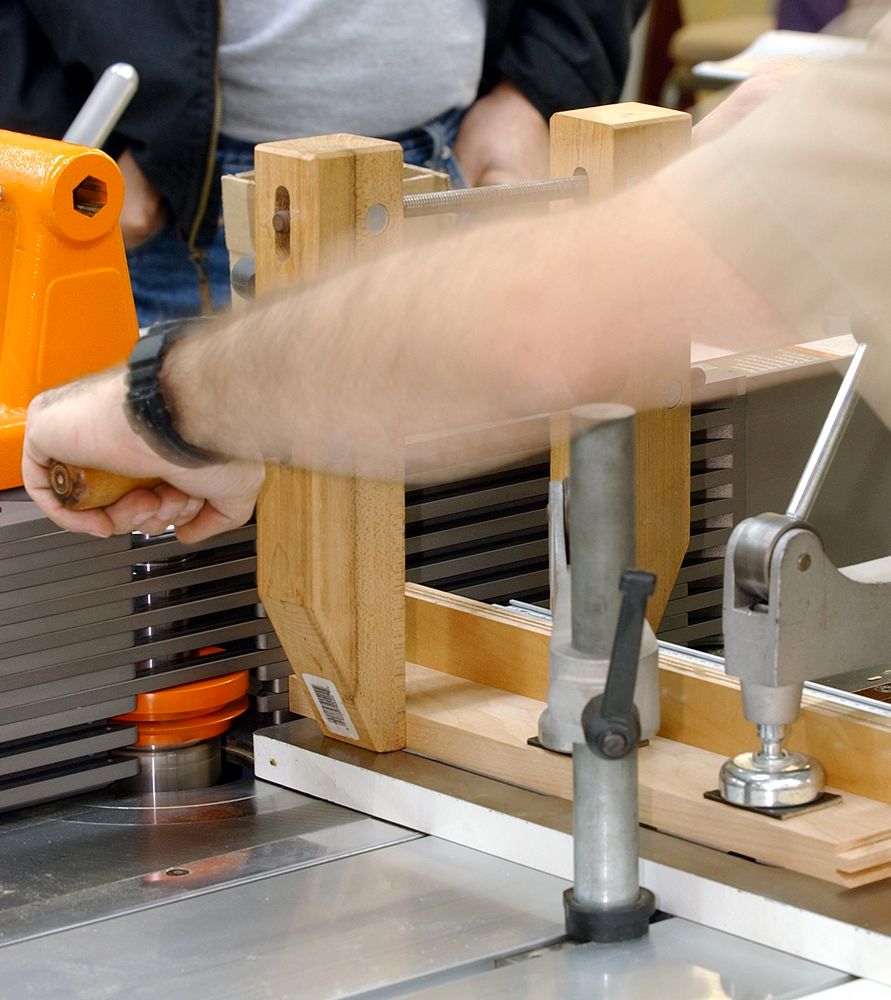
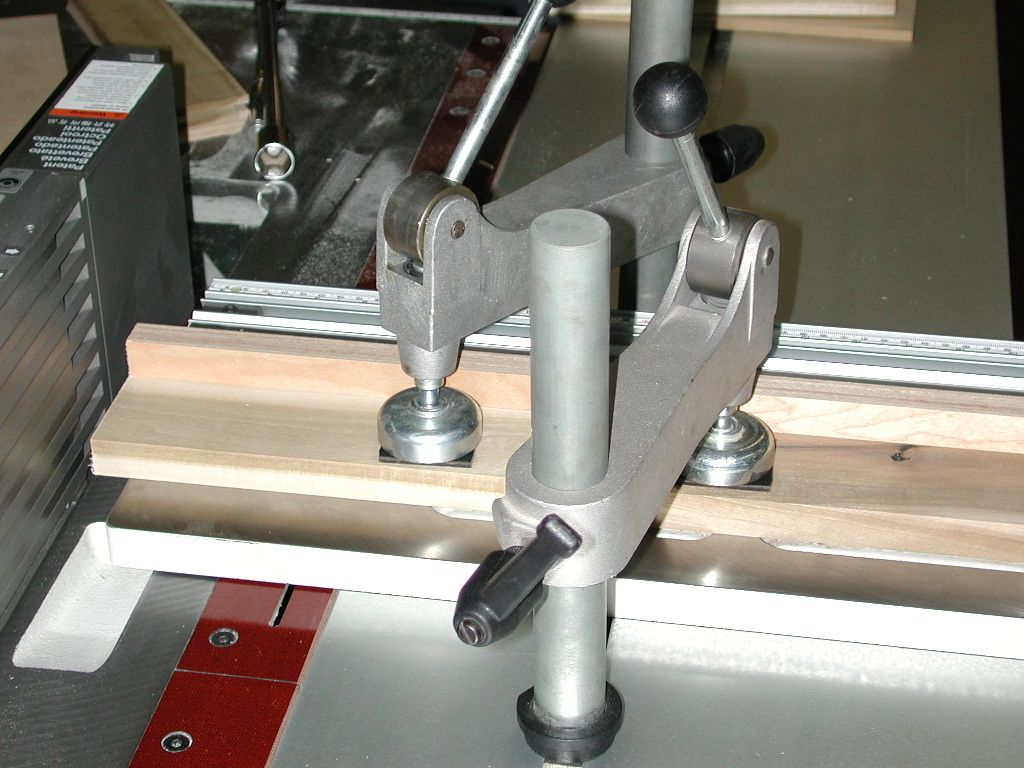
    Both have posts for eccentric clamps which I use. I sometimes worry about wood movement though.

    I also have a 4 wheel 1hp feeder mounted.

    My main fence is Lagunas model that has bars similar to an Aigner. It has positional mounting but not tilt away.

    I also have the tenoning hood.

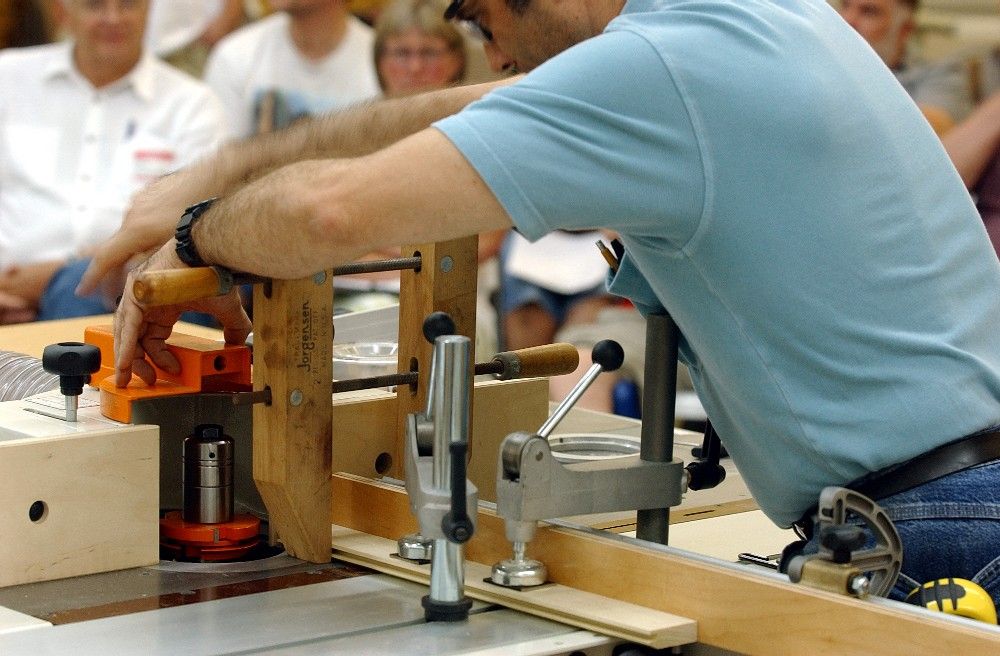
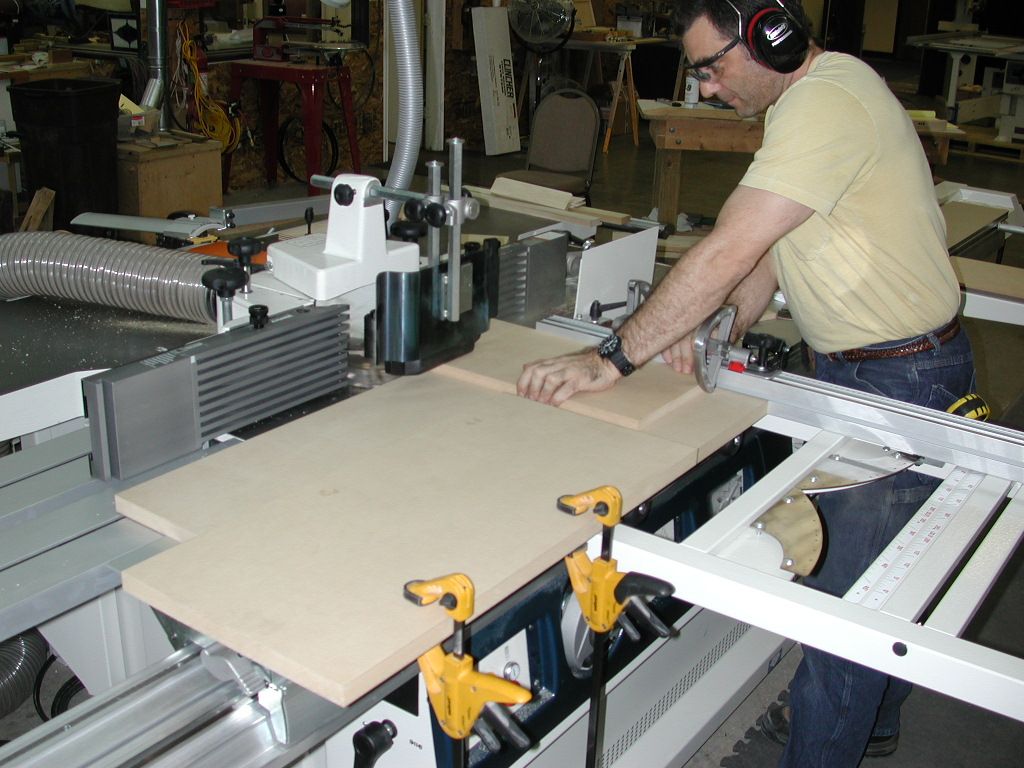
    I am looking for ides on how you mount wood to your slider, how you hold it down and in place etc. Any advice on how to get more out of my slider? Many time I am using it like a traditional shaper with a feeder.

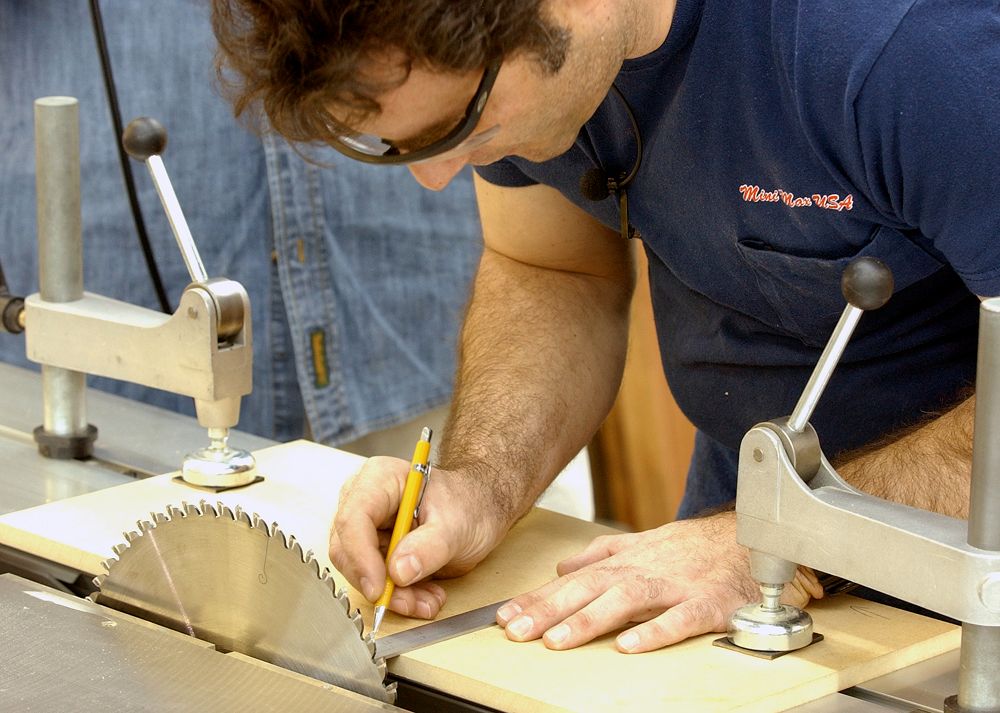
    Any pictures of jigs or methods??


    Mikie
    Glad its my shop I am responsible for - I only have to make me happy.

  2. #2
    Join Date
    Aug 2009
    Location
    'over here' - Ireland
    Posts
    2,532
    Can't help much Mike, but interested to see what comes up. I've a 3KW Hammer F3 shaper with the stock short slider awaiting setting up and use, and am new to spindle use.

    There's times I wonder if i wouldn't have done better to get the version of the 8ft K3 Perform with the spindle built in - it would have meant (a) a long slider, and (b) more floor space.

    One step for me is the need to buy a power feeder - awaiting funds. So one angle of interest is just what is and is not possible without one.....

    ian

  3. #3
    Courtesy of my colleague, Sam. Mild to wild...


    Erik Loza
    Minimax USA

  4. #4
    Join Date
    Feb 2011
    Location
    Central WI
    Posts
    5,666
    Erik has really good pictures. My set ups are similar. Here are things I try to remember

    Yellow tires on feeder- Western Roller or Axiom. Wax table and not too much down pressure. You get a feel for it.

    Crosscut fence locked down hard at exactly 90. Heavy cuts tend to pull the out end of the fence forward so always watch for that. Even a little is a lot.

    At least one eccentric clamp down and I also always use a second hand squeeze type holding the board to fence if the board is over 3/4". I do 1.75" doors and only one cut so good clamps are a must.

    If doing matching end cuts for stiles I try to use boards twice as wide and rip down the middle so each is exactly the same. You should be able to do that safely with your SS.

    I also use an auxiliary fence that either fits over the existing or have modified the flip stop for entry door or stile cuts when I want to reference off the face or back but not off the tongue. I never reference off the tongue so a stop that flips down partially helps.

    I made a feather board that attaches to the T slots in the sliding table when doing edge or rail cutting, especially for short pieces. They can tip in or the end kick out so a feather board helps the feeder to keep them heading straight down the line.

    Whenever I have the room I use the feeder as a guard. If I'm doing raised panels I might clamp them to the crosscut fence but if wide enough I leave the sliding table free and use the feeder and shaper fence for the cut. Even if I don't need it I use the feeder if I can.

    When in doubt err on the slow side with the feeder. Slow is annoying but fast can be fatal.

    I have big shapers and always try to shape in one pass. I've never had luck with the second fine cut thing. My best cuts come in one pass and it cuts my ability to screw up in half.

    Check your cope cuts with a square square every so often. Any light showing on one end will screw up your life. Errors don't cancel in shaping. they always multiply.

    I'm sure I'll think of more. Dave trying to grow.

  5. #5
    One observation I have made, in particular with combo machines, is that the factory usually installs the sliding table a few-thousandths of an inch proud of the cast iron table. They do this so that panels don't drag while you are cutting them but it can be frustrating when you are switching back and forth between sliding table saw and shaper, to accomodate that extra height into your shaper endgrain work. So, if you have a saw/shaper or 4-in-1 combo and want to do lots of tenoning or endgrain work, I would be ready to adjust the slider height down a little bit, yourself.

    Erik Loza
    Minimax USA

  6. #6
    Join Date
    Feb 2011
    Location
    Central WI
    Posts
    5,666
    Erik, the sliding table height really shows up well in the pictures. I try for .001-.002 right in front of the spindle. Important that the table and the slider are parallel or on the same plane might be more accurate. You don't want the end cuts at even a slight angle . Checking the tilting spindle against the spindle for angle and not the bushings is good too. Dave

  7. #7
    Quote Originally Posted by David Kumm View Post
    Erik, the sliding table height really shows up well in the pictures. I try for .001-.002 right in front of the spindle. Important that the table and the slider are parallel or on the same plane might be more accurate. You don't want the end cuts at even a slight angle . Checking the tilting spindle against the spindle for angle and not the bushings is good too. Dave
    Ya, I remember watching Sam working on that slider with his long straight-edge for a while, to get it where he wanted. In this photo, he is checking the slider freecut, as you mentioned...


    ...and checking spindle perpendicularity during raising/lowering...


    Erik Loza
    Minimax USA

  8. #8
    Join Date
    Feb 2008
    Location
    Northwestern Connecticut
    Posts
    7,149
    Quote Originally Posted by Erik Loza View Post
    One observation I have made, in particular with combo machines, is that the factory usually installs the sliding table a few-thousandths of an inch proud of the cast iron table. They do this so that panels don't drag while you are cutting them but it can be frustrating when you are switching back and forth between sliding table saw and shaper, to accomodate that extra height into your shaper endgrain work. So, if you have a saw/shaper or 4-in-1 combo and want to do lots of tenoning or endgrain work, I would be ready to adjust the slider height down a little bit, yourself.

    Erik Loza
    Minimax USA
    Will the tenoning plate not solve the table/slider height issue? I'm thinking if you are clamped to the plate the cut edge of the piece won't flutter and it won't tend to drag the table either. It would be held a fixed height above the table and move perpendicular to the spindle. I've had issue with my rustic t40 setup where the slightest bow in a piece of stock will drag hard on the table once the eccentric clamp is set making it almost hard to advance the carraige. Sure, a lot of bow and a part gets defected, but a little, and for certain things, still works fine. Is the tenoning plate rigid enough to keep things in line or even clamp a slight bow out without flexing?

  9. #9
    Join Date
    Oct 2006
    Location
    Bloomington, IL
    Posts
    6,009
    Quote Originally Posted by Peter Quinn View Post
    Is the tenoning plate rigid enough to keep things in line or even clamp a slight bow out without flexing?
    I think it should be from Felder. My plate alone from Laguna weighs in at around 85lbs without the clamp.
    Glad its my shop I am responsible for - I only have to make me happy.

  10. #10
    Join Date
    Feb 2011
    Location
    Central WI
    Posts
    5,666
    Peter, I've had three different tenoning plates and am embarrassed to say I've seldom used them. The Felder plate was 1/2" steel and the back was recessed over the cast table to insure no interference, the other two were cast iron. Aigner makes a cope cut accessory that is easier to use for a couple short pieces so the plates sit. I almost always just use the slider and clamp to it. The Felder shaper table gets closer to the spindle so that may be a help. I don't use the slding table on the T130 often because it sits so far away. One reason I don't think the SCMI slider is as handy as on a little smaller machine. To answer your question the tenoning tables range from 25-40 lbs or more. The Knapp is really heavy. None of them will ever deflect. Dave

  11. #11
    Yeah, the plate is PLENTY rigid. Trust me, you wouldn't want to drop it on your foot. Here the plate as well as a dedicated tenoning hood...


    Erik Loza
    Minimax USA

  12. #12
    Join Date
    Dec 2006
    Location
    Toronto Ontario
    Posts
    11,282
    The Hammer tenon plate is a hollow aluminium extrusion with a machined relief on the bottom.

    The force from the hold down clamp is over the table, not over the free space, deflection isn't an issue........Rod.

  13. #13
    I had a sliding table on my scmi shaper, but I took it off due to the dragging issues already mentioned. It really is a tall order to have the surface of the sliding table and the machine table exactly on the same plane, particularly if you want to place the tenon very accurately. Realisticly, it's not going to happen. I guess the plate would solve this issue, but I have not tried it. If I wanted to do entry doors, it would be first up on my to do list.

    For normal coping, such as door parts or table aprons, a simple jig with destaco clamps will have both sides of the board done before you can blink. I do this in one of two ways. For tenons, I have 8" tenon disks, which I use with a 4 inch bearing mounted below the bottom disk. I use a jig that rides on the bearing to mount the workpiece with destaco clamps. The first cut cuts the backer board, and this is used to locate the scribe line for the tenon.

    For coping, I use a jig that rides in the slot and the shaper fence. The first step is to make a cut from a long piece with the fence backed off, so that material is cut off the end of the tenon. Leaving the wood clamped in, the fence is set to just touch the wood. Much easier with a stub fence than a real heavy fence. Later cuts are placed right against the fence and theoretically the length of the part will not change.

  14. #14
    Join Date
    Aug 2009
    Location
    'over here' - Ireland
    Posts
    2,532
    To ask a couple of very basic questions related to clamping. The Hammer F3 uses the Felder hold down clamp - very similar to the one in the first photo in Erik's post no.3:

    1. How reliable is this pattern of clamp to hold down e.g. a piece as in that photo?

    2. Is it possible to damage the T slot in the slider by over tightening one? (bearing in mind that my Hammer slider might be a shade lighter than some)

    Thanks

    ian

  15. #15
    Join Date
    Dec 2006
    Location
    Toronto Ontario
    Posts
    11,282
    Quote Originally Posted by ian maybury View Post
    To ask a couple of very basic questions related to clamping. The Hammer F3 uses the Felder hold down clamp - very similar to the one in the first photo in Erik's post no.3:

    1. How reliable is this pattern of clamp to hold down e.g. a piece as in that photo?

    2. Is it possible to damage the T slot in the slider by over tightening one? (bearing in mind that my Hammer slider might be a shade lighter than some)

    Thanks

    ian
    Hi Ian, I have the hold down clamp, it has never had an issue

    I'm sure someone somewhere could damage anything, I haven't had any issues.........Regards, Rod.

Posting Permissions

  • You may not post new threads
  • You may not post replies
  • You may not post attachments
  • You may not edit your posts
  •