Page 2 of 3 FirstFirst 123 LastLast
Results 16 to 30 of 41

Thread: Lap Desk In A Weekend

  1. #16
    Join Date
    Feb 2010
    Location
    Philadelphia, PA
    Posts
    3,697

    And that's a wrap.....er, almost.

    After bit resawing, planing, and then cutting of tiny dovetails I have the makings of a drawer. So that's it for this weekend. I'm pleased that I got this far even though I didn't technically quite finish. I still need to make a bottom for the drawer and install a couple dividers right at the front of the drawer to hold pencils and such. I'll need to grab some cheep box hinges this week to attach the lid, and then of course, I need to decide on a finish. Maybe just some BLO, maybe some paint...IDK, I'll decide later. I'll post some pics when its done for real.

    Thanks for reading. Please join us for our next segment of woodworking in my basement, when instead of "Lap Desk in a Weekend" we will completing "Philadelphia High Boy in a Fort Night"

    IMG_20130616_180302_082.jpg IMG_20130616_181527_759.jpg IMG_20130616_190729_445.jpg IMG_20130616_190907_729.jpg IMG_20130616_190838_925.jpg
    Woodworking is terrific for keeping in shape, but it's also a deadly serious killing system...

  2. #17
    Join Date
    Feb 2010
    Location
    Philadelphia, PA
    Posts
    3,697
    Quote Originally Posted by Jim Ritter View Post
    I built one from those plans years ago. I used Butternut and Walnut for the molding. It's a nice size. I cut enough wood for two. One with the drawer and one without. I still haven't put together the one with the drawer. I'll get to it someday.
    Jim
    I think I recall you posting some pic of yours once. It was really nice. I had always planned on making one of these out of a nice hardwood, and have some figured maple around that i had originally planned to use. It would have been lovely, BUT I really wanted to get this done or near done this weekend. I totally did not want to thickness 4/4 hard maple down to 3/8 and 1/4 thick. Not only would that have been a lot of time and work but I would have hated to waste away all they maple.....i have some walnut that would have been nice but again didn't want waste it all away..It was nice to be able to use up a bunch of pine scraps instead, but I'd still like to make one out of walnut, maple, or cherry when I decide I want to put a little more time in to it.
    Woodworking is terrific for keeping in shape, but it's also a deadly serious killing system...

  3. #18
    Join Date
    Mar 2012
    Location
    Mid coast Maine
    Posts
    480
    Yup, I did post it a while ago. You might just inspire me to put the second one together.
    Jim
    Ancora Yacht Service

  4. #19
    Join Date
    Dec 2008
    Location
    Gibsons British Columbia Canada ( near Vancouver )
    Posts
    693
    Very nice Chris - I bet the floor was swept / vacuumed throughout the house before the Mrs. showed - well done - what about finish??

  5. #20
    Join Date
    Feb 2010
    Location
    Philadelphia, PA
    Posts
    3,697
    Quote Originally Posted by Dave Beauchesne View Post
    Very nice Chris - I bet the floor was swept / vacuumed throughout the house before the Mrs. showed - well done - what about finish??
    Thanks Dave. Chores were in progress when LOML got home, but yes I did end up getting dishes done, floors swept (downstairs anyway) and laundry put away.

    Haven't decided on finish yet. Paint maybe, otherwise I'll probably do some oil and shellac, maybe topped off with some varnish just for added protection since this will likely get knocked around a bit and perhaps exposed to alcoholic beverages.
    Woodworking is terrific for keeping in shape, but it's also a deadly serious killing system...

  6. #21
    Join Date
    Feb 2010
    Location
    Philadelphia, PA
    Posts
    3,697

    The saga continues...

    I had about 30 minutes this morning before work to get down to the shop, so I took the opportunity to install one of the dividers in the drawer.

    (which begs the question if I'm at work now than why am I posting this? Well, fortunately, lets just say I am a far more efficient data analyst then I am woodworker)

    The dividers are only 1/8" thick and fortunately I had some resawn cutoffs left over from other parts of the desk so already had stock that was nearly at the thickness I needed. This really sped things up for me.

    I begin by marking out 1/8" wide 1/16" deep stopped dado in the drawer sides. If this were larger, I would saw the walls first but they are so shallow and the wood is so soft that I can literally push a chisel to the depth to cut the fibers. Once the walls are defined I pare out the waste on each side of the dado with a wide chisel. I got stuck when it came to leveling out the center when I realized I don't have a chisel narrow enough to pare the length of the bottom and level it off. Then I remembered I bought a 3/32" router plane blade a while back for inlay work...well I haven't used it for that yet, but I was sure glad to have it here. I literally pulled it out of its unopened box and didn't take the time to hone it so the bottoms of the dado's are a little rough, but they are of even depth and no one will ever see the bottoms so giant who cares. I really do need to pick up a 1/8" chisel one of these days though...a router plane is total overkill for a dado this small and while I typically finish larger dados with it, these little guys would have been done quicker, easier and probably cleaner with a sharp 1/8" chisel.

    IMG_20130617_063155_648.jpg IMG_20130617_063946_363.jpg IMG_20130617_063745_307.jpg IMG_20130617_064139_147.jpg

    I then cut one of my thin offcuts to width and just a hair over length, and plane it down until it fits snuggly into the dados. I shoot it to its final length and my drawer has a divider. I still have another divider to add, which will divide the already divided section to create an approximately 3"x3" in the front corner of the drawer that will be just the right size for a stack of post-its. The remainder of the divided section will be for pens and pencils.


    IMG_20130617_065601_095.jpg IMG_20130617_070146_704.jpg
    Last edited by Chris Griggs; 06-17-2013 at 12:10 PM.
    Woodworking is terrific for keeping in shape, but it's also a deadly serious killing system...

  7. #22
    Join Date
    Feb 2011
    Location
    Carlsbad, CA
    Posts
    2,231
    Blog Entries
    2
    Awesome Chris!!

    1) Lap desk project complete -- check.

    2) Housecleaning done -- check.

    3) Membership in Husband's union temporarily revoked -- check. Dude you're make the rest of us look really bad!

    Very nice hand tool work -- I love the pictures -- thanks for sharing!

    All the best, Mike

  8. #23
    Join Date
    Feb 2010
    Location
    Philadelphia, PA
    Posts
    3,697
    Quote Originally Posted by Mike Allen1010 View Post
    Awesome Chris!!

    1) Lap desk project complete -- check.

    2) Housecleaning done -- check.

    3) Membership in Husband's union temporarily revoked -- check. Dude you're make the rest of us look really bad!

    Very nice hand tool work -- I love the pictures -- thanks for sharing!

    All the best, Mike
    Thanks Mike. You're hilarious my friend!

    -----

    Had about 20-30 more minute last night to add the 2nd divider and glue up the drawer.

    The dividers came out nice.

    IMG_20130617_215510_780.jpg IMG_20130617_215500_821.jpg

    The dovetails....Er....not so much...the worst I've cut in quite some time. Oh well, they hold plus I used my favorite trick to get them to appear better fitting, which works especially well with this soft as styrofoam BORG pine.

    Step 1: Smash tails into pins with hammer, ensuring that you smash hard enough to fill gaps.

    Step 2: Apply hot water to joint to swell smashed tails and pins further reducing and and hopefully eliminating any remaining gaps.

    Step 3: Repeat as necessary to obtain desired effect.

    IMG_20130617_215520_428.jpg

    Hopefully, they look alright once I plane everything flush. And if they don't, meh, oh well, not that big a deal.
    Last edited by Chris Griggs; 06-18-2013 at 1:31 PM.
    Woodworking is terrific for keeping in shape, but it's also a deadly serious killing system...

  9. #24
    Join Date
    Feb 2010
    Location
    Philadelphia, PA
    Posts
    3,697

    WAY too much work for a drawer bottom

    Okay, well its definitely not a lap desk in a weekend anymore, but really since I've only had short bits of time over the last couple days I think I can call it "lap desk in a long weekend" Or "lap desk in just a bit more then a weekend"

    I had one last piece to put together, the drawer bottom, to call the construction complete (then its just hinges and finish/paint). As I look through my pile of pine cutoffs I'm left with 2 choices A) glue up two wide 3/4" thick pieces and then plane them down to 1/4" B) resaw a long narrow piece, glue up several thin pieces, and then do some light planing to get things down to the final 1/4" thickness.

    I opt for option B. Why? Well the thing about making a piece from offcuts is that there is a reason they are off cuts THEY ARE FULL KNOTS. Normally, I loathe resawing and would much rather hog a wide panel of softwood down from 3/4" to 1/4 (not that that is ever fun either). These knots,however, are awful to plane through, BUT actually this soft pine even with all its knots is pretty easy to resaw through. So I grabbed an approximately 5 foot long 4 1/2" wide offcut and set about sawing...

    IMG_20130618_182608_104.jpg

    and sawing....
    IMG_20130618_183142_098.jpg

    and sawing...
    IMG_20130618_183835_489.jpg

    Until I have the most pointless book match on the planet
    IMG_20130618_184152_386.jpg

    ...and by extension a drawer bottom made out of 5 pieces two pairs of which are bookmatched. Like I said, WAY too much work for a drawer bottom.
    IMG_20130618_194436_733.jpg

    Now I need to nail this on and fit the drawer and then the construction is complete for real. What fun this has been.
    Last edited by Chris Griggs; 06-19-2013 at 8:58 AM.
    Woodworking is terrific for keeping in shape, but it's also a deadly serious killing system...

  10. #25
    Join Date
    Feb 2010
    Location
    Philadelphia, PA
    Posts
    3,697

    It's done

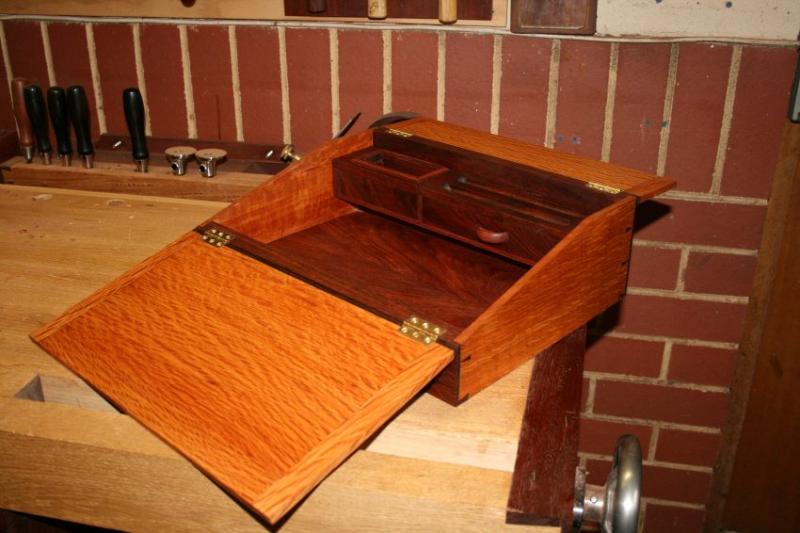
    Well, after I didn't quite finish my "Lap Desk in a Weekend", in a weekend, I left town for a few days for a relaxing vacation in the "Gorges" Ithaca area. Got back on Monday and in the last couple nights got around to putting the hardware and finish on the lap desk. So its done. Fun build...I'm usually super slow and anal when I build things but on this I really tried to push myself to complete it quickly. Yes, I did make few mistakes that I might have avoided if I had gone at my usual tortoise pace, but honestly even when I'm going slow in an effort for "perfection" I still end up with mistakes. In the end I was pleased to find that going a good bit faster then usual didn't lead to many or any more imperfections than going super slow would have and I still ended up with a fairly nice piece.

    This was a fun satisfying build. No idea if I'll actually use the thing, but it was nice just to bang something like this out and get some quick gratification from is completion. I would also highly recommend this as a skill building project for someone just getting into hand cut joinery and casework. Since it involves dovetailing, hinge mortising, as well fitting panels and drawers, it would really provide someone with a great way to apply these skills in a project without risking wasting a bunch of wood, and I think initial success with this would really set someone up for taking on larger/more complex cabinets/cases. The one part that might make this a little too tough for a total beginner is the thinness of the material and some the small scale joinery, but really you could get away with using slightly thicker material, and could either remove or adjust the size/construction of the drawer to fit ones skill level.

    Thanks for looking. As always, questions and criticisms are welcome.

    IMG_20130627_073110_013.jpg IMG_20130627_073255_504.jpg IMG_20130627_073128_299.jpg
    IMG_20130627_073358_254.jpg IMG_20130627_073329_802.jpg
    IMG_20130627_073423_414.jpg IMG_20130627_073156_022.jpg
    Woodworking is terrific for keeping in shape, but it's also a deadly serious killing system...

  11. #26
    It's very pretty! Congratulations.

  12. #27
    The drawer is a nice addition there. When I use mine and I have to get at something, it would be nice to just pull out a drawer than to spread a hand to hold everything and lit the lid.
    Trevor Walsh
    TWDesignShop

  13. #28
    Join Date
    Feb 2010
    Location
    Philadelphia, PA
    Posts
    3,697
    Thanks guys.

    Trevor, funny of you to comment just now. I was searching threads on other lap desk builds and was literally looking at your old thread when you posted. I had totally forgotten that that thread was what got me wanting to build one of these in the first place. That was where Jim Ritter posted some nice pics of his too.

    Yours looks very cleanly done, and had that LOVELY carved monogram under the lid, but you never post pics of the completed one. How about it man, would love see the finished product. When you have the chance you should stick some completed pics in this thread or your old thread.

    Anyway, yeah the drawer was one of the reasons I picked this design over the Becksvoort one in FWW. I liked the idea of having a separate confined space where pens and post-it pads wouldn't roll around all over the place.
    Woodworking is terrific for keeping in shape, but it's also a deadly serious killing system...

  14. #29
    Join Date
    Feb 2004
    Location
    Perth, Australia
    Posts
    9,506
    Hi Chris

    Excellent work! I followed your build every step of the way with much interest.

    In addition to the lap desks of Trevor and Jim, I also posted one here a while ago .... mine used the "waste" of my plough plane box build and, as a result, it was not viable to add a drawer, as you did - I really like that feature. Rats. Instead I placed one inside. In any event, mine was a fun project about building secret drawers. Do you have any in yours?


    Regards from Perth

    Derek

  15. #30
    Join Date
    Feb 2010
    Location
    Philadelphia, PA
    Posts
    3,697
    Thanks Derek. Yours is lovely and I enjoyed your build of it!....and it was yours that resparked my interest in building one for myself. I love the interior drawers, find them very classy, and thought about doing it that way instead, but since I was trying to just get this knocked out quickly stuck almost exactly with the plan I found.

    Also, it is impolite to ask another woodworker to tell you about or show you his secret drawers!!! Shame on you! Of course, if it does have any I can't tell you about them...certainly not on a public forum.

    No in all seriousness, no secret drawers, would have loved to but again, kept things simple for the sake of just getting it done. That's really what this project was about for me...pushing myself to work a little faster than I'm comfortable with in effort to become a more productive woodworker.

    Anyway, the more I thought about the more I thought I'd really like to make one with interior/and or secret drawers. I've got some lovely walnut in the shop that would make a nice lap desk...perhaps there is a second one in my future.
    Woodworking is terrific for keeping in shape, but it's also a deadly serious killing system...

Posting Permissions

  • You may not post new threads
  • You may not post replies
  • You may not post attachments
  • You may not edit your posts
  •