Page 1 of 2 12 LastLast
Results 1 to 15 of 21

Thread: D-8 thumb hole ripper (gloat) & question

  1. #1
    Join Date
    Aug 2013
    Location
    Enchanted land of beer, cheese & brats
    Posts
    1,314

    D-8 thumb hole ripper (gloat) & question

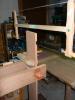
    Out at the flea market today. My first rip saw. 28" 5ppi and it would seem a lot of life left in her. Unfortunately I can't make out a etch, maybe it will reveal its self after a bath. The handle is a craggly. Other than repairing the top horn any thoughts on fixing the cracks?

    IMG_20130901_084630_953.jpg
    IMG_20130901_084642_685.jpg
    IMG_20130901_084659_781.jpg
    IMG_20130901_084712_841.jpg
    IMG_20130901_084731_635.jpg
    IMG_20130901_084757_336.jpg

  2. #2
    Join Date
    Sep 2007
    Location
    Longview WA
    Posts
    27,467
    Blog Entries
    1
    Short of making a new handle, an epoxy might be a good choice.

    When the handle is taken off you may get a better idea of whether or not the handle will break at the crack. Often it is easier to repair a controlled break than a small crack.

    jtk
    "A pessimist sees the difficulty in every opportunity; an optimist sees the opportunity in every difficulty."
    - Sir Winston Churchill (1874-1965)

  3. #3
    Join Date
    Aug 2013
    Location
    Enchanted land of beer, cheese & brats
    Posts
    1,314
    Thanks Jim

    I don't think the pictures show it very well but there is many small cracks. The handle seems plenty tough. I'll be take it apart shortly and start cleaning her up. I like the epoxy idea.
    Last edited by Judson Green; 09-01-2013 at 12:08 PM.

  4. #4
    I personally would let the cracks go. You can torture yourself doing a lot to fix them, but they appear to be cosmetic even though one runs through a bolt. The saw handle has dried and shrunk, and there's not a lot you can do about it other than soaking it in oil, but that will be counterproductive to gluing.

    If you want to oil it to oil it, by all means, go ahead. But there are so many bolts in a disston d8 that a crack in one of them that is not severe is no big deal. I have an old richardson saw like that, and it has progressed no further with use and is very solid.

  5. #5
    Join Date
    Sep 2007
    Location
    Longview WA
    Posts
    27,467
    Blog Entries
    1
    I know some turners use CA (cyno acrylic) or super glue to fill cracks in pieces they are spinning in a lathe.

    If the handle has been soaked in oil it may be difficult to get any kind of adhesive to stick.

    I have used epoxy a lot to repair plane totes. With clear epoxy saw dust from the wood being repaired can be used to color the epoxy.

    jtk
    "A pessimist sees the difficulty in every opportunity; an optimist sees the opportunity in every difficulty."
    - Sir Winston Churchill (1874-1965)

  6. #6
    Join Date
    Aug 2013
    Location
    Enchanted land of beer, cheese & brats
    Posts
    1,314
    OK. Decided to take David's advice about the handle. It feels fine in my hand and I can always add glue/epoxy later. And besides if being lazy was a martial art, I'd be a black belt. So she's about as cleaned up as she's gonna be for now. Just got done sharping, didn't joint, has a nice crown breast (am I saying that right?) Most of the teeth seemed right. Set them and a little stoning and did a test cut. My cut seemed a little wonky but for now I'm gonna blame that on the white oak closing up on the back of the saw and about 4 different clamping adjustments. I don't have a saw bench and that will be the very next shop project.

    But have I set it enough? Using a Stanley 42x

    IMG_20130903_120524_364.jpg
    IMG_20130903_120616_689.jpg
    IMG_20130903_125546_745.jpg
    Last edited by Judson Green; 09-03-2013 at 4:16 PM.

  7. #7
    Join Date
    Sep 2007
    Location
    Longview WA
    Posts
    27,467
    Blog Entries
    1
    But have I set it enough? Using a Stanley 42x

    Attachment 270127Attachment 270128Attachment 270129
    For some reason the images do not open for me.

    It is hard to tell without being able to see what is meant by the "cut seemed a little wonky."

    If the say wondered off to one side it could be one side of the say has more set or sharper teeth than the other.

    The oak shouldn't close up if it is dry.

    One of the things I have experienced with taper ground saws is the full length of the saw needs to be used or the kerf might not be wide enough to clear the back near the handle.

    Do you have a caliper or micrometer to measure the different thicknesses of the saw plate compared to the tooth line?

    jtk
    "A pessimist sees the difficulty in every opportunity; an optimist sees the opportunity in every difficulty."
    - Sir Winston Churchill (1874-1965)

  8. #8
    Join Date
    Aug 2013
    Location
    Enchanted land of beer, cheese & brats
    Posts
    1,314
    I think I fixed the pictures not loading.

    The cut being wonky I think is more the nut behind the wheel kind of thing. Had to repossession the chunk of 8/4 a bunch, not a good way to hold down.

    Got the white oak from a dude on craigslist so it may not be as dry as it should be.

    One of the things I have experienced with taper ground saws is the full length of the saw needs to be used or the kerf might not be wide enough to clear the back near the handle. -jtk

    I'm not sure I'm following here. Are you saying the saw gets thicker at the heel?

    I've got a caliper.

  9. #9
    Join Date
    Sep 2007
    Location
    Longview WA
    Posts
    27,467
    Blog Entries
    1
    I'm not sure I'm following here. Are you saying the saw gets thicker at the heel?

    I've got a caliper.
    Yes, the plate has a progressive taper. From tooth line to spine and toe to heel.

    If your caliper will measure down to 0.001 you should have a tooth line a few thousandths wider than the saw plate just above it.

    With a saw that is very lightly set, the plate at the heel could be wider than the tooth line at the toe.

    jtk
    "A pessimist sees the difficulty in every opportunity; an optimist sees the opportunity in every difficulty."
    - Sir Winston Churchill (1874-1965)

  10. #10
    It's hard to tell from the picture, but the way the 42x is set, I'd suggest a little bit more. It will give you room to work in the kerf a little and keep a less than perfect saw straight. I never have been a big fan of rip saws that are set so narrow that you can feel plate friction in the cut, and I suspect you might be at that or close to it in the picture. You're going to plane an edge you rip, anyway, unless it's not a show edge. In either case, the rip cut needs to stay outside of the marking line but it doesn't have to be a perfect polished cut.

  11. #11
    Join Date
    Aug 2013
    Location
    Enchanted land of beer, cheese & brats
    Posts
    1,314
    OK. Thanks Jim. Just measured the plate. My calipers don't have anything to do with decimals. 1/128 line up the closest line kind of thing. But I understand now. At about 5" from the toe there is about a 1/64 difference tooth line to back. At about the same place from the heel a difference but not nearly as much.

    I set very lightly (don't know if the marks on the 42x in the photo mean anything to you) perhaps I should set a bit more. The saw seems to sort of stop at about 10" or so from the heel. Guess I'll give it another try in something that's dryer and that I can hold down better before changing the set.

  12. #12
    Join Date
    Aug 2013
    Location
    Enchanted land of beer, cheese & brats
    Posts
    1,314
    Thanks David. I'll set it a bit more.

  13. #13
    Join Date
    Dec 2010
    Location
    South Coastal Massachusetts
    Posts
    6,824
    I've got a similar D8 with the same sort of "reluctance" at the heel of the saw.

    The angle of attack is important, you want the teeth to skim through the cut - not gouge.
    The larger the chip you eject, the more the gullet fills with sawdust and the harder it is to drive the saw.

    If you have difficulty at the end of the cutting stroke, try dropping your hand a little closer to the board.
    As you cut longer boards (8/4 - you're a monster in training!) it may be worthwhile to drive in a cedar wedge to keep the kerf open.

    It's a big saw, and it needs room to work.

  14. #14
    Join Date
    Aug 2013
    Location
    Enchanted land of beer, cheese & brats
    Posts
    1,314
    Increased set and used a little more agreeable wood (5/4 soft maple) and she's like a buzz saw. OK not really but much better. I'm gonna have to get on the saw bench making project I've been putting off. I don't think ripping at work bench height is for me. Cross cutting I've been OK with but not this. And thanks Jim Matthews, I kind of feel that angle of attack already.

    IMG_20130903_165820_059.jpg
    IMG_20130903_165856_692.jpg

    Might increase set a bit more. This is where it is now.

  15. #15
    Join Date
    Sep 2007
    Location
    Longview WA
    Posts
    27,467
    Blog Entries
    1
    The angle of attack is important, you want the teeth to skim through the cut - not gouge.
    This is another little tid bit that bears explaining. I just learned this better myself from watching The Woodwright's Shop episode of the Roubo bookstand.

    You want to let the saw do the work and don't try to force it or push it hard. The reason is the saw can bow (deform) a little in the kerf and cause a bit of concavity to the cut line.

    jtk
    "A pessimist sees the difficulty in every opportunity; an optimist sees the opportunity in every difficulty."
    - Sir Winston Churchill (1874-1965)

Posting Permissions

  • You may not post new threads
  • You may not post replies
  • You may not post attachments
  • You may not edit your posts
  •