Results 1 to 8 of 8

Thread: Advice on using a round slab for a tabletop.

  1. #1

    Advice on using a round slab for a tabletop.

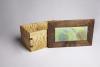
    I was out in my woods gathering some firewood to burn next year. Got to the base of this tree, and I couldn't bear to cut any more of it - just too cool looking. Plus the rounds were almost 3' across. It just looks like it would make a really cool table to me:
    image6.jpg

    Anyone here have experience making a slab table out of something like this? What did you do to minimize checking during the drying process? Did you use a "sub table" underneath to reinforce it? How thick did you cut it?

    Any advice would be appreciated. Thanks.

  2. #2
    Join Date
    Jan 2010
    Location
    Greater Hendersonville NC
    Posts
    310
    For most species, it is almost impossible to get a round to dry without some radial cracking. You may have better success if you cut some slabs on the diagonal and paint the endgrain with Anchorseal to slow down drying. A plan B can be to cut the slab (cookie) into two semi-circles, dry them, plane the common surface smooth and rejoin with method of choice. If you do this with two adjacent slabs, you can recombine them to get two book-matched pairs.

  3. #3
    Join Date
    Dec 2003
    Location
    SF Bay Area, CA
    Posts
    15,332
    It may or may not defeat the purpose of a table but if you cut the center pith out of a cross-section like that, you will increase your odds of reducing the stress cracks as it dries.
    Wood: a fickle medium....

    Did you know SMC is user supported? Please help.

  4. #4
    Quote Originally Posted by Chris Padilla View Post
    It may or may not defeat the purpose of a table but if you cut the center pith out of a cross-section like that, you will increase your odds of reducing the stress cracks as it dries.
    How big of a hole do you think? Only thing is, the pith is off-center in this piece. But maybe I could get a hardwood dowel that looks similar to put back in the hole once it's dry, or try to stain one to match.

    Combining the two ideas, if I were to halve or quarter it, I suppose I'd probably want to align those cuts to go straight through the pith? I could see how that might help reduce checking, looking at this year's stack of firewood. Anything left round is radially checked, and most of the quartered splits have almost no checking.

    Don't think she'd fit through the DeWalt though! Suppose I'll finally need to get me a nice hand plane if I wanted to go that route.

    I've used Rockler's end sealer on some logs and it's worked great to prevent checking, but I've noticed that it turns white when it gets wet - must be the waxes in it? Wonder if there might be a better alternative for this application? I have some butcher block conditioner that's a combination of BLO and beeswax - think something like that could help? If applied repeatedly during the drying process?

  5. #5
    Join Date
    Dec 2003
    Location
    SF Bay Area, CA
    Posts
    15,332
    That's the million dollar question, Shawn! I honestly have no idea HOW MUCH of the pith you should remove. Your guess would be as good as mine. If you cut it out with a hole saw, you might even be able to save it and glue it back in later when everything has dried out.

    As to sealing, almost anything could work: old paint, old shellac, old poly. All you are doing is slowing down the drying process. Skip BLO...it doesn't last and doesn't really seal well at all. The thing with sealing is: get on it right away...like right now...like right after you read this post of mine!
    Wood: a fickle medium....

    Did you know SMC is user supported? Please help.

  6. #6
    Join Date
    Jan 2013
    Location
    Pittsburgh, PA
    Posts
    868
    Hi,

    I made a few tables like that. They are going to crack as they dry. No doubt about it. But this does not have to be a big deal.

    You can just live with the cracks. Personally I have not found that too hard to do. Of course, a spilled drink becomes an issue as it will go down through those cracks onto whatever is below the table surface.

    The tables I made were about 6" thick. Kind of heavy, but you can turn them on their sides and roll them to where you want them to go.

    After our grand kids appeared my wife was afraid they would get a finger stuck in one of the cracks, trip or fall, and break their fingers! So I had to come up with a solution. This table was well seasoned and had been varnished years previously. What I did was buy some dark brown 100% silicone calk, jam some tin foil in the cracks about a quarter inch or a little more below the top surface (half inch?)then fill all the major cracks with the silicone calk so it protruded above the surface. After the calk cured, I took a box cutter with the blade fully extended, so it would bend and slide over the surface, and cut the silicone calking flush with the top surface.

    The final result was quite acceptable. It actually looks better than the table did with the open cracks. The dark brown lines of the filled cracks contrast pleasantly with the lighter colored wood.

    And the silicone is flexible so if the slab moves during seasonal humidity changes one cannot tell from the cracks as the rubber stretches or compresses.

    I think you can make a nice table from that stump without getting too excited about cracks developing. Either by just living with them or doing something like I have.

    Edit: I filled both the cracks in the top surface and the vertical ones that exist on the outside edge of the slab. Was very simple to do.

    Bill
    Last edited by Bill Space; 09-08-2014 at 7:37 PM.
    Too much to do...Not enough time...life is too short!

  7. #7
    Join Date
    Jan 2010
    Location
    Bellingham, Washington
    Posts
    1,149
    Desktop 001.jpgThis isn't as round as yours, but I had this Big Leaf Maple slab kiln dried, then filled all the checks with sanding dust thickened and colored epoxy. Works beautifully. I'll try to add a photo of the finished desk.

    Helm, David (4).jpg
    Bracken's Pond Woodworks[SIGPIC][/SIGPIC]

  8. #8
    Join Date
    Dec 2003
    Location
    SF Bay Area, CA
    Posts
    15,332
    Cool desk, David!
    Wood: a fickle medium....

    Did you know SMC is user supported? Please help.

Posting Permissions

  • You may not post new threads
  • You may not post replies
  • You may not post attachments
  • You may not edit your posts
  •