Page 4 of 4 FirstFirst 1234
Results 46 to 60 of 60

Thread: Tavern Table Project

  1. #46
    Join Date
    Mar 2009
    Location
    Chevy Chase, Maryland
    Posts
    2,484
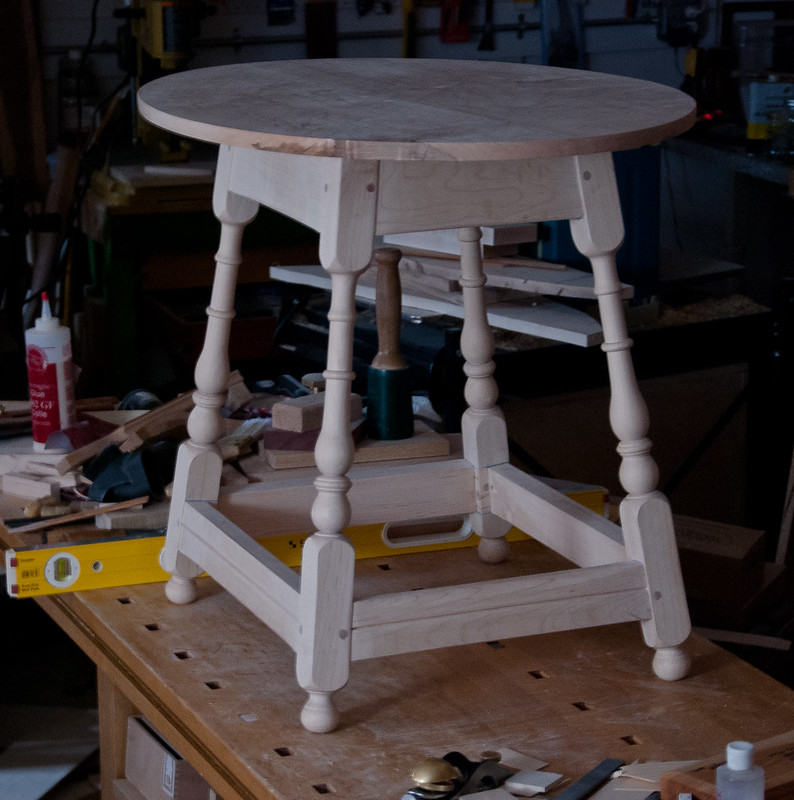
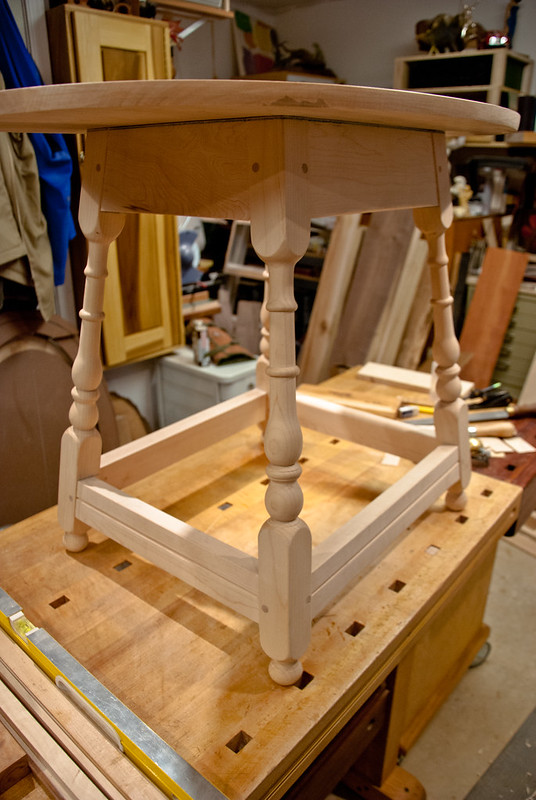
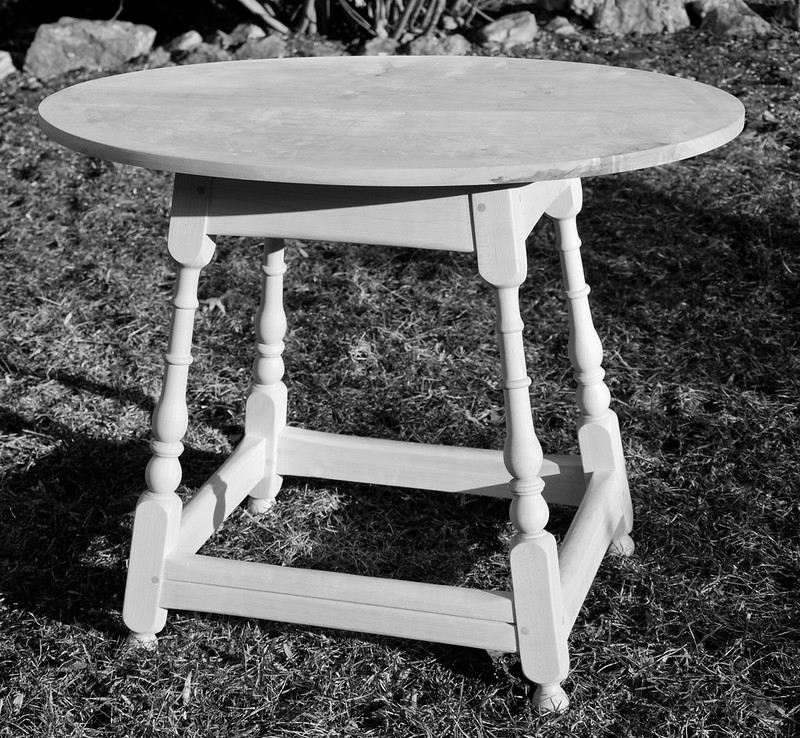
    I angled the mortises. It worked, but it's hardly an exact science when working by hand. One of those things where in theory, there should be no difference between theory and practice, but in practice, there is! Minor deviations in the mortise or the tenon fitting make tiny differences in angles when all is dry fit, but enough to play some havoc with your shoulders.
    Last edited by Sean Hughto; 02-18-2014 at 2:02 PM.

  2. #47
    Join Date
    Mar 2009
    Location
    Chevy Chase, Maryland
    Posts
    2,484
    Part of the problem is that at a 7-8 degree splay, the twist introduced is very small - like a degree or two - enough to matter greatly in fit and assembly especially when the degrees accumulate, but very hard to work to a one degree spec.

  3. #48
    I've never seen an old one that had tight joints, they seem to depend on the pegs to keep them together, and hold the top on.

  4. #49
    Join Date
    Mar 2006
    Location
    SoCal
    Posts
    22,514
    Blog Entries
    1
    Here, here. This has been great. Thanks for taking the time to take us all along.
    "A hen is only an egg's way of making another egg".


    – Samuel Butler

  5. #50
    Join Date
    Mar 2009
    Location
    Chevy Chase, Maryland
    Posts
    2,484
    Geeez, Mel, and you're just telling me this now? If I'd known from the beginning that the originals weren't airtight at the seams I coulda relaxed and made an "accurate" reproduction - true to the pilgrims! ;-)

  6. #51
    I'm pretty sure you knew ,Sean. I was just being diplomatic. You are too good a craftsman to build an authentic table!

  7. #52
    Join Date
    Mar 2009
    Location
    Chevy Chase, Maryland
    Posts
    2,484
    Some progress - I've assembled the legs and stretchers - glued, pinned, and leveled. Next will be refining the stretchers a bit and making the bits to attach the top - then on to finishing.


  8. #53
    Join Date
    Nov 2009
    Location
    Ellsworth, Maine
    Posts
    1,810
    Very nice Sean, the double splay is certainly impressive. I went over to that Carpenter's website and skimmed through the posting about this double splay and was surprised by the effect of the splay. I'm glad I did realize this effect before I started on a project I had in mind of a splayed leg side table. For you to combat this issue in the middle of a build and get your shoulders as tight as they look is impressive Sean. I've always been a fan of your work on here and this project is proving to be another great build of yours. I would have to agree with the others in that the most noticeable characteristic of your build is how crisp everything is, especially the turnings.

    Quick question though, what is the dark shadow line on top of your aprons and legs? Maybe you posted this already and I missed it but I didn't see it.

  9. #54
    Join Date
    Mar 2009
    Location
    Chevy Chase, Maryland
    Posts
    2,484
    Quote Originally Posted by Tony Shea View Post
    Quick question though, what is the dark shadow line on top of your aprons and legs? Maybe you posted this already and I missed it but I didn't see it.
    Thank you, Tony. You are very kind. Pictures are funny. Sometimes they exaggerate minor problems and other times they obscure problems. I'm satisfied so far as far as avoiding big gaps, but these are not m&ts where there is nowhere you could get a needle in - I know why they painted these! As far as the line underneath, that's a pencil line. With chair legs and such, you can level and cut to length from the bottom, but with these turned feet, I needed take any adjustments from the top. So after making sure all four feet touch on a level surface, I turned the table over and after using shims to get a board level on the feet marked al the way around for planing the leg and apron tops.

  10. #55
    Join Date
    Mar 2009
    Location
    Chevy Chase, Maryland
    Posts
    2,484
    As I get ready to refine the lip of the top and apply my finishes, I took advantage of a sunny day yesterday to try to shoot a picture at the same angle as the shot of the antique that inspired this project for me. Helps me to assess whether I got close. I like taking in-progress shots of things as photos often help me see things in a different way than in life - photos emphasize different things and sometimes reveal things or give me ideas.


  11. #56
    Join Date
    Mar 2010
    Location
    Southern Md
    Posts
    1,138
    I think ya did fine job!

  12. #57
    I am similar to you Sean in that almost exclusively I pursue my own designs in my shop (noting of course that there is nothing new under the sun and I am influenced by all that came before me) but twice I have made copies because the originals inspired me so much and I thought that copying them would reveal some lessons. In both cases it did. I made a series of Shaker oval boxes and a series ofShaker candlestick stand. Those projects were remarkably different from usual pursuits and I found them really refreshing, I knew that the outcome would be beautiful if I only got the work right.

    Pommels are indeed a bit tricky as you point out! Especially your detail at the bottom pommel, excellent work. I've been through a few "sticks" myself. My favourite turning tool is the skew, I think it represents the highest level of attained skill when used to effect. When it bites back it bites hard.

    Nice work and thanks for the thread.

  13. #58
    Join Date
    Aug 2008
    Location
    Chicago-ish
    Posts
    352
    Looks great!
    clamp the work
    to relax the mind

  14. #59
    Join Date
    Jul 2013
    Location
    NE Ohio
    Posts
    1,029
    Looks great, Sean. The stretchers look a bit taller on yours and have the groove detail otherwise it looks to be a pretty faithful recreation.
    -- Dan Rode

    "We are what we repeatedly do. Excellence, then, is not an act, but a habit." - Aristotle

  15. #60
    Join Date
    Mar 2009
    Location
    Chevy Chase, Maryland
    Posts
    2,484
    Yeah, I have been looking at lots of other antique examples, and decided to adopt the stretchers from another that were a bit beefier and had the groove. I also made mtable about an inch and half taller, and the top is a somewhat larger oval with slightly different l&w - making it a bit rounder. So much for absolutely fidelity. Even with reproductions, I guess I can't help tweaking stuff to suit myself.

Posting Permissions

  • You may not post new threads
  • You may not post replies
  • You may not post attachments
  • You may not edit your posts
  •