Page 1 of 3 123 LastLast
Results 1 to 15 of 35

Thread: Japanese blade "tapping out" disaster

  1. #1
    Join Date
    Oct 2008
    Location
    Cupertino, California
    Posts
    361

    Japanese blade "tapping out" disaster

    I have often read warnings of cracking a japanese plane blade if ura-dashi (tapping out the back) is done improperly, but I have never seen the failed results. Well, I cracked a blade tonight, and the results are horrible.


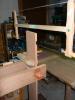
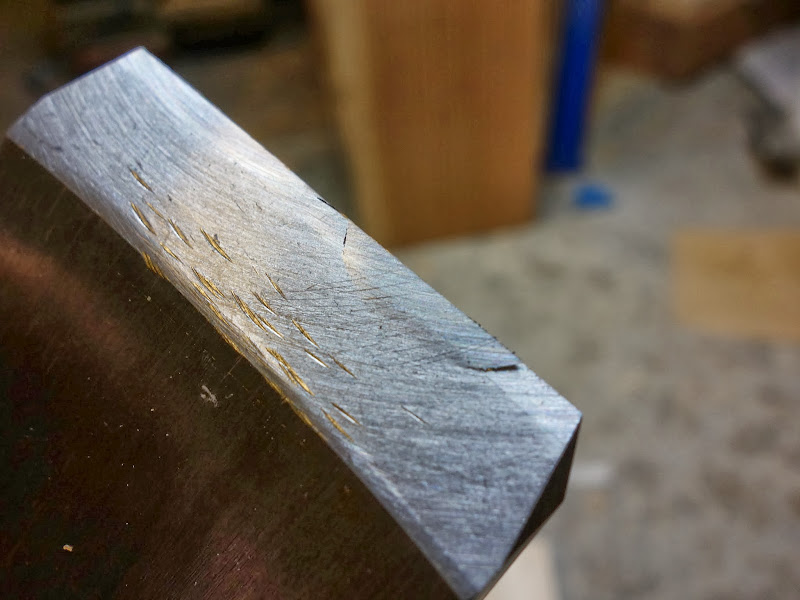
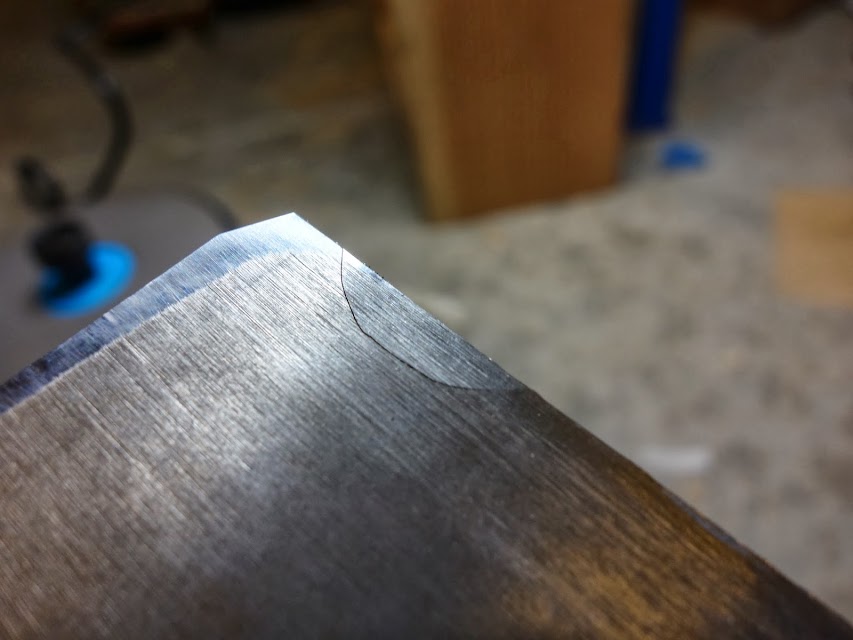
    I re-beveled the blade to a slightly steeper angle, and needed to tap out a new flat. I had just started with some light taps on the blade against my anvil, listening for a dull thud sound as I strike the blade to know the back is adequately supported. As I was making my way across the blade and establishing a rhythm, I saw the large semi-circular crack appear. Note that none of the hammer marks are near the edge.

    This is not my first time attempting ura-dashi. I have successfully tapped out blades on 4 or 5 other times. What really surprised me is how the blade cracked when I was using fairly light taps. To fix this blade, I will have to grind off better than 1/4 inch of blade. This is no cheap blade. It is a good (i.e. expensive) Yamamoto swedish steel blade.

  2. #2
    What a drag. Do you think the weld failed?

  3. #3
    Join Date
    Dec 2010
    Location
    South Coastal Massachusetts
    Posts
    6,824
    It does look like a clean fracture.

    What sort of hammer was used?

  4. #4
    That stinks. What was the shape of the support under the edge. It wasn't similar to the break was it?

    I remember reading a description that So had on his page about a really short iron that he was selling (or maybe he wasn't, sometimes it's hard to tell), where he said that he had to grind away a large part of the iron because it developed a crack when he was tapping it out.

  5. #5
    Join Date
    Jan 2009
    Location
    Williamsburg,Va.
    Posts
    12,402
    The weld did not crack. The steel is very hard and brittle. Maybe TOO hard. It might well could use some tempering. What do you think,David? I do not use Japanese tools. They use very hard steels.

    I see the 2nd. picture is the other side of the crack. Good. It will grind away with not too much loss. What I am concerned about is why the steel cracked. If it is just too hard,it will also be too brittle. The 2 go together. Usually Japanese blades get away with it because the hard steel is welded to a soft steel,which supports it. Could there have been a tiny chip or anything else on your anvil that pushed against the blade and caused that chip? Is your anvil flat,or worn with a wavey surface? That will cause a chip.
    Last edited by george wilson; 01-26-2014 at 9:28 AM.

  6. #6
    Join Date
    Oct 2008
    Location
    Cupertino, California
    Posts
    361
    It is not uncommon for the leading edge of a newish japanese blade to be somewhat brittle. A few sharpenings may be needed to until the blade settles down.

    My anvil is a japanese rail track shaped thing, and the surface I was using was smooth and gently curved. My hammer blows were from the edge of the head. My guess is that I was improperly supporting the back of the blade during one blow, and the blade flexed, causing the crack. Maybe supporting too far forward of the blow. I was choking up on the hammer so as to not strike too hard, but... After grinding, I'll try it again even less aggressively.

    kanatoko.jpg

    They sell a mechanism specifically for ura-dashi, but the cost is ~$200. If it prevents me from cracking another blade, the cost would be worth it.

    hitta-b.jpghitta-c.jpg

  7. #7
    Join Date
    Apr 2013
    Location
    Wild Wild West USA
    Posts
    1,542

    Details Smetails

    Hey !
    This one looks right up my alley.
    Or not.
    You guys can shoot me out of the sky later but here are some thoughts. Keeping in mind I am no big essspurt on super hard laminated blades (though I have some).

    Here are some general metal working things to keep in mind:

    First the relatively un related . . .
    the deep marks in the blade produced by the hammer concerns me. Use a "peen" like hammer to tap the blade when drawing out the metal. Meaning the area of the face of the hammer that is hitting the blade needs to be narrow, rounded and polished so you don't cut furrows in the blade. Hey at least you can plant potatoes now.

    The anvil surface against the back side of the blade needs to be able to fit into the concave back of the blade. See the machine in the photo. Also his comment in the close up of the text. Ignore my underlining that was from when I read the book.


    The book is a good one if you don't already have it.
    http://www.amazon.com/Japanese-Woodw...s=toshio+odate


    Next and I believe fairly, or perhaps critically, significant is the "stress risers" you have created from the grinding.
    See
    and
    this

    I would recommend polishing the blade, at least on the bevel side where you were grinding to eliminate the scratches. The scratches ARE the stress risers.

    Are you familiar with the way they cut glass ? They scratch it and then flex it and the scratch concentrates all the stress and channels it along the scratch and down into the glass bellow the scratch.
    The curve of the crack and the curve of the scratch marks from the grinder are suggestive.
    Last edited by Winton Applegate; 01-26-2014 at 3:07 PM.
    Sharpening is Facetating.
    Good enough is good enough
    But
    Better is Better.

  8. #8
    Join Date
    Jan 2009
    Location
    Williamsburg,Va.
    Posts
    12,402
    Yeah,I'll bet all the Japanese carpenters have that gadget!!

  9. #9
    Join Date
    Oct 2008
    Location
    Cupertino, California
    Posts
    361
    Thanks Winston. The stress risers are interesting. Normally, I grind by hand on 80 grit sandpaper, or a 220 grit waterstone. This was the first time I had used mechanical help, in the form of diamond lapidary wheels on a worksharp. The deep scratches were left behind by 100# and 500# wheels. I really liked the lapidary wheels because they did not really cause the blade to heat up. Something I am always afraid of on japanese blades. I do not use a peen hammer because I find it difficult to see exactly where I am striking. Also all other examples of tapping out that I have read or seen in videos, people have used the edge of their hammers to create those furrows. The area I am striking is soft iron, so an edged hammer helps to prevent the hammer from slipping.

  10. #10
    Join Date
    Apr 2013
    Location
    Wild Wild West USA
    Posts
    1,542
    OK I hear you on the edged hammer. To be clear I wasn't saying use a "western" ball peen. I just wanted to create the image in the mind of the reader of a rounded and polished edge on the traditional Japanese hammer.

    This was the first time I had used mechanical help, in the form of diamond lapidary wheels on a worksharp
    Electrons are the Devil's work. Shun them or perish.

    (just kidding)
    Sharpening is Facetating.
    Good enough is good enough
    But
    Better is Better.

  11. #11
    Join Date
    Oct 2006
    Location
    East Brunswick, NJ
    Posts
    1,475
    Quote Originally Posted by David Wong View Post
    My anvil is a japanese rail track shaped thing, and the surface I was using was smooth and gently curved. My hammer blows were from the edge of the head. My guess is that I was improperly supporting the back of the blade during one blow, and the blade flexed, causing the crack. Maybe supporting too far forward of the blow. I was choking up on the hammer so as to not strike too hard, but... After grinding, I'll try it again even less aggressively.

    kanatoko.jpg
    Hi David,

    I think you’re on the right track. Either your blade wasn’t supported well enough, or you hit the blade too hard or too close to the edge.

    For me, I use a body shop dolly for an anvil. (This is a tool used to repair dents.)


    I think the important thing is that the surface of this is nice and rounded, which helps me make sure that the plane blade is in good contact with the anvil. I don’t have a rail-type anvil, but I’ve seen them and I think it would be a little trickier to keep the blade in contact with the rounded area that is there. You might want to take a file and make that rounded area bigger, to give you more room for error.

    The hammer on the left is the one that I use for tapping out. I put it next to a 375 g Japanese hammer for scale. My tapping out hammer is considerably lighter, at about 125 g. This reduces the chance of hitting the blade too hard. Even if you were choking up, a lighter hammer is easier to control


    Finally, here’s another view of the end of the hammer that I use for tapping out. Notice how much pointier it is.


    I know it’s possible to tap out a plane blade with the edge of a regular Japanese hammer. It’s far easier to control the point of impact if the hammer is pointier. You may want to look into getting a lightweight tack hammer for tapping out. It’s going to be a lot cheaper than the tapping out jig, for sure.

    I have some more information on tapping out a plane blade here, and a brief video here.
    giant Cypress — Japanese tool blog, and more

  12. #12
    Join Date
    Oct 2008
    Location
    Cupertino, California
    Posts
    361
    That's a nice shaped hammer. I have been meaning to pick up a more suitably shaped hammer, like one for japanese boat building, but have not had occasion to do so.

    I'm convinced I did not have the blade back adequately supported. The surprising thing to me was how large the fracture was relative to the strength of the hammer blow. I guess I am lucky that the blade looks like it can be recovered (fingers crossed).

  13. #13
    Join Date
    Oct 2006
    Location
    East Brunswick, NJ
    Posts
    1,475
    Japanese boat builder hammers are readily available down to 6 oz (170 g). Hida Tool has tack hammers in 80g, 110g, 165g, and 225g sizes.

    Fixing the blade won’t be as hard as you think. The hardest part is regrinding the blade so you’re past that crack, mainly because you don’t want to draw out the temper from overheating the blade. I use a Tormek when I need to do this, since the water cooling ensures that the blade won’t get too hot. I am sure that there are some people who can do this on a dry wheel grinder without screwing things up, but I’m not one of them.
    giant Cypress — Japanese tool blog, and more

  14. #14
    Join Date
    Aug 2008
    Location
    Chicago-ish
    Posts
    352
    For what it's worth, using the end grain of a wood block for an "anvil" is a little more forgiving. Probably takes longer, but the "shock" seems less dangerous.
    clamp the work
    to relax the mind

  15. #15
    Quote Originally Posted by george wilson View Post
    The weld did not crack. The steel is very hard and brittle. Maybe TOO hard. It might well could use some tempering. What do you think,David? I do not use Japanese tools. They use very hard steels.
    You might be talking to the other David, but I'll offer up a few observations that do come from decidedly limited use of tools (in terms of numbers and credibility):

    * A lot of the mid-range stuff that's marketed to people isn't as hard as its spec says it is. 6 or 7 years ago, a friend bought an iyoroi mortise chisel that was specified 64 hardness, and it tested on an average of three strikes at 61. I didn't have a western chisel over 60, though I gave him a couple of things to test. My iyoroi chisels are probably about the same (61) - they are harder and hold their edge better than most of my vintage stuff, but they can be sharpened on oilstones. They do, however, still hold an edge better than anything else I have except for the harder japanese chisels. I believe my ouchi chisels are a tick or two harder, as are the koyamaichi (those two probably are what they say they are) - they barely barely sharpen on oilstones unless there are loose particles. In the balance of things with use, the iyorois are just as nice to use, but they are not the red oak handled iyorois that most people are used to seeing so I'm not telling people to go out and buy iyoroi for chisel nirvana. Mine are wrought iron backed and would be expensive to replace.

    * Alex Gilmore (a dealer in sharpening stones and some vintage japanese tools) for a time was having vintage irons struck to determine their hardness. One of the things I see thrown around is age hardening, but his 50s vintage irons tested 60-62, and I didn't see any above 62. That's actually a really nice hardness to use on a carbon steel iron for japanese planes...62 or so. It doesn't really chip, it's easy to sharpen and quick because it doesn't chip. I believe that many of the modern irons are harder than the vintage irons, though I've heard more than one place that a lot of tokyo smiths made hard irons. It would take someone who knows what they're looking for to clarify that. Oilstones are a good test with carbon steel, because once something gets above about 62, they really struggle with it. I'm convinced the mosaku iron that I have is too hard, and chips a little compared to some softer irons I have. It's a bear to sharpen on any oilstones despite being white #1, and it's even a bit difficult on natural japanese waterstones.

    * Some of the makers making irons now still aren't that hard. I'm convinced (and this is just tinfoil hatting) that most of the swedish stuff that's described as very easy sharpening is a tick or two softer than hitachi steel tools that come from tokyo and nigata. I've got an iron that is well regarded by the planing contest people over there (Ogata), and it takes a great edge, but sharpens extremely easily. It's softer than the mosaku by quite a bit. Part of that is because the backer is softer, but part is the steel. I have to admit that i like it better, too. Nothing unpredictable happens with it. Stan Covington mentioned that he had chipping problems with a mosaku plane that he got based on my comments, and I think he's cursed my plane, too!! The last time I used it, I had tiny chipping issues with it, and combined with its hardness, that can make for an undesirable session.

    I also have two funjii (cheap brand) planes that are some kind of white or yellow steel, and they are probably about 60 or so hardness. They were marketed as 64. I use one as a jack with a ton of camber on it, it holds up very well at the hardness it is. It would be less nice to use for that coarse work if it was harder. It's my white collar plane (in that if you're not in shape enough to work pushing a plane continuously, you can put one that you pull into the mix and then go on working for a long period of time with nothing more than sharpening breaks).

    My experience with yamamotos (having had 3) is that they are somewhere between in hardness. They are not as hard as the mosaku iron, but the ones I had (not swedish) were not exactly soft, either.

Posting Permissions

  • You may not post new threads
  • You may not post replies
  • You may not post attachments
  • You may not edit your posts
  •