Results 1 to 14 of 14

Thread: Leigh Dovetail Jig OFFSET

  1. #1

    Red face Leigh Dovetail Jig OFFSET

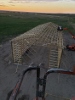
    We'll, I've searched and read all I could find on the subject and then implemented each suggestion. With all of that effort and trail and error, I still have an offset of about 1/32nd inch. Since it is the bottom casework of a secretary, I think I'll go forward with the dovetails as where they meet with the other sections the intersections will be covered with molding.

    If anyone has any other suggestions besides checking concentricity of the bushing/bit, the squareness of the stock, or cleaning the area around the stops,,,,I'm all ears! By the way, I'm cutting halfblind dovetails with a D4R. Thanks as always!

  2. #2
    Join Date
    Jan 2011
    Location
    Northern UT
    Posts
    762
    Can you post a photo?

    I have, on almost every project, had a small gap in one section with my Leigh jig. I will take a photo and post it tonight or tomorrow. Curious to see if it is the same issue.

  3. #3
    Join Date
    Feb 2008
    Location
    Wake Forest, North Carolina
    Posts
    1,981
    Blog Entries
    2
    Don,

    I think the 1st thing I'd look at is the left hand stops. Maybe one of them is just a touch off.

    From what I remember the manual was pretty clear about how to set the top and bottom stops.

    PHM

  4. #4
    Is there any way with the Leigh dovetail jig to use one side of the joint to align the work for the other side? I'm just curious. When I cut dovetails with a router, I cut the sockets (tails) first and then put the two pieces together and mark for the pins exactly as you would for hand cut dovetails. Then I have lines to cut to with the straight bit. Can you do a similar thing on the Leigh? If so maybe you'd be able to detect the location of the problem.

  5. #5
    Join Date
    Feb 2014
    Location
    Lake Gaston, Henrico, NC
    Posts
    9,084
    Never take out both boards at the same time. Leave the backer in place until you switch the next board, and then change the backer after the next board is in. Always make sure the one board you are inserting aligns perfectly with the board that got left in.

  6. #6
    Paul, The stops on this jig are machined in.

    Tom, That was the last "trick" I did, as I saw that suggestion as we'll (probably an earlier post of yours).

    A continued thanks for all the suggestions!

  7. #7
    Join Date
    Jan 2008
    Location
    Western Nebraska
    Posts
    4,680
    Something is not set right. Am I understanding correctly, the joint goes together correctly, but a 32nd off?

  8. #8
    Join Date
    May 2006
    Location
    Central Florida
    Posts
    266
    I have found that you have to put a backer on both sides of the jig even when you are just using one side or you can sag in toward the middle of the template guide that the router rides on. The net effect of this is that on one side the cut is a little deeper.

    Basically the template guide is as rigid and needs to be supported from underneath. Maybe this is your problem.

  9. #9
    Steve, The dovetails fit perfectly; as an example, the front piece ends up 1/32nd higher than the side piece when the joint is tight.

    Mac, I put spacers the same thickness as the backer board on both the top and bottom clamps.

    It's a head scratcher!

  10. #10
    i'm basing this off of a leigh super 18, so i might be wrong, but...
    if the front piece ends up high when assembled then either the stop needs to move to the left to bring it down, or the stop for the side piece should come to the right by 1/32. since the stops are fixed, maybe a few layers of tape or paper could be added to the stop to bring the side piece up to flush with the front.
    Melad StudioWorks
    North Brookfield, MA

  11. #11
    Join Date
    Jan 2008
    Location
    Western Nebraska
    Posts
    4,680
    It has to be the stops on the board sides I think. If it has always done it, it could be a manufacturing defect. I see some of the R series have the rabbeted edge stops, you don't have one of them interfering by any chance? I'm also assuming you are cutting tails and pins on the same side of the jig, ie not setting for asymmetrical? I have a D4, so it's easy to fix that on mine.

  12. #12
    Join Date
    Mar 2005
    Location
    Raleigh, NC
    Posts
    888
    Don't know if this applies to your jig, but:
    A fellow brought his PC 42xx to my shop recently with the same symptoms. His problem was caused by the screw holding the one-piece stops. The screw, when tightened was causing the ill fitting stop piece to cam the stop away from 'square'. I put fender washers under the screw head to prevent the head from moving the stop piece.
    I'm calling it a 'stop piece', for lack of a better name because it's a bent piece of steel with one adjustment slot for setting both stops.

  13. #13
    Join Date
    Nov 2003
    Location
    Central North Carolina
    Posts
    1,830
    A Leigh D4 jig has adjustable side stops, but the D4R has machined in side stops that cannot be adjusted. After reading this post from the beginning I'm not really clear which jig you are using. Can you look at the label on your jig and tell us which one it really is? There is a big difference between a D4 and a D4R.
    Pictures will help a lot.

    Charley

  14. #14
    After commenting on this last week, i went and started building some drawers and had exactly the same problem with my Leigh jig. My fix was to adjust the fingers until the top and bottom edges of the box were coming out flush. The left most finger is supposed to be flush with the edge of the stock, but i pushed it slightly to the left so it overhung the wood by 1/32. why this worked I'm not entirely sure, since effectively i changed the finger position equally for both pieces being dovetailed (using super 18 with single pass half-blind), but it seems to have done the trick.
    Melad StudioWorks
    North Brookfield, MA

Posting Permissions

  • You may not post new threads
  • You may not post replies
  • You may not post attachments
  • You may not edit your posts
  •