Page 1 of 2 12 LastLast
Results 1 to 15 of 25

Thread: Converting a radial arm saw into a (radial) overhead pin router

  1. #1

    Converting a radial arm saw into a (radial) overhead pin router

    Hello Fellow Creekers:

    I just thought I would share a recent shop project I've been working on.

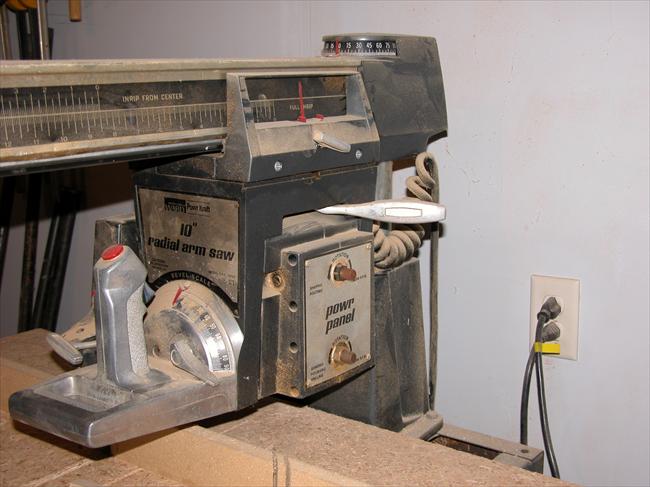
    A few weeks ago, I came across a radial arm saw with a broken motor pivot mount but in otherwise decent shape. I've always wanted an overhead pin router for template work, so I thought it would be a fun project to mount a router on the radial arm carriage. $10 and a short drive home brought it into my shop.

    I just finished the final setup today, and I am posting the videos I've made so far. I will be making one or two final videos to show it in action, but I've already made a few cuts and it seems to work pretty well.

    Comments and suggestions are welcome....thanks in advance :-)

    1. Explaining the project for my Dad's benefit, and showing him the two routers (optional)
    2. Stage 1
    3. Stage 2
    4.
    Resizing the router support box (optional)
    Last edited by Quesne Ouaques; 03-21-2014 at 1:31 AM.

  2. #2
    Join Date
    Mar 2008
    Location
    Beantown
    Posts
    2,831
    I would suggest being very careful and taking very light passes with that setup. The Craftsman RAS's are not overly robust machines and having a bit of flex in the arm is not great for pin routing. If you look at pin routers the arm is usually quite a massive piece of iron to minimize the potential for flexing, which when running bits in the 20k rpm range would be bad. Not saying it can't be done successfully as I haven't tried it, (and honestly I wouldn't). Just saying to be very careful

    good luck,
    Jeffd

  3. #3
    Join Date
    Jun 2006
    Location
    The Hartland of Michigan
    Posts
    7,628
    I kept skipping ahead in the videos to see if you actually mounted it.
    Awful long to wind up without the finale.
    Never, under any circumstances, consume a laxative and sleeping pill, on the same night

  4. #4
    Hi Myk:

    Yes, I know. My apologies.

    I tried to add the final video after I published the thread, but could not. This is the final video with the router mounted and ready to cut.

    I will post another video with some sample cuts and measurements.

    Thx

  5. #5
    Join Date
    Jun 2006
    Location
    The Hartland of Michigan
    Posts
    7,628
    You could shorten it by showing the box, how you mounted it, and an actual test. Cut it down to 5 minutes as opposed to 45.
    Never, under any circumstances, consume a laxative and sleeping pill, on the same night

  6. #6
    Join Date
    Mar 2003
    Location
    Upland CA
    Posts
    5,571
    Looks like it might work ok. Anxious to see it work. Your second box is much better than the first idea, and it looks sturdy enough. Some of the ideas on YouTube are scary.

    You will want to adjust the play in the rollers a bit to get rid of that slop. So far it is an overarm router, but not a pin router. Do you plan to put a pin setup in it for pattern routing? You could do some edge work (fence) and pattern routing with it now, but only with bits that have a bearing above the cutter.

    Rick Potter

    PS: Quesne Ouaques, or Ken Wachs?
    Last edited by Rick Potter; 03-22-2014 at 3:02 PM.

  7. #7
    Join Date
    Feb 2005
    Location
    Easthampton, MA
    Posts
    986
    In my experience using pin routers, the radial armsaw falls far short of a pin router. Being able to raise and lower the cutter for internal routing is what makes a pin router so unique

  8. #8
    Dadoes? Yes. Surface planing? Probably. Pin routing? Doubtful. It's missing the two main features of a pin router, an inflexible arm and an automated plunge mechanism. What operation do you see this thing doing? The yoke and arm assemblies on those saws is barely up to cutting straight lines. Internal routing, plunging, or pattern routing is likely to be real sloppy. Probably would be better just to weld the entire thing solid. Good luck.

    And remember this: there is no more important safety rule than to wear these — safety glasses.
    Attached Images Attached Images

  9. #9
    I would love to be I don't know how to cut and paste the videos.

  10. #10
    Join Date
    Feb 2008
    Location
    Southwestern Penna.
    Posts
    329
    I think you can get it to work. I did a very similar thing with a much older Craftsman RAS.

  11. #11
    Yes, I agree about the final box format. It feels very strong, and in making some fairly aggressive test cuts, 1/2" x 3/8" (posting video in a few minutes) , I've gotten much less deflection than I had originally anticipated.

    I do intend to create a pin setup, though I am a little confused as to why I cannot use top-bearing bits. Can't my template simply be on the bottom of my workpiece?

    P.S. Quesne Ouaques is the spelling of my name in Algerian French. Strange but true :-) I sometimes use it as my login name

  12. #12
    Reminds me a bit of an old Montgomery Ward Power Craft Radial arm saw I used to have.
    They had a "power panel" that could be flipped down (or around) with two spindles on it.
    One was 20,000 rpm for router bits and the other was 3450 rpm for sanding,polishing,drilling.


  13. #13
    Here is a video of two test cuts I made. BTW - I installed the movie editor that came with my wife's camera, so I was able to make the video shorter (riotous applause ;-)

    The 1/2" x 1/4" dado is pretty much perfect on depth, width and square. The 1/2" x 3/8" rabbet is excellent on flatness and square with some edge deflection toward the end of the cut.

    The roller bearings could probably be tighter, but I also think I would have gotten better results with 2 or 3 lighter passes.

    Overall, the tool feels pretty stable and I'm generally happy with the cut performance. I see this setup as a prototype until I really figure out what it's good for.

  14. #14
    Thanks very much for the concern, Jeff. You and I are of one mind on that matter.

    In the videos, you can hear that I am very concerned about the safety issues, and I am planning to do quite a bit of testing to establish the "behavior" characteristics under different types of cutting conditions.

    I do expect that it will be stable, though I'm not sure what level of precision I can expect :-)

  15. #15
    I see a very quick and easy to use french dovetailer. Also, stopped dadoes couldn't be any easier.

Posting Permissions

  • You may not post new threads
  • You may not post replies
  • You may not post attachments
  • You may not edit your posts
  •