Results 1 to 12 of 12

Thread: Questions About Bowls

  1. #1
    Join Date
    Jan 2006
    Location
    Chicagoland
    Posts
    2,802

    Questions About Bowls

    I'm a new turner and have a few questions about a bowl I made today:

    Last weekend I picked up some American Sycamore for the lowest price possible (free). I rough turned the first bowl from a piece of QS wood about 7" in diameter. I turned some cherry bowls about 8 months ago and nothing since so figured I start on a small piece first.

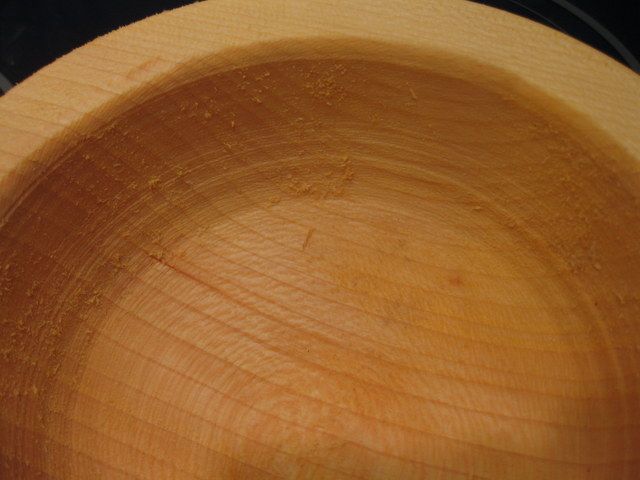
    I can cut the outside pretty well. Sometimes the gouge wants to take a bigger bite than I do when I start the cut near the base. On the inside I just can't get a good profile. I had the same issue with the cherry bowls. Maybe grind on gouge or just technique?

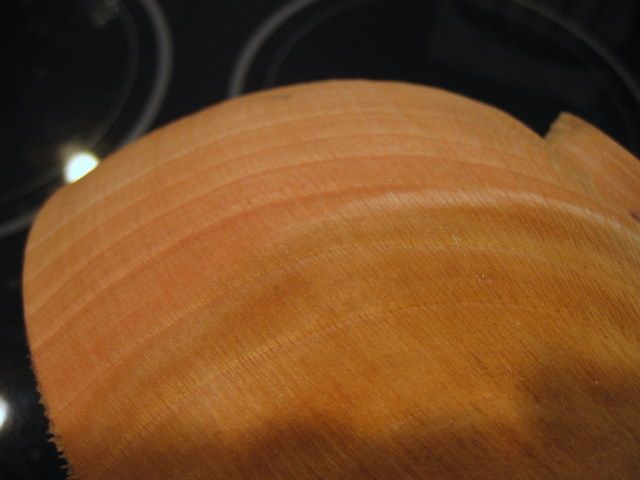
    Here is the bowl:


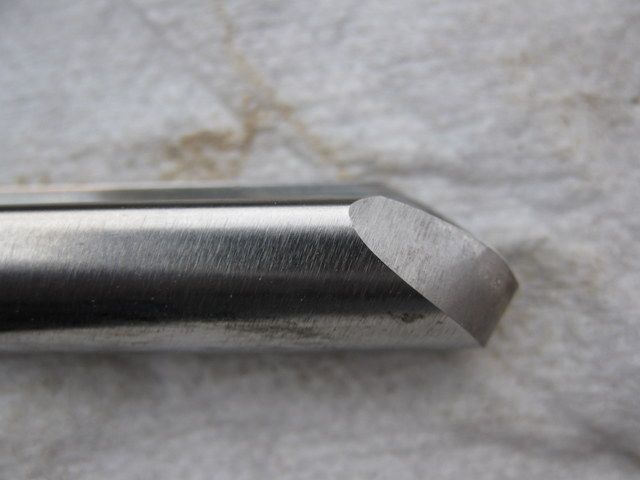
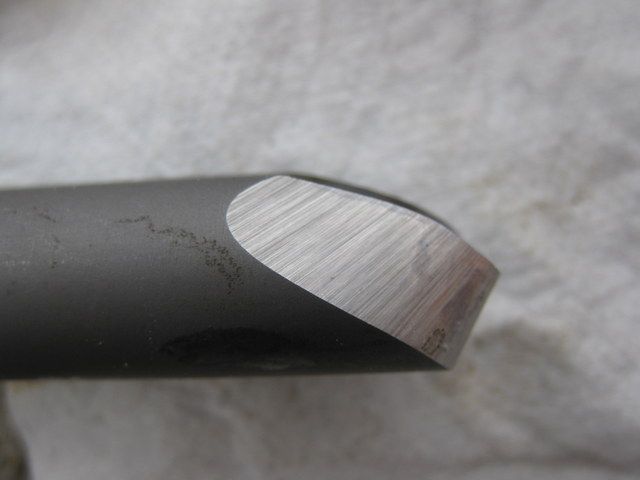
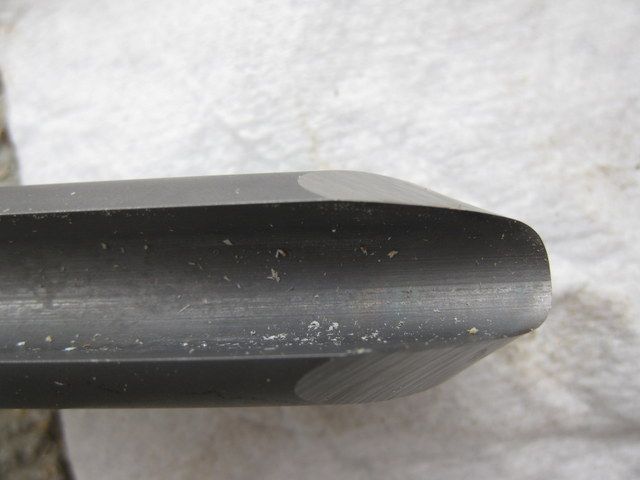
    Here is my 1/2" Sorby gouge ground on my Tormek:


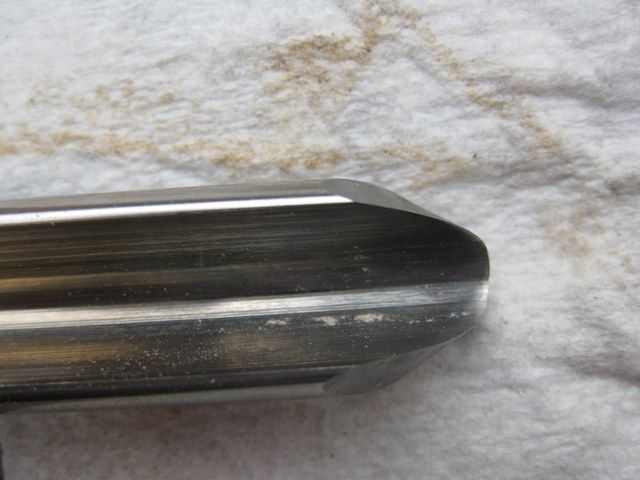
    Here is my new 5/8" CPM 10V as ground from Woodturning Store (I first used it on this bowl):


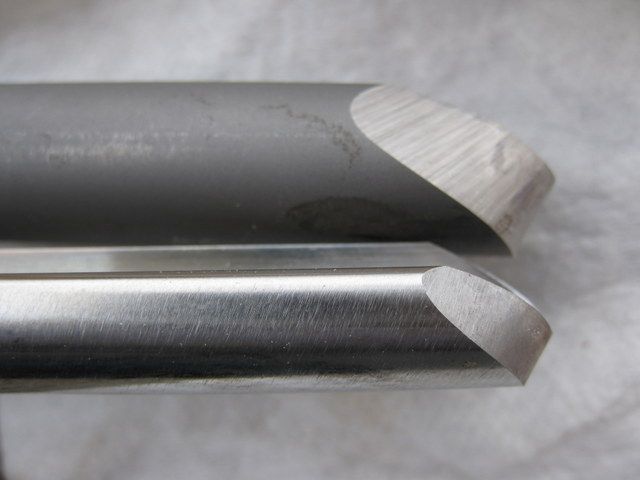
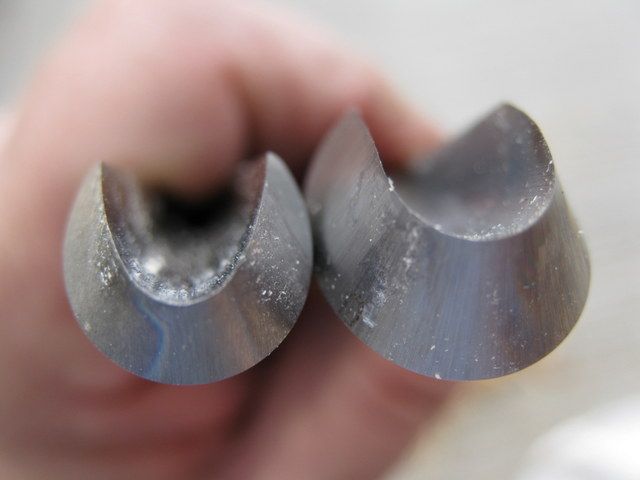
    Both:


    I found it easier to cut the inside of the bowl with the 1/2" gouge over the 5/8".


    Also, any suggestion for larger faceplate for close to 20" bowl (I have a PM 3520B).


    Thanks,

    Mike

  2. #2
    Grinding back the "heel" of the bevel will help some on the inside. Your gouge shapes look fine to me.
    _______________________________________
    When failure is not an option
    Mediocre is assured.

  3. #3
    Grinding off at least half of the heel on the bevel really helps. This keeps the rubbing spot of the bevel closer to the cutting edge. Not a problem on the outside because of the shape, but the sharp heel can actually push the cut forward. Also, it can leave marks/bruises that you can not sand out, even if you sand through to the outside of the bowl. The outside is a lot easier to do than the inside, in part because it is easier to 'see' what you are doing. You do need a 60 or so degree bevel to get through the transition and across the bottom. With a more pointy bevel, you can't rub the bevel through there. Check out my clips on You Tube, it might explain a bit better. You are a bit far away for a shop session, and they still haven't invented transporters.....

    robo hippy

  4. #4
    Join Date
    Oct 2010
    Location
    Mountain City, TN
    Posts
    573
    I think the only thing you are missing is practice.

    I wasn't happy with most of my bowls until I made 10 - 15 of them.

    I can get the inside done using a 1/2 " gouge, but I always use a scraper for my final cuts.

    My scrapers are 1/2 thick X 1.125" wide pieces of A2 steel I made myself. The shavings are very fine if I take a gentle cut.

    The rest of the bowl it beaten to submission with sandpaper.

  5. #5
    The grind looks fine but I also recommend that you grind the heal off the gouges. This will help with riding the bevel and not bruising the wood as you go. The picture of the inside looks like the shape along the sides isn't bad but the transition to the bottom seams a little abrupt. I do notice quite a few ridges down the sides. These are caused but start and stopping. Keep practicing to perform one continuous cut from the rim to the bowls center... for the final ....and light, last cut.
    -------
    No, it's not thin enough yet.
    -------

  6. #6
    Join Date
    Jan 2004
    Location
    Fredericksburg, TX
    Posts
    2,576
    As mentioned above, grind back the heel will allow making the corner easier. A flatter grind (60degree or so) is also often recommended by many as a bottom gouge. I think it was a Bill Grubine video that told me to transition my cutting point to above center making the curve and starting the bottom then starting to head for center to finish up. It has allowed me to do more with the standard grind, but a "bottom gouge" will likely end up in your rack over time.

  7. #7
    I'll second the 'bottom gouge' suggestion and the suggestion to grind off the heel and shorten your bevel.

    Most of us who use a 'bottom gouge' use a standard grind on that gouge with a 55 or 60 degree bevel angle (see catalogs for pictures) and grind the heel ground off on this gouge too. You'll start up on the wall of the bowl a bit with this gouge and turn a gentle curve from there across the bottom rubbing the bevel the whole way.

  8. #8
    Join Date
    Oct 2008
    Location
    Kapolei Hawaii
    Posts
    3,236
    Greetings fellow Tormek user. There are very few of us around here. Most use the Wolverine. You are in luck. In case you did not know this, your 185 jig has that collar on the bottom that can be loosened, and the whole jig raised up to do that secondary grind most everyone suggests. Easy as pie, works great.
    Have you gotten a blackstone wheel? It's really nice, and designed for those modern A2 gouge steels. It will still cut tool steel. I use setting 4 and P 65. (I think) Looks like yours, pretty much.
    I also gave up using a bowl gouge for finishing the inside of a bowl and resort to scrapers and 100 grit sandpaper.

  9. #9
    Just practice. Also, a lot of newbies make their walls steep and deep which forces an abrupts transition near the bottom. Think of your bowl as one big side wall with no bottom. The inside curve should be fair and smooth and only flat at the vertex of the bowl bottom. Its not the only way, but its the easiest way to learn.

    the secondary bevel may help with the quality of your cut and bruising, but its a distant second to raw practice.
    Last edited by Prashun Patel; 04-07-2014 at 6:57 AM.

  10. #10
    Join Date
    Jan 2006
    Location
    Chicagoland
    Posts
    2,802
    Quote Originally Posted by Kyle Iwamoto View Post
    Greetings fellow Tormek user. There are very few of us around here. Most use the Wolverine. You are in luck. In case you did not know this, your 185 jig has that collar on the bottom that can be loosened, and the whole jig raised up to do that secondary grind most everyone suggests. Easy as pie, works great.
    Have you gotten a blackstone wheel? It's really nice, and designed for those modern A2 gouge steels. It will still cut tool steel. I use setting 4 and P 65. (I think) Looks like yours, pretty much.
    I also gave up using a bowl gouge for finishing the inside of a bowl and resort to scrapers and 100 grit sandpaper.
    I forgot about that collar - will try it out tonight (I do have the high speed grinder attachment.


    Thanks for all the replies. It probably is mostly user error/inexperience but gouge won't cut in the transition so maybe grinding the heel will help too.

    Another thing I wanted to ask is when I put the foot on the bottom with my gouge I can't get that nice sharp taper for the chuck to grab. I resort to using the tip of my skew. I notice some seem to have a smaller gouge with a pointy tip - what is this tool? Almost looks like a spindle gouge. Right now I'm tool limited guess I need to slowly build the arsenal .


    Mike

  11. #11
    Mine is known as a detail gouge. Mine's 1/4", and I grind the tip to a more acute angle than the bowl gouge. This makes it pointier and easier to get up into that shoulder.

    To be honest, though, I do just as many tenons with my 1/2" bowl gouge roughly, and then use a parting tool (akin to your skew) to get that shoulder razor sharp. My parting tool's tip is ground kind of dovetailey, so it takes away some of the guesswork about the tenon shape.

    I found that equally important as proper tenon angle is getting a flat, level shoulder. A straight skew or parting tool are nice vis-a-vis the skinny gouges in this respect.

  12. #12
    Join Date
    Jan 2004
    Location
    Fredericksburg, TX
    Posts
    2,576
    Whats wrong with using a skew to get the sharp corner for your chuck? You can cut a square or dovetail for tenon or recess with the tip coming in from the tailstock end and not side. Works for me anyway.

Posting Permissions

  • You may not post new threads
  • You may not post replies
  • You may not post attachments
  • You may not edit your posts
  •