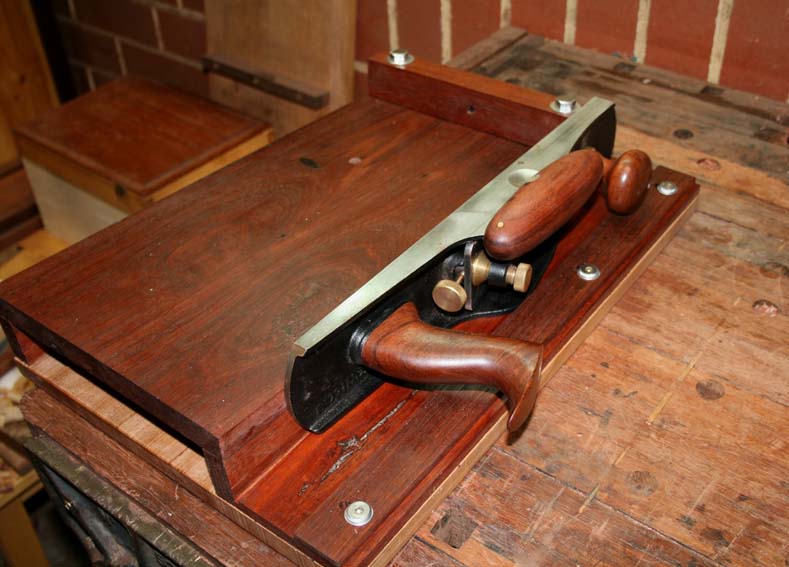
What keeps that hotdog in place? Just a presssure fit? Seems like it would slide off, even with downward pressure.
My recollection is that Derek used a set screw in his.
My first one was made before seeing Derek's build:
http://www.sawmillcreek.org/showthre...ng-Board-Plane
My first attempt was to have a more vertical handle. My main concern was this setup might cause damage to the side of the plane.
My later attempt further down in the thread has the hot dog pressing against the back of the frog. It still gets used occasionally on one of my Stanley/Bailey planes when a slightly wider blade is needed.
Once you discover the technique and benefits of shooting, you will want to have a hot dog on your plane to help with control and comfort. Check out Derek's website. It has a lot of great ideas and shares many techniques that will help you with your work.
jtk
"A pessimist sees the difficulty in every opportunity; an optimist sees the opportunity in every difficulty."
- Sir Winston Churchill (1874-1965)


 Reply With Quote