Results 1 to 10 of 10

Thread: Mortise Buttons

  1. #1

    Mortise Buttons

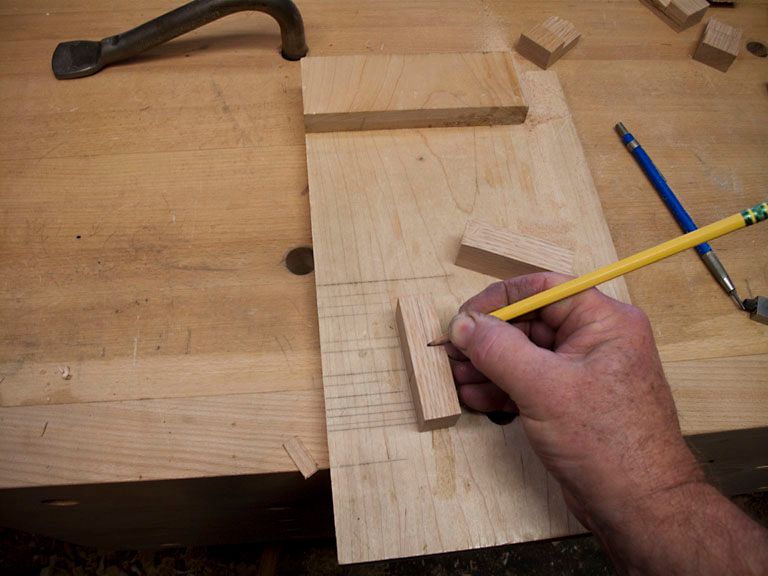
    This probably old hat for most but just in case this is how I make buttons to attach table tops. I like to use Oak because it splits easily. Most of the time the I will chop the mortise with a 3/8" pig sticker. For that size mortise a 9mm tenon works so a 19mm thick hunk of Oak is a good starting place. I will usually cut the stock into 30mm wide 70mm long pieces. Mark two lines near the center of the stock the length of the desired tenon:


    Transfer one line to the top and the other to the bottom and mark the center line on both sides:


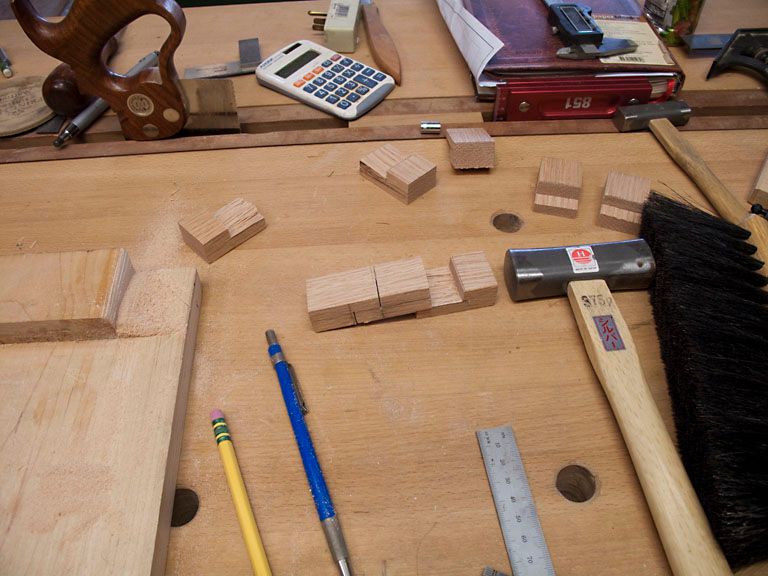
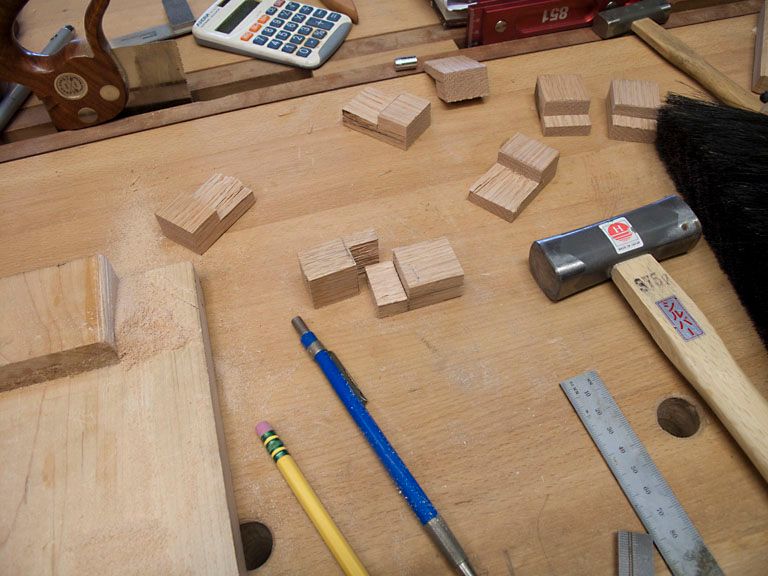
    Saw to the Center line from the top and the bottom using the offset lines as reference and then split the button by propping one end on something and giving it a good whack:


    The split button, just needs a pilot hole drilled and I will usually counter sink the pilot hole:


    This is the fastest way I've found to make a number of buttons. I figure I need at least ten maybe fourteen buttons for the bath vanity.

  2. #2
    Join Date
    Dec 2010
    Location
    Burlington, Vermont
    Posts
    2,443
    Thanks! Nothing ground shaking here, but sometimes I need a slap upside the head to remember to use the splitting of agreeable woods to my advantage…

  3. #3
    Join Date
    Apr 2013
    Location
    Wild Wild West USA
    Posts
    1,542

    Ken

    Cool
    Thanks
    Would you please post one more photo, or two, showing how to suport it and where to hit it ?
    If I didn't know better from what you described or if I forgot that step months from now I would be trying to wedge them apart with a chisel.
    Or is that what you mean ?
    Sharpening is Facetating.
    Good enough is good enough
    But
    Better is Better.

  4. #4
    Quote Originally Posted by Winton Applegate View Post
    Cool
    Thanks
    Would you please post one more photo, or two, showing how to suport it and where to hit it ?
    If I didn't know better from what you described or if I forgot that step months from now I would be trying to wedge them apart with a chisel.
    Or is that what you mean ?
    Sure Winton, I will make a couple more photos if needed, I have a few more buttons to make .

    I zoomed in on the third photo, it may make it clearer. Usually one good whack on the "X" will do the job. Almost anything will support one end, most of the time I just use another button like I'm doing in the same third photo. The only need for a chisel is to smooth the tenon if the split is a little rough.


    Hope this helps,

    ken

  5. #5
    Join Date
    Apr 2013
    Location
    Wild Wild West USA
    Posts
    1,542
    Ken,
    Oh . . . yah . . . that's totally clear now.
    That's way different than I imagined.
    Thanks again.
    Sharpening is Facetating.
    Good enough is good enough
    But
    Better is Better.

  6. #6
    Join Date
    Sep 2007
    Location
    Longview WA
    Posts
    27,486
    Blog Entries
    1
    That's way different than I imagined.
    +1 on that.

    My thought was Ken was driving a chisel from one side for two buttons from one piece. Otherwise it was just making one button but then it was confusing why the two kerfs.

    jtk
    "A pessimist sees the difficulty in every opportunity; an optimist sees the opportunity in every difficulty."
    - Sir Winston Churchill (1874-1965)

  7. #7
    Join Date
    Dec 2010
    Location
    Burlington, Vermont
    Posts
    2,443
    Ooh; guess I didn't get this the first time 'round. This is cooler than I thought. I have some oak scraps kicking around; I'm going to go try this now.

  8. #8
    I should add: saw just a smidgen pass the center line on each side, in other word make sue you saw to the center line, it helps to have a good break point. If you stop short on both sides sometimes it is hard to get the buttons to split.

  9. #9
    Join Date
    Mar 2009
    Location
    Chevy Chase, Maryland
    Posts
    2,484
    I've never tried this, so it may work a treat. But in buttons, the crucial geometry is the relationship between the surface that mates with the underside of the table and the surface you are splitting here. They need to be th right distance apart and parallel. Every other dimension in a button is not critical and could've off by an eighth or more or out of square etc and not affect a thing. I would be concerned that a split would risk the precision of the distance and the parallelness of the created face.
    ~ Do not seek to follow in the footsteps of the men of old; seek what they sought.

  10. #10
    Join Date
    Aug 2013
    Location
    Princeton, NJ
    Posts
    7,298
    Blog Entries
    7
    Sean, I suppose one could clean up the split with a chisel or router plane if they felt the need.

    Thanks Ken, that is a very ingenious way to create two of these.
    Bumbling forward into the unknown.

Posting Permissions

  • You may not post new threads
  • You may not post replies
  • You may not post attachments
  • You may not edit your posts
  •