Page 1 of 2 12 LastLast
Results 1 to 15 of 25

Thread: Finish Carpenters.......

  1. #1
    Join Date
    Jan 2004
    Location
    Lewiston, Idaho
    Posts
    28,554

    Finish Carpenters.......

    In August our contractor finished our kitchen addition, remodel and whole house window replacement. Because we went with new flooring all the baseboard in the dining room, kitchen, bathroom and hallway had to be removed so it only made sense to remove the trim for the doors opening onto the hallway. While the contractor and his subs did an excellent job, I elected to do the finish carpentry. I just came in from staining the last of the baseboard. Tomorrow I will begin the two days of applying 2 coats per day of poly. After that baseboard is installed, I have one more window to manufacture casing, finish and trim it out. When they installed the new windows, I insisted they use nailing flanges. Thus exterior trim was required. The new windows were thicker thus new interior trim and casing was required too.

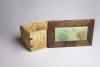
    All the doorways and windows are getting stained oak casing and picture frame trim as appropriate.

    The things I have learned while trimming out 4 doors and 7 windows with picture frame trim?

    1. All necessary surfaces are flush with each other UNTIL you glue the joints and drive the nails!

    2. All surfaces that need to be are perpendicular to each other are perfect UNTIL you drive the nails.

    3. In our area, it's difficult to find straight oak picture frame trim. You can find oak trim, however, it's difficult to find straight trim.

    4. A sharp low angle block plane is a good friend to a finish carpenter.

    5. A good finish carpenter is worth his/her weight in gold. I am neither.

    In my defense, my wife insisted on a 5 week driving trip for a Grandma fix so it delayed my work. While my work is okay, I am sure a good professional would have been faster and done a better job!
    Last edited by Ken Fitzgerald; 11-20-2015 at 11:31 PM.
    Ken

    So much to learn, so little time.....

  2. #2
    Lotta work Ken, but sounds like it will be nice.

    I don't recognize the term "nailing flanges". Are they a way to fasten wood to brick, a way to keep water out better, or something else? I ask because Im considering replacing my windows.

    Thaanks,
    Fred

  3. #3
    Join Date
    Oct 2010
    Location
    Australia
    Posts
    2,534
    Quote Originally Posted by Frederick Skelly View Post
    Lotta work Ken, but sounds like it will be nice.

    I don't recognize the term "nailing flanges". Are they a way to fasten wood to brick, a way to keep water out better, or something else? I ask because Im considering replacing my windows.

    Thaanks,
    Fred
    https://www.google.com.au/search?q=w...HTmxC6YQsAQIGw

  4. #4
    Join Date
    Oct 2015
    Location
    Winnipeg, MB
    Posts
    40
    #6. This tool is a trim carpenter's best friend: http://www.homedepot.com/p/Dasco-Pro...e-91/202585548

    Sooo handy. For $10, the most used tool I own.

  5. #5
    Join Date
    Nov 2006
    Location
    NE Ohio
    Posts
    7,034
    5. A good finish carpenter is worth his/her weight in gold. I am neither.
    Whenever I see/read/hear people complain about gaps in trim or out of square frames or uneven reveals, I just shut my mouth and bite my tongue. .
    Finish carpentry is as exacting as it gets.

    What I've never figured out is how it can be that, you pry some trim off, then put it back in the exact same spot & it doesn't fit?
    That will baffle me forever....
    "Life is what happens to you while you're busy making other plans." - John Lennon

  6. #6
    Quote Originally Posted by Stewie Simpson View Post
    Thanks Stewie!

  7. #7
    Join Date
    Apr 2006
    Location
    Near saw dust
    Posts
    980
    Its just a game of experience. LIttle things like the beveled edge of the drywall, if installed at the floor, will cause base boards to open/roll into the walls when nailed. Door jambs are rarely perfectly flush with drywall and so I like to make door and window casings and biscuit them and use hartford clamps to assemble them on a bench then nail them up with the clamps on to the jambs only. After the glue is dry nail to the wall and then deal with any gaps at the outer edge of teh casings later if need be. Often just caulking is all thats needed and a painter should do that.

    I always carried a block plane that was sharp for jambs that are out a little here and there, base that needs a quick scribe, doors that need a little fitting etc. and it really saves time. I think the thing most people do that is wrong is try to quantify every part of finish carpentry with an angle or length when it really is just something that comes in time like any "art" if we can call it that. Once you have scribed base over a hump in a floor or a casing to a drywall surface about 1000 times, it be comes second nature and this cant be read or taught or learned online unfortunately. I wish. Could have saved quite a few mistakes over the years.
    Strive for perfection...Settle for completion

  8. #8
    Join Date
    Jan 2010
    Location
    Bellingham, Washington
    Posts
    1,149
    What Ben said!
    Bracken's Pond Woodworks[SIGPIC][/SIGPIC]

  9. #9
    Join Date
    Feb 2008
    Location
    Northwestern Connecticut
    Posts
    7,149
    It's a lot of work, and a very specific set of skills. I say cudos to tackling it your self Ken! The buck stops at the finish carpenter, they have to rectify the aesthetics of all the cumulative errors of every other trade. Lots of different tricks and tools. My trim experience is more limited, I've opted to stay as far away from it professionally as possible, but it has come up occasionally. Some people just think woodworkers and carpenters are the same thing! We know better.

    Part of it comes down to the product being installed, a good system goes in better than anything in today's big box world. Jambs proud of drywall, casing biscuited at corners and glued with Hartford clamps then nailed to jambs, back band with beveled scribes to close gaps at wall. It takes lots of time but can go in very seamless. I had a friend ask me to install crown molding a while back, as a paying side job....I declined and told them I didn't do that sort of thing. Then I made them a mantle...wrapped in several layers of crown...eyebrows were raised! "Hey, I though you didn't do crown...." In the shop I have the privalage and luxury of starting with a very square assembly so it's a straightforward job. Field installations are much more difficult for me, so much tweaking off angles, compound angles, scribing and adjusting....often in the air on ladders. It's not that I can't do it, I just decided a long time ago I don't like it, right around when I got decent if not quick and productive. To watch somebody that is good at it and enjoys it is to me a thing of beauty. I'd rather make the moldings than install them!
    "A good miter set up is like yoga pants: it makes everyone's butts look good." Prashun Patel

  10. #10
    Join Date
    Mar 2008
    Location
    Beantown
    Posts
    2,831
    First off, for stain grade I'd install everything first and then stain and poly. That way the nail holes are all filled and sanded and you get the best possible finish….IMHO. I've had to do stuff in the shop where it's all finished and then installed and I'm never as satisfied with the end results.

    I'll also second what Peter said, the only difference is I give just a bit more information. I tell people straight out I don't do trim work as I'd be much too expensive. I'm very comfortable working in my shop, but installing onsite I find I work painfully slowly. I'm too much of a perfectionist and spend too much time on the details.

    As far as a professional being faster and doing a better job…..maybe. I've worked next to a LOT of finish carpenters over the years and like most other trades the goal is get in and get out quickly. Most do decent work, and these days decent seems to be generally accepted as good quality. But it's rare to see someone really good at it unless your working on a pretty high end project. So if you take your time and get it done to your satisfaction, I'm sure it will be a very good job!

    good luck,
    JeffD

  11. #11
    Congratulations Ken. Both on your trim work and on getting done with your large project. Even with a contractor, there are decisions to be made and cleanup and other things that keep you busy. I has always felt good to be done.

    I have done a bit of trim work, most recently I did the baseboard and casing for our addition (maybe 800 ft2 total area in two spaces). I've also made the molding but I don't plan to do that again (it was another house maybe 20 years ago). Took too long. But I've never done clear finish trim. Always painted. Caulk hides a multitude of issues. I think I could do stain grade but it would be a lot harder.

    One thing I started in the last house where I finished the basement including putting up crown was to join the crown into one piece for long runs. A piece of scrap on the back secured with construction adhesive and staples will close a scarf joint and prevent the trim from opening up later.

  12. #12
    Join Date
    Oct 2009
    Location
    Mount Vernon, Ohio
    Posts
    168
    Quote Originally Posted by Rich Engelhardt View Post
    What I've never figured out is how it can be that, you pry some trim off, then put it back in the exact same spot & it doesn't fit?
    That will baffle me forever....
    Did you ever dig a ditch, place pipe in said ditch and not have enough dirt to refill that ditch?
    Do like you always do,,,,,get what you always get!!

  13. #13
    Join Date
    Mar 2007
    Location
    Kingston, ON, Canada
    Posts
    223
    Having done several trim jobs over the years I tip my hat to you for giving it your best and working through the many challenges that come with such tasks.

    One of the most challenging ones for me was when helping a friend trim out their kitchen and adjoining dining room and hallway with clear maple we machined very carefully ourselves. I think that job was the start of my failing knees from going up and down that ladder to trim a bit off here and there on the joints with first my SCMS and then my block plane!
    Marty Schlosser
    Kingston, ON, Canada
    Instagram: https://www.instagram.com/apexwoodworks/
    Facebook: https://www.facebook.com/ApexWoodworksFurniture/
    YouTube: https://www.youtube.com/channel/UCkmbvXb44CJ9t17SbHEWxJg/videos

  14. #14
    Join Date
    Aug 2013
    Location
    Hatfield, AR
    Posts
    1,170
    Like anything it just takes a little practice. The whole "you don't know what you don't know" falls a bit to the wayside because of the plethora of videos out there.

    Test miters on wider and/or thicker boards.
    Practice using the miter saw as a shooting board. Lightly putting the stock against the saw body and you can shave 1/64 off.
    Create margin blocks and keep them in your bag.
    Get FastCap's scribe tool.
    SHIMS!!!!
    -Lud

  15. #15
    Join Date
    Apr 2009
    Location
    Mandalay Shores, CA
    Posts
    2,690
    Blog Entries
    26
    Way back in the day, I worked as a finish carpenter. Tough work. I seemed to grow resentful of my having to rectify the compounding errors of framers, drywallers, electricians, plumbers, etc. It can be tedious, and frustrating but when done well, looks dynamite. Good work, Ken!
    Shawn

    "no trees were harmed in the creation of this message, however some electrons were temporarily inconvenienced."

    "I resent having to use my brain to do your thinking"

Posting Permissions

  • You may not post new threads
  • You may not post replies
  • You may not post attachments
  • You may not edit your posts
  •