Page 1 of 2 12 LastLast
Results 1 to 15 of 16

Thread: Walnut Table Project: First coat is on

  1. #1
    Join Date
    Jun 2010
    Location
    twomiles from the "peak of Ohio
    Posts
    12,195

    Walnut Table Project: First coat is on

    Will let it dry, and see IF it will need a second coat.
    tipped up.jpg
    IMAG0315.jpg
    Will have to rub out the top a bit..
    finished top.jpg
    And a shelf
    bottom shelf.jpg
    I did get some screw holes plugged, and then trimmed flush
    trimmed plugs.jpg
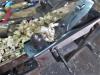
    I flipped the table onto it's top, for two reasons, one is I start with all the undersides when applying a finish, and two, I wanted to add some foot pads
    foot pads.jpg
    Just nail them in place. protecets the flooring, and the ends of the legs.

    Will check it out later, to see IF it needs another coat.

  2. #2
    Join Date
    Aug 2012
    Location
    Missouri
    Posts
    2,152
    Nice little table Steven. Thanks for sharing the build. From your past performances I would guess you already have something in the wings ready to take the stage.
    Jim

  3. #3
    Join Date
    Mar 2006
    Location
    Austin Texas
    Posts
    1,957

    Top Mounting?

    How did you mount the top to the frame?
    David

  4. #4
    Join Date
    Jun 2010
    Location
    twomiles from the "peak of Ohio
    Posts
    12,195
    I used a few of those corner brackets...
    IMAG0317.jpg
    There is just enough"slop" to allow things to move.

  5. #5
    Join Date
    Mar 2006
    Location
    Austin Texas
    Posts
    1,957
    Never thought of those before. I normally use shop-made buttons that can slide in a groove, but have owned a box of the "Z" brackets (metal versions of my wooden buttons) for years and just re discovered them in a drawer. I was thinking about using them on a couple of nightstands I am working on now. I also have a box of the "figure 8" gizmos for attaching table tops (bought a box of each 20+ years? ago) and have never used either. Not quite sure about easy installation of the figure 8 gizmos. No way you will get away with one coat of finish.
    David

  6. #6
    Join Date
    Jun 2010
    Location
    twomiles from the "peak of Ohio
    Posts
    12,195
    Second coat is now on. Waiting to rub it out later. Trying to knock down the gloss a bit. All depends on how #2 coat dries.

  7. #7
    Join Date
    May 2015
    Location
    NJ
    Posts
    1,421
    I've enjoyed watching the progress on this project.

  8. #8
    Nice table Steven! I've never used walnut but always wanted to - it's just so beautiful.
    "All that is necessary for the triumph of evil is that good men do nothing."

    “If you want to know what a man's like, take a good look at how he treats his inferiors, not his equals.”

  9. #9
    Join Date
    Jan 2009
    Location
    Williamsburg,Va.
    Posts
    12,402
    I only ever use the wooden buttons that are screwed into the top,but the other end rests in a groove cut into the apron. These buttons have been in use for a long time,and allow a great deal of movement of the wood,much more than corner brackets. I'd encourage everyone to use the buttons if you don't want to find that your top has split open in the dry part of Winter.

    I know that you will probably disagree with me,but you ought to take this advice seriously. Leaving slack in corner brackets may not permit enough movement,and the top will be loose all the time. Buttons secure the top quite well so it doesn't rattle.
    ,but permit quite a bit of movement.
    Last edited by george wilson; 12-04-2015 at 10:05 AM.

  10. #10
    Join Date
    Jun 2010
    Location
    twomiles from the "peak of Ohio
    Posts
    12,195
    Actually, there over a 1/4" of swing for the scews in the brackets. About like using slotted holes for the screws.
    brackets.jpg
    Note the bracket with a screw in it? It will swing a lot as the wood moves. While the brackets are tight to the aprons, there is a gap between them and the top. Allows even more room for the screw to tilt. There are just four such brackets holding the top in place, one at each end, and one right in the middle on the sides. Designed a bit of "flex" into the attachment of the top.

    Bottom shelf? One screw at each end into an apron. The cap has the screws. The two attaching the cap to the shelf sit in slotted holes. Allows for the top to move a bit, as well. There is a slight gap between the shelf and the legs, as well. Maybe a 1/16" or so.

    Winter time..I build things on the loose side, Summertime, I build towards the tight side. They even each other out.
    Last edited by steven c newman; 12-04-2015 at 4:36 PM.

  11. #11
    Join Date
    Jun 2010
    Location
    twomiles from the "peak of Ohio
    Posts
    12,195
    Ok, the sizes for this little table?
    Top is 30" long, by 14" wide. Between the floor and the top of the top? 19-1/4" in height. All out of Walnut a friend dropped off one day. Still have a few pieces left over.....might see what else I can cobble up?

    Thanks for looking in...

  12. #12
    Join Date
    Jun 2010
    Location
    twomiles from the "peak of Ohio
    Posts
    12,195
    Second coat rubbed out, and a wipe on coat of O'Sullivan's Oil Finish buffed out...
    end view.jpgother side.jpg
    Different lighting made a difference...

  13. #13
    Join Date
    Jan 2006
    Location
    East Central Illinois
    Posts
    532
    Beautiful table, great work.

  14. #14
    Join Date
    Apr 2007
    Location
    Columbus, Ohio, USA
    Posts
    3,442
    I thought it was just a few days ago here was no finish on this at all.... Looks really nice!

  15. #15
    Join Date
    May 2004
    Location
    N Illinois
    Posts
    4,602
    Nicely done....
    Jerry

Posting Permissions

  • You may not post new threads
  • You may not post replies
  • You may not post attachments
  • You may not edit your posts
  •