Page 1 of 4 1234 LastLast
Results 1 to 15 of 58

Thread: My idea for a better table saw insert

  1. #1
    Join Date
    Feb 2007
    Location
    southeast Michigan
    Posts
    676

    My idea for a better table saw insert

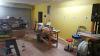
    A few years ago I submitted this as a tip to one of the woodworking periodicals. I tried to be very thorough and provided pictures. Yes, I was disappointed that it was not chosen and published, but I was even more disappointed that they didn't at least send me a message back thanking me for my submission. So I thought I'd offer it up to this forum and see what you folks think about it. I will say up front that this project involves some drilling and tapping in your table saw and so it will likely not appeal to everyone. I've always had an issue with zero clearance inserts, especially for my Grizzly. Other brand saw ones are easier to find but they are all on the pricey side. And I think there are two reasons for this; the material (either hard phenolic or some kind of plastic) and the fact that they all involve labor to have four set screws installed to allow for surface adjustment. So I reversed that. I decided to drill and tap four holes, one in each of the tabs on my table saw that the insert rests on. I then put a set screw in each location. That way I can make a bunch of my own inserts and not have the laborious job of drilling and tapping and adding set screws to all those inserts. I used 1/2 inch MDF for the insert material. Here's the process. You'll want to drill the holes fairly perpendicular in the tabs. The reason for this is that it is better for the insert to sit flush on the tops of the set screws. You could drill by eye, but I used one of those little plastic drill guides with different size bushings. Speaking of size, I used 1/4-20 set screws. I just felt this is a good size for the job but you can go bigger or smaller. Cast iron drills very easy and you might want to use a shop vac if you don't want the small metal chips mixed in with your wood dust. The holes need to be chamfered on top and remember to use a little oil when running the tap through. For the inserts I used one of the metal inserts that came with the saw as a pattern and I also made some using a purchased insert as a pattern (more on that later). Take your piece of 1/2 inch MDF and rip some strips the same width as your pattern insert. Then cut them to rough length. By hand, hold down the pattern insert on each piece of MDF and draw the rounded ends. I used my miter saw set at 45 degrees to chop the corners off close to each rounded line. One at a time put a piece of double sided tape on the pattern insert and fasten it to a piece of MDF (you will, of course, have to use a new piece of tape for each insert). Then it's off to the router table with a pattern bit in place. After making as many inserts as you want set up your router table with a cove bit to make the undercut where the blade comes up. The location of the undercut will vary depending on your brand of TS. If you use a couple of stop blocks this part goes quickly. I was able to make 18 inserts in a little over an hour. You will also want to drill a hole (I used 3/4 inch) in each insert for a finger hole to easily remove the insert. Lastly, there needs to be a way to prevent the insert from rising at the back end when the blade comes up. Many manufacturers use a pin inserted at a slight angle in the back edge of the insert. I made some this way and used a section of finishing nail with the head cut off. Be sure to drill a pilot hole though. One of my pattern inserts used a nub at the back which was part of the material itself. But it needs to be pared down part way. I also made some inserts like this. MDF is a nice flat material but it is not always the same thickness from sheet to sheet. So I suggest making all your initial inserts from from the same sheet. The other advantage now is that your set screws don't have to be readjusted for each MDF insert. BTW, you should use a bit of thread locker on each set screw so it doesn't move with vibration. Remember to break the edges of each insert and chamfer the finger hole. And even like a purchased insert, if you have a riving knife you will have to extend the cut from the blade by hand to accommodate it. You can still use the metal inserts that came with your saw but you may have to readjust their set screws if they contact one of the ones you've just installed.
    Attached Images Attached Images

  2. #2
    Join Date
    Apr 2013
    Location
    Okotoks AB
    Posts
    3,500
    Blog Entries
    1
    I'm sure that's a good idea and all, but honestly, I didn't get past the 3rd line before my eyes shut down. Could you edit your post & break it up into small paragraphs? Thanks.

  3. #3
    Join Date
    Aug 2011
    Location
    Nashville, TN
    Posts
    449
    I've made inserts and put the set screws in the new insert so I can adjust from above with everything in place, much like Sawstop and others do. I just looked at the pictures; all that text is an eyesore.

  4. #4
    Join Date
    Dec 2010
    Location
    WNY
    Posts
    9,756
    I see the benefit, but I'm not about to drill and tap those tabs. The minute or two it takes to put 4 screws in the bottom of the insert and adjust them doesn't warrant doing that, IMO.

    John

  5. #5
    Join Date
    Feb 2007
    Location
    southeast Michigan
    Posts
    676
    Really? Do you guys actually read any woodworking magazine articles or do you just look at the pictures? Doesn't sound like you've ever read a book either. I wrote the post as short as I could while keeping it detailed enough in case anyone was actually interested. If someone actually read it I'd like to think they would realize the benefits. But if you're someone who only uses one zero clearance insert every few years I guess it wouldn't matter.

  6. #6
    Join Date
    Sep 2012
    Location
    Tampa Bay area
    Posts
    1,106
    John, the length of the article is not the problem. It is the lack of paragraph structure of the article, not the content or length. Were the article broken into paragraphs I bet a bunch of people would start reading it. I know I would, were it broken into paragraphs.

  7. Dude, the wall of text is hard to read and hard on the eyes. You could take the suggestions without getting defensive and you would be able reach more people. It would have taken less time to add the paragraphs that's to post your last reply. I was actually going to do it for you since those inserts look nice but then I read your reply.

  8. #8
    Join Date
    Dec 2010
    Location
    WNY
    Posts
    9,756
    I have a multitude of ZCI's and one is almost always on my saws. It wasn't necessary to read 5 minutes worth of prose to understand what the pictures were showing, or at least as much as I needed/wanted. Had you described the important points in a short paragraph or a few bullet points perhaps I and others would have read it. But just looking at that big block of print convinced me to look at the pictures first, and last.

    From an old class: "Communication is not how you intend it to be, it's how it is received."

    John

  9. #9
    Actually, I'd prefer to have the traditional set-screw-in-insert design. Once made, it takes seconds to adjust it flush with the table using a straight edge while turning the screws from above the insert. Easy Breezy.

    With your design, you have to install the plate, check for flushness, remove the insert, guess on how much to adjust the insert and adjust the set screw, re-install the insert, check for flushness (you'll probably still be off a bit), remove the insert again, re-adjust again, re-install the insert, repeat as necessary, then repeat for the other 3 screws. That seems like a very finicky way to adjust an insert.

    I also used multiple inserts in my table saw before I replaced it with the slider (straight cut, 45° cut, dado, etc.) With the traditional method, I could just swap the inserts knowing that they'll still be flush. With the set screws fixed to the table, any variance in thickness of your insert material (say MDF from a different sheet) would mean you'd have to go through the whole process all over again.

    That's just my opinion for what it's worth. I do have to agree wholeheartedly with Frank regarding the paragraph thing, though. I made it to about the 10th line before I gave up.

  10. #10
    Join Date
    Jun 2006
    Location
    The Hartland of Michigan
    Posts
    7,628
    Quote Originally Posted by John Ziebron View Post
    Really? Do you guys actually read any woodworking magazine articles or do you just look at the pictures? Doesn't sound like you've ever read a book either.
    Well, thank you for that. Time to quit whining and go beddie-bye.
    I've been making inserts like that for years. That's why it didn't get published. It isn't a new idea.
    Now, I'm going to bed and read my book.

    Oh. Bye the way. Use paragraphs.
    Never, under any circumstances, consume a laxative and sleeping pill, on the same night

  11. #11
    Join Date
    Nov 2007
    Location
    NW Indiana
    Posts
    3,092
    What a shame....might have been a good idea but too difficult to read.

    If you are trying to get people to understand something, it needs to be written in an easier format.

    What would I know....only spent a career as a technical person and wrote reports on projects.

  12. #12
    Join Date
    Dec 2005
    Location
    West Lafayette, IN
    Posts
    6,538
    Let's take it easy on the guy and not pile on.


    though I do 100% agree with Frank and I stopped reading.

  13. #13
    Another way to manage your table saw insert plate.

    1. Drill and tap the tabs you have in your saw's throat for some machine screws
    2. Use them to level the insert instead of set screws through the insert itself
    Was there anything I missed? I am sure you put a lot of effort and energy into your write-up. But I'm afraid you would get more with honey than vinegar. Your pictures told the whole story.

    I appreciate the work that goes into developing an idea. But insulting the people you're trying to convince your idea has merit is never going to get it done. You should reconsider lashing out at people just because they disagree with you.


    As for the idea - no, sorry. I don't consider this better. I consider it another way, but it's not a way I have any interest in trying. Being able to adjust from the top with the plate installed is far faster than having to remove it repeatedly to get things dialed in. For the record, I use a ZCI more than every few years. I also change my inserts frequently.

    I absolutely love that each one is already set for the height it needs to be without having to mess with anything. This idea would require that either all my inserts are exactly (to within at least .01" or less) the same thickness around the edges, or that I have to go through the mind-scorching trouble of check-pull-adjust-reinsert-check-pull-adjust.

    Far simpler to put the adjustment system on the part that is replaced more often. You don't move an insert from table saw to table saw.

    I apologize for being critical - but it's honest feedback. If you want to feel attacked, that's on you to deal with. My intent, lest it be unclear, is to offer feedback on your proposal in the hopes that you take it in the spirit of help, not harm. It's out of my hands from here.
    Jason Beam
    Sacramento, CA

    beamerweb.com

  14. #14
    Join Date
    Feb 2005
    Location
    Easthampton, MA
    Posts
    986
    image.jpgYou can't beat this zci! Put the set screws in the zci. If you put the set screws in the support ears I would tap it with a hammer to give a location to drill holes that you could fit an Allen wrench so you could adjust it from above. That would be the easy smart way.
    Last edited by Rick Lizek; 01-14-2016 at 10:06 PM.

  15. #15
    Join Date
    Mar 2011
    Location
    Florida's Space Coast
    Posts
    389
    First of all, Thanks for sharing.

    I did read the whole post.
    But, I increase my screen 150% because it was very hard to follow.

    I am fairly new to a lot of this, so any article that helps me understand why something is done one way or another is helpful.

    I think the best part of it was the DIY to make your own inserts. The advice about using the same piece of MDF made a lot of sense. Even if the set screws are in the insert, it would help to keep all of them setup the same way.

    Again, Thanks for sharing.
    Steve Kinnaird
    Florida's Space Coast
    Have built things from wood for years, will finally have a shop setup by Sept. 2015 !! OK, maybe by February LOL ……

Posting Permissions

  • You may not post new threads
  • You may not post replies
  • You may not post attachments
  • You may not edit your posts
  •