Anyone have any tips or strategies for sanding a chuck recess on a bowl bottom? Or just cut cleanly w/a sharp chisel and leave 'er be?


 [OP]
Member
[OP]
Member
Anyone have any tips or strategies for sanding a chuck recess on a bowl bottom? Or just cut cleanly w/a sharp chisel and leave 'er be?
Member
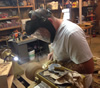
I typically use a friction chuck/drive so I have a little nub left from the tailstock point.
The 1" disc from Vince will fit all but the smallest area (sanding off the lathe). If using the 2" disc it may not fit in the recess.
"I became insane, with long intervals of horrible sanity." - Edgar Allan Poe
 Member
My preferred method is a donut chuck, which I use to finish turn and then sand the recess. I often add a curve to the inside lip of the base rather than leaving it straight vertical, which also makes it easier to sand neatly. In the old days, I would just turn down to as tiny a nub as possible with the tailstock up and then lop it off and sand the bottom off lathe with a power sander.
Member
I've tried a number of things... the "face" of the recess (not sure that's the right word) is usually easy enough except near the edges, but the walls are frustratingly difficult -- especially if you're doing the sanding before you reverse the piece to hollow and need to make sure you keep the shape of the cut so the jaws can grip correctly. Fingers seems to cause rounding of the edge, folded sandpaper "kinda" works but seems to have a tendency to skitter around.... I've tried wrapping the sandpaper around a dense piece of foam -- worked okay, but also caused some rounding on the edge... I tried a small scrap of wood once to provide stiffness... it proved too difficult to control.
At this point, I usually just use bare sandpaper and fingers to very lightly touch op the walls of the recess with coarse grits (maybe up to 220 or so max) and leave it at that. There are invariably spots of tearout, tool marks, and/or sanding scratches, but I don't really worry too much about them. If I had a donut or longsworth or cole jaws, maybe I'd finish turn and sand a little better after finishing the inside...
[OP]
Member
I do use a friction chuck and jam chuck for getting the bottom down to a nub at the very end of the process. Simply rounding the edges of the recess is an interesting idea. (The chuck doesn't need to grip again at this point.) Aaron- I've had about the same luck as you trying to sand the walls of the recess. Nearly impossible to keep the edges crisp.
Member
I have narrowed the process down a bit. Clean cuts are the first step. For the bottom of the recess, I clean up the dove tail scraper marks with the little fluteless gouge from Doug Thompson. It is pretty simple, more of a shear scrape than bevel rub and you can take it all the way to the vertical wall. For the wall of the recess, I use another fluteless gouge that is sharpened more pointy like a detail gouge. It is a fairly simple plunge cut, but you have to make sure that the bevel is at the same angle as the wall angle. Same process as picking up a cut inside a bowl, with the point inside, swing the handle till it just starts to cut, then come back to the top and make the cut. For sanding it, I have 1 and 2 inch 'special' interface pads. I have some old abrasive cutters for when I made my own discs. I cut the interface pad with the cutter, and the abrasive with the cutter so they are exact. The side of the pad eventually takes the angle of the recess so I can sand all the way to the edge. I only use 220 for the recess.
robo hippy
 Moderator
Ben,
The way I do the bottom is with very little sanding. After reversing I turn the bottom to whim (as cleanly as I can), then use miniature (mostly curved) cabinet scrapers to clean up any irregularities such as any nub at the center. I probably work with these more with the lathe off than running. After the cleanup, a little sanding.
After using the scrapers, there is usually very little sanding needed. For example, this little elm box needed only a bit of 600 grit.
bottom_IMG_5346.jpg
I've been working this way for years. Minimizing sanding can preserve sharp detail. (I usually finish the outsides and insides of things the same way)
I don't have photos of a lot of bottoms but I found a few more. These are in eastern red cedar.
bottom_IMG_4687.jpg
bottom_PC141201.jpg
I did the bottom of this large mahogany platter with the same scraper technique. This one had been held with a tenon instead of a recess. Where things are tight I use a couple of small negative-rake scrapers (one flat, one rounded) that I ground from Thompson Tool stock. I use these with the work spinning, then finish mostly by hand with the little cabinet scrapers where necessary.
bottom_PC012804_e.jpg
Sometimes I remove the piece from the lathe and clean it up while sitting in a chair. This often makes tiny defects easier to see since I can tilt the piece back and forth in the light. This works for me.
BTW, with clean cuts and cleanup with the scrapers I find no need for power sanding. I haven't even pulled my power sanding drill out of the drawer for years.
JKJ
Last edited by John K Jordan; 02-05-2016 at 11:57 AM.
 Contributor
I don't often use recesses on bowl bottoms, but occasionally I will and I often do chuck recesses on the underside of lids if the top side is going to require access for embellishment of some sort. In both cases, I create a medallion look with some profiling and texture.
Here is a bowl bottom -
BOCOTE LIDDED BOWL BOTTOM WEB.jpg
And, a lid underside recess -
EBONIZED TEXTURED WALNUT LID WEB 3.jpg
Granted, there is some sanding required, and a bit more work, but I think the results are worth it. That said, I would not do this on a utility bowl - both of these pieces are lidded bowls that are not utilitarian. On utility bowls (nearly all of mine are footed), I don't do recesses, but I do embellish the base of the foot with a bead and/or an incised border similar to the outside ring on these pics. I leave the center for signature. I should add that I also use cabinet scrapers to clean up the bottom, along with a carving gouge.
[OP]
Member
Really beautiful stuff. I love the cedar. And the patterns on the mahogany foot are fantastic.
[OP]
Member
Thanks for the photos, John. Love your work.
Moderator
Thank you! I don't get to turn much but when I do I have a lot of fun. I enjoy teaching as much as turning.Really beautiful stuff. I love the cedar. And the patterns on the mahogany foot are fantastic.
i have a sawmill behind the barn and have been fortunate to get an occasional highly figured cedar log. I have some big slabs waiting for the right projects.
I learned the patterned platter base technique from good friend Frank Penta, turned off-center from three centers. If you are interested he has PDF instructions on his web site:
http://www.woodspriteturnings.com/si...ocman&Itemid=7
That particular platter was auctioned as a benefit for a terminal cancer patient. In case you want a look, here is the whole platter:
platter_PC012780_e_comp_small.jpg
The profile shape of the small squarish cedar platter was also somewhat inspired by something I saw Frank do. I've made several of these from a variety of woods and they make great presents. :-)
penta_plates_comp_small.jpg
(Sorry, I love pictures!)
Frank is an amazingly enthusiastic creative and helpful fellow! The last time I saw him he was immersed in slicing up wood and gluing up blanks for turning. Frank is scheduled to demo at the TAW symposium in Jan 2017.
JKJ
 Member
First off I should say that I use a recess 90% of the time, one of the reasons is that with wet wood ( I use wet wood to rough turn my bowls) is that I don’t have that extra thickness of wood when drying my bowl, very early on I noticed that I could get splits there, so I changed from making a tenon to a recess, find also that it holds better in the way I do things.
Typical foot from a recess I make by holding the finished but for the foot turning with my jumbo jaws or other manner, like a platter with tabs screwed to it, of course you can make the recess or foot as fancy as you like if you have a good hold on the turning.
Oakburl.jpg White Ash bowl.jpg Catalpa bowl.jpg
I have only a couple of picture that show how I held something, as I don’t usually make pictures while turning, so you’ll see an oval bowl that I was returning that has a tenon on it, though that could have been e recess just as well, as it is only to show how one can hold a turning.
The platter with the stub glued on also had a recess when I rough turned that, I’m only showing it for the double stacked buttons I used to hold that platter, as I wasn’t sure a single height was going to hold it safely for me to remove the stub.
I do use the Oneway Jumbo and Mega Jumbo jaws a lot, not having a tailstock on the outboard side I have learned to return and finish my bowls in this way, with my smaller lathes I still very seldom use the tailstock to hold the bows, but I am able to if I want to.
Inside hold.jpg outside hold.jpg Holding oval.jpg Stacked buttons.jpg
There are other ways to hold a bowl, like the donut chuck for instance, I just don’t like using it,as it blocks me from seeing the piece as I return the bottom and foot, it is in my way
So I have made large disks from a couple of wide thick barn boards, screwed to a faceplate, with a very shallow recess turned in that disk where the bowl fits into and then a half dozen or more tabs screwed to the disk clamping the piece down, I can then again safely work on the bottom side, HTH
disk and tabs.jpg
Last edited by Leo Van Der Loo; 02-06-2016 at 1:50 AM. Reason: added info
Have fun and take care
 Posting Permissions

 Reply With Quote

