Ok, everything I know about chip carving in 20 words or less. Well, maybe a few more...
Chip carving is apparently a very old craft where one usually triangular chip is removed at a time to form a decorative pattern. Some interesting history:
http://www.thewoodcarverscabin.com/l...ipcarving.html
Chips can also be 2-sided or 4-sided or more, straight cuts or curved. The artwork can be rigidly geometric or free-flowing. Carving letters involves removing both straight and curved chips, usually long chips.
One attraction is the equipment needed is minimal! Nearly all carving can be done with a single knife and can be done almost anywhere. Well, maybe not on horseback.
The knife is held to give a constant angle into the wood and the tip is pressed down to the proper depth as the knife is drawn backwards, then drawn upwards so the knife exits the wood. The wood is turned and a second then third cut is made and a pyramidal chip pops out. If you do it right. Repeat a few hundred times and you are done!
Working on an ornament. Sure is hard to take a photo with both hands occupied!
chip_ornament_carvingIMG_43.jpg
I am basically a rank beginner at this but I do find it pretty easy. The hardest thing is to make the cut deep enough. The next hardest thing is to not make the cut too deep! (I.e., it has to be just right for best results.) Like anything it gets easier with practice.
A chip-carving knife is available from several sources. The best design has the blade angled down from the line of the handle - this makes cutting and control easier and prevents severe hand fatigue and pain. One thing I found - I bought several different knives and NONE of them are useful out of the box. Every one had a cutting edge with a short bevel that was way too thick to use. It just pushed and pried and distorted the wood without making a clean cut, even when sharpened to a keen edge. Very frustrating. I suspect many people buy a knife and give up after trying to cut the first chip. I know I did - it was almost 10 years until I picked it up again and learned how to rework the knife. (It would have been nice if a knife came with at least a hint that this was needed.)
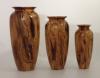
Almost all chip carving I've seen has been on flat surfaces, very little on turned things. My goal has been to turn cool things and carve chips into them.
I ran into an expert chip carver who gave me some tips. I've since sent him some woodturnings to carve. This guy, Bill Johnson, carves wonderful aquatic sculptures! Check out his web site if interested:
http://www.carolinamountainreefs.com/index.html
I first practiced on flat things then started on turnings. I learned a lot quickly! The first thing I learned was carving on flat sure is a lot easier.
The very first turned thing I carved on was a goblet, then some ornaments. Round things are tricky to lay out so the pattern will come out even. I had to use MATH! I started with a rotary table from my milling machine but later got an indexing wheel for the lathe.
chip_carved_goblet_c.jpg chip_carved_ornaments3.jpg
Then I practiced some letters and made a sign for my shop. I copied the font from the back of a book on chip carving, traced onto the wood with graphite paper.
chip_mess.jpg
The goblet is cherry, walnut, and basswood, glued up with the grain running along the axis. I wanted the weight of the cherry to give a more substantial feel since basswood is extremely light weight. That is also the reason I used the cherry on the Beads of Courage box. Other fine-grained woods besides basswood can be chip carved but basswood is much easier than most! I have tried small chips on bradford pear and I think it's possible. Buckeye is supposed to be good.
Chip carving is best done in pure side grain. End grain is tricky. A close look at my BOC box/bowl will show some letters are not so cleanly cut since face turning leaves a lot of end grain on the side of the bowl. Ack.
Basswood, BTW, is easy to turn but can have some tearout if tools are not sharp. I was afraid that the transitions between the basswood and harder woods would give me trouble but they didn't, possibly because I use cabinet scrapers for smoothing instead of coarse sandpaper. I think I started with 400 grit or 600 on these things.
Just for fun, here are my practice boards. I did most of these during a vacation at the beach this fall. The first little picture shows the knives I use.
practice_comp.jpg
There, an introduction to chip carving! Probably WAY more than you wanted to know. Once I get started...
JKJ


 Reply With Quote