Results 1 to 8 of 8

Thread: Embellishment testing on sphere

  1. #1
    Join Date
    May 2010
    Location
    Ambridge, PA
    Posts
    968

    Embellishment testing on sphere

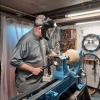
    Thought I was going to get a spalted maple sphere out of the blank I started with but ended up with just a plain
    nondescript round piece of nothing special. Decided to try and jazz it up with some coloring. Wasn't looking to create
    a great piece, more of just experimenting with colors and design. Used Tombow & Staedtler pens and although they look
    okay while the piece is turning once you stop the lathe the colors aren't nearly as bright. Guess I'm looking for a
    higher gloss like a Krylon paint would give you except in pen form. Anyone have a suggestion???

    Tried out a Copic Multiliner SP with a 0.1 tip for the squiggly lines & decoration and must say I was impressed with the lines it gave me.
    Nice thin bright black line every time.

    Unless I figure out how to get a much brighter coloring, I'll probably just do some eccentric slashing & hollow/pierce for embellishing these spheres.

    Maple Sphere 8.jpgMaple Sphere 5.jpg
    Member Turners Anonymous Pittsburgh, PA

  2. #2
    If you polish the wood surface to a high degree, and seal it with shellac or lacquer before using the markers you will get a shinier look. The irregularities of the wood surface are deeper than the binder in the color can fill, thus lowering any tendency the pens have to be glossy. You can topcoat with shellac or lacquer, and that will gloss the entire surface up, but I would spray that on to avoid swearing the color. You could try some sort of paint application rather than ink over sealed wood, but I don't know of any that are as handy as the markers you used.

  3. #3
    Join Date
    May 2010
    Location
    Ambridge, PA
    Posts
    968
    I did try using a water based sanding sealer but didn't see any real difference. Sanded to 600 grit, applied sealer, light sanded with 800 grit, applied 2nd coat sealer and sanded lightly with 800 again & then applied the ink. The end grain at the tail stock side came out very well but no real difference between going thru at that procedure and just sanding to 220 or sanding up to 600 on the cylinder portion. In this first pic, the 9 lines closest to the headstock are from the original bare wood sanded to 240 grit test area.

    test 1.jpg

    In this 2nd pic after peeling away a couple layers of ink, from the shoulder of the cylinder to the tail stock I only sanded the piece with 220, 320, 400, 600, 800, 1000, 1200, 1500, 2000. On the shoulder area Touchdown both color brightness wise with a well defined line. The cylinder came out nice color-wise but no matter what type of light touch on the pen tip I used, it wants to bleed over to where it's not wanted.

    test 2.jpg

    Without using the sanding sealer I was expecting the results to be sort of the opposite to what I got. Back to the drawing board I guess.
    Member Turners Anonymous Pittsburgh, PA

  4. #4
    Paint is going to look like paint, which may be a good thing or a bad thing depending on what you are looking for. Also, the only real paint markers out there have huge tips as they were designed for street art, not fine detail work. Fine detail painting will necessitate a paint brush or a nib pen. With either, I recommend you look at liquid acrylics, which are pre-thinned acrylic paints (much thinner than paint from a tube) but where the pigment load is still high like tube paint. Golden and Liquitex both sell liquid acrylics and you should be able to find one or both in a good art supply place.

    As for markers, your choices with fine tips (at least as far as I have seen) really are confined to water-based inks and dyes, with Tombow and Pitt markers being the common ink choices and Copic Originals (as opposed to their Multiliner pens) being the most popular with dyes. Neither of these are going to offer strong opacity, most especially in lighter colors, and both will need some help if you want a glossy finish. The dye markers will be even worse for opacity as they are really just fancy magic markers.

    For my bead weaving illusion pieces, I use a third option: acrylic ink. It is water-based ink but with most of the opacity of acrylic paint since it also uses acrylic as a pigment carrier. It does not look "painted on" the way paint does, which is what I like about it. Like paint, I can also mix to whatever color I want. However, it requires a brush or a nib pen to apply. I use a nib pen. You can see from this piece on walnut what kind of opacity I can get, even against dark wood:

    eddies-400.jpg

    However, the shine is mostly from the finish. It is a little glossier than the markers unfinished, but probably not enough to make you happy.

  5. #5
    Join Date
    May 2010
    Location
    Ambridge, PA
    Posts
    968
    Thank you for some great information Justin. Although the OP was shown with a sphere, the piece you showed is the type of piece where I'm heading to. I'm starting to get handy with the D-Way beaders and want to further jazz-up with burning and/or coloring. Just one question: what type of surface prep you doing for a piece like that? 600-800 or way up to 2,000 grit and are you using a sanding sealer?
    Member Turners Anonymous Pittsburgh, PA

  6. #6
    Quote Originally Posted by David Delo View Post
    Thank you for some great information Justin. Although the OP was shown with a sphere, the piece you showed is the type of piece where I'm heading to. I'm starting to get handy with the D-Way beaders and want to further jazz-up with burning and/or coloring. Just one question: what type of surface prep you doing for a piece like that? 600-800 or way up to 2,000 grit and are you using a sanding sealer?
    400 tops, honestly. I prepare the rim for beading by sanding to 400. I apply sanding sealer between 240 and 320. After beading, I sand the beads with little pieces of stiff paper, I think it is 220. I should probably hit them with 320 and 400 as well, but so far I haven't bothered. While acrylic ink doesn't look painted on like paint does, it still does have a lot of acrylic in it, so it will coat the area you apply it to with somewhat of a surface film compared to just a straight ink or dye. The end result is fairly smooth comparatively.

    There is a large close-up shot of the rim on the piece above on my webpage (jjstephen.com) if you want a closer look at what the finished product looks like.

  7. #7
    Join Date
    May 2010
    Location
    Ambridge, PA
    Posts
    968
    Again, thanks for the great info Justin. My AW magazine came the other day and saw the pieces featured but just didn't connect your name to the piece. Truly an inspiring piece of art.
    Member Turners Anonymous Pittsburgh, PA

  8. #8
    Quote Originally Posted by David Delo View Post
    Truly an inspiring piece of art.
    I think that's overstating it quite a bit, but thanks.
    A link to my homepage is in my profile.

Posting Permissions

  • You may not post new threads
  • You may not post replies
  • You may not post attachments
  • You may not edit your posts
  •