Page 1 of 2 12 LastLast
Results 1 to 15 of 17

Thread: Update on chest

  1. #1
    Join Date
    Feb 2004
    Location
    Perth, Australia
    Posts
    9,497

    Update on chest

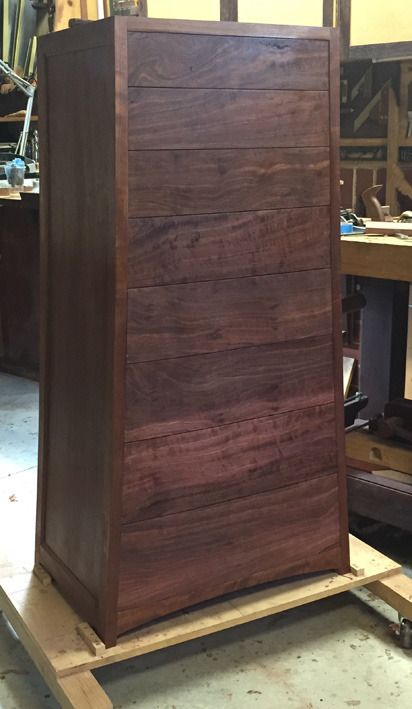
    This weekend I returned to the Lingerie Chest to flush the drawers fronts and seal all with white, dewaxed shellac.


    The drawers are now complete (coplanar) save for the drawer handles and waxing .. which will be done this coming weekend. And then it will be time to start the top section.


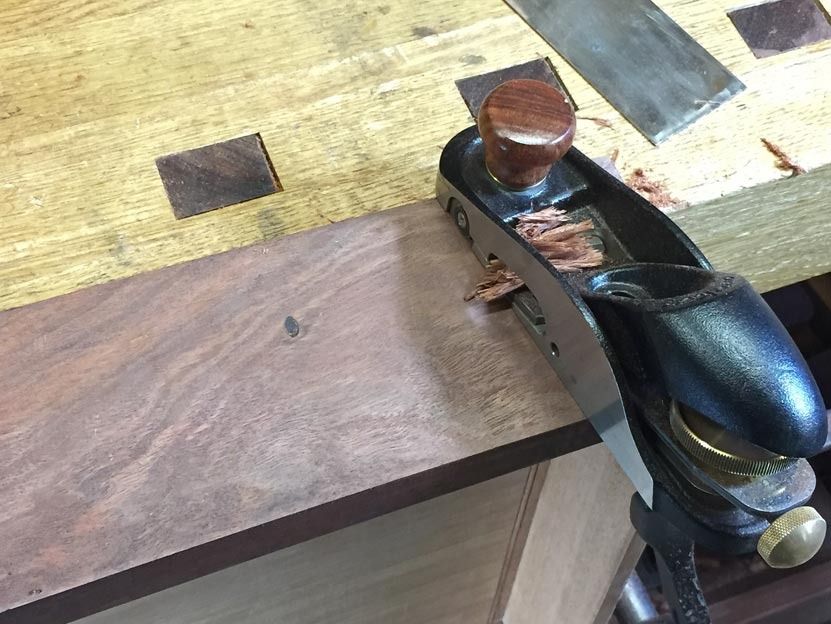
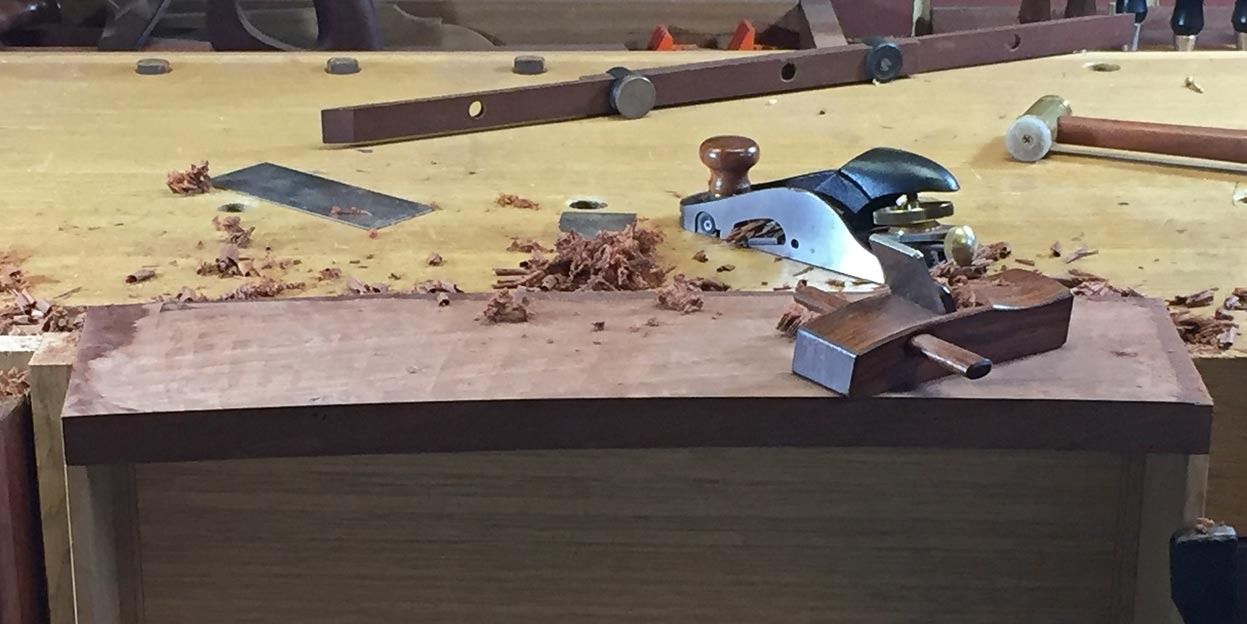
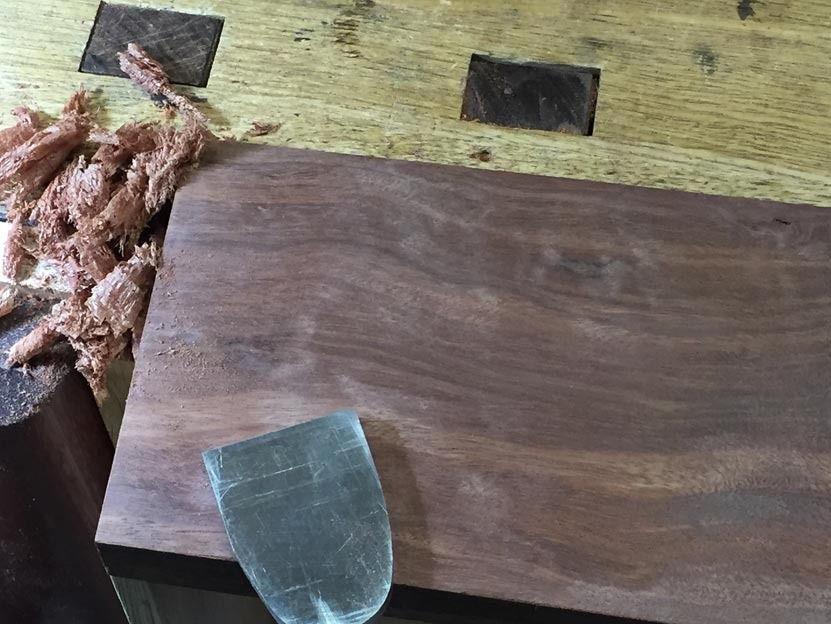
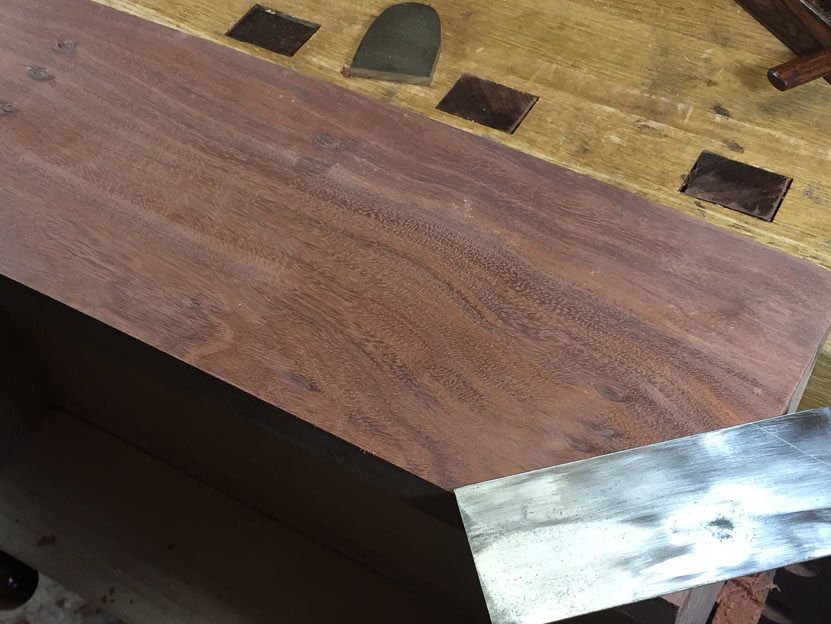
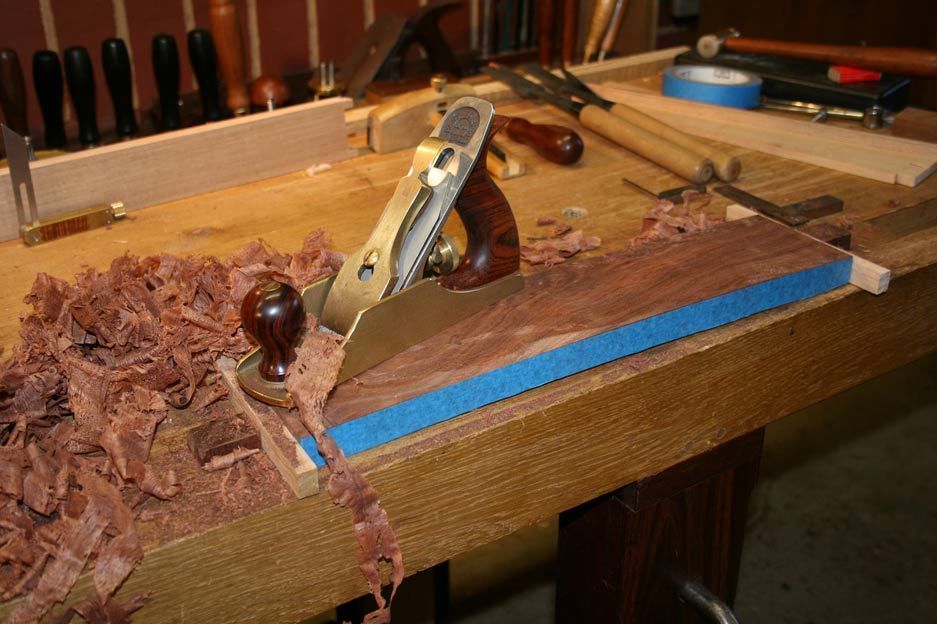
    In the end I did not use sandpaper to level the drawer fronts, but simply marked off the high spots and planed/scraped them.


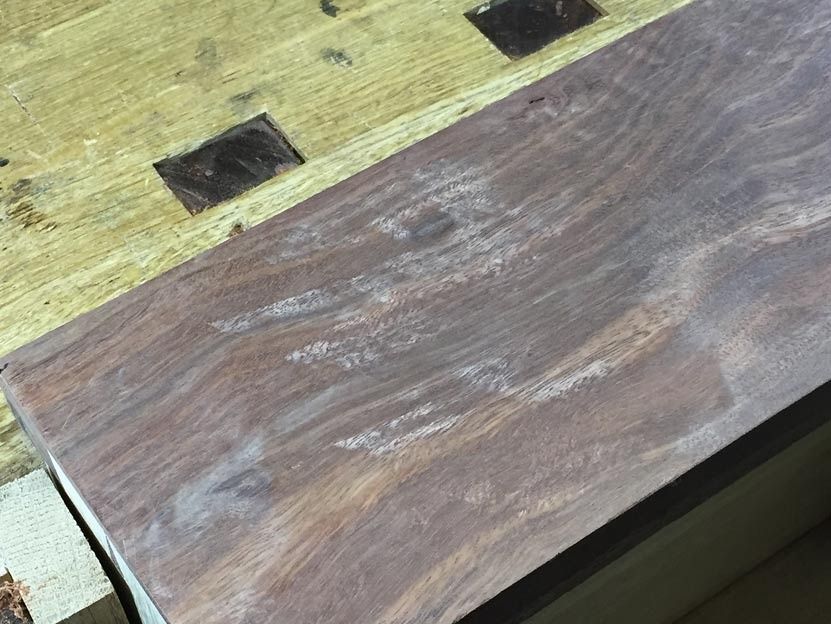
    It is difficult to see the bow fronts in this photo.


    Regards from Perth


    Derek

  2. #2
    Join Date
    Sep 2007
    Location
    Longview WA
    Posts
    27,468
    Blog Entries
    1
    Stunning

    jtk
    "A pessimist sees the difficulty in every opportunity; an optimist sees the opportunity in every difficulty."
    - Sir Winston Churchill (1874-1965)

  3. #3
    Very impressive. Love the design, and the execution gets better with each set of photographs.

  4. #4
    You also did a great job in selecting the grain patterns. Hats off.

  5. #5
    Join Date
    Aug 2010
    Location
    USA
    Posts
    5,582
    Nice work Derek, but what do you mean by starting on the top section? Is there going to be another box of drawers on top of this one?

  6. #6
    Join Date
    Aug 2012
    Location
    Missouri
    Posts
    2,152
    Very nice Derek. The grain patterns in that wood is really something. Sometimes I can get caught up in just looking at the wood and not seeing the the furniture piece. All of your piece seems to come together with the wood and the gentle curves. Well done.
    Jim

  7. #7
    Join Date
    Feb 2004
    Location
    Perth, Australia
    Posts
    9,497
    Quote Originally Posted by Pat Barry View Post
    Nice work Derek, but what do you mean by starting on the top section? Is there going to be another box of drawers on top of this one?
    Hi Pat

    Not another box of drawers, but the top of the chest will have a cornice moulding. This will be hinged at the rear and lift up. Inside the lid will be a mirror.

    Regards from Perth

    Derek

  8. #8
    That is a beauty.

    Graceful simplicity.

  9. #9
    Join Date
    Mar 2015
    Location
    SE Michigan
    Posts
    3,225
    Just amazing. I keep going back to look at the dovetails that match into the adjoining drawer. My wife would probably get irritated, but I'd just have to leave the drawers open!

  10. #10
    Join Date
    Feb 2004
    Location
    Perth, Australia
    Posts
    9,497
    Thanks Phil. That is a woodworker speaking We all rate joinery, especially dovetailing, more highly than others. I would also leave the drawers open. My long-suffering wife just says, "That's nice dear, now get on with it".

    Regards from Perth

    Derek

  11. #11
    Join Date
    May 2015
    Location
    NJ
    Posts
    1,412
    She's coming along quite beautifully. Wonderful craftsmanship.

  12. #12
    Join Date
    Feb 2004
    Location
    Perth, Australia
    Posts
    9,497
    Quote Originally Posted by Kees Heiden View Post
    You also did a great job in selecting the grain patterns. Hats off.
    Thanks Kees. The figure was both a source of pleasure and frustration. I love the wildness of it. On the other hand, it was important to achieve a flow from board-to-board, and I only had just enough to make these drawer fronts. If I screwed up one, I would have had to start all over again. The Jarrah fronts were also difficult to work. Very hard wood, with grain that went all over the show - reversing ... even end grain showing through. Planing these boards really demonstrated the value of the double iron as they were less affected by grain direction. It was necessary to scrape at the end since I needed to level small areas, and fortunately the scrapers worked very well.

    Traversing with a LV Skew Block plane to level the faces ..


    Followed by a HNT Gordon palm smoother (60 degree bed) ...


    This is the type of tearout from this plane (which is a fantastic very small smoother) ..


    Removed by scraping ...


    Then sanded (!) to remove marks (this is a Mirka Abranet hand sander, using dust extraction - I hate sanding, but this excels) ...


    And finally scraped for a fine, burnished finish (you can distinguish the scraped from sanded sections) ..


    Lastly, two coats of White Shellac (by Ubeaut) to finish.

    Regards from Perth

    Derek

  13. #13
    Join Date
    Feb 2011
    Location
    Carlsbad, CA
    Posts
    2,230
    Blog Entries
    2
    Derek, I always find your work super impressive. Your lingerie chest however is truly "next level" – admittedly a descriptor that that is overused, but IMHO truly applies to this piece!


    I love the "rhythm/balance" of the curves in the overall shape. The execution of the bowed drawer fronts, angled dovetails, the matching of the grain pattern and the brilliant, finished surface you achieved with such hard, interlocking wood are collectively fantastic.


    Dude, you absolutely killed it with this one! I really look forward to seeing the finished chest.


    Thanks again for taking the time and effort to post the photos and descriptions, and also for the inspiration to aspire to achieving the highest standards of design and execution!


    All never be able to do work like yours, but having the opportunity to follow this build gives me the encouragement to at least try.


    All the best, Mike

  14. #14
    Join Date
    Apr 2006
    Location
    Tucson, Arizona
    Posts
    855
    Derek, that is a fantastic looking piece.
    Lori K

  15. #15
    Join Date
    Feb 2004
    Location
    Perth, Australia
    Posts
    9,497
    Mike

    Thank you for you kind words. This piece certainly has been the "next level" for me, and I am unsure that many would understand why, and what is involved. I am reminded that I have not described as much of my processes as I usually do, partly because there were two builds going (Brian's was the other), and his was going so well and was so interesting (and while also a chest of drawers, it was quite different), that I just posted updates of where I was at.

    However, I have been asked for details on other forums, so I will cut-and-paste some of the information I wrote there. Understand when some comments appear to be repeating myself:

    I was asked about the sanding - why did I do it and why the grits I chose (since they jumped tradition sequence choices) ...

    I did a lot of planing throughout with a double iron. This planed against the grain without tearout, leaving a good finish. It still required some scraping to produce an even surface ...


    It is relevant to clarify that the aim of the last session was to level (make coplanar) the 8 drawer fronts. Although I worked to lines traced from a template I used for all the drawers, it is not possible to produce exact replicas with hand planing. There will always be some variation. This is most noticeable where the drawers join, where the levels did not match. In other words, the drawer fronts required fine tuning. Some needed a little removed in spots, and others (such as displayed) required flattening across the width.

    The small HNT Gordon Palm Smoother came out now to concentrate on smaller sections. For the most part it did a good job, but it was obvious when it hit reversing grain - as one expects not just from Jarrah, but also as the boards are bowed with the grain, effectively altering the grain direction. That was when the coarse scraper came out. This was smoothed off with a card scraper, then sanded, and then scraped again. (I chose not to explain this before since it sounded more complex that I imagined anyone would want to hear).

    The sanding I did was with a hand block, NOT a power sander. It was used to refine the surface.

    The sanding was quick: I ran through 120/220/400 grit. The Abranet grits are amazing. With the vacuum cleaner connected, it is extremely efficient. There is no waste dust to clog up the sander to slow things down, and an Abranet sheet, itself, lasts and lasts.


    But even 400 grit is not as clear as the scraped finish I showed earlier (below again), and the reason why I scraped after refining the surface with sanding.


    My preference when sanding is to roughly double the next grit in the sequence. Consequently, I went 120/220/400. The Abranet/Mirka mesh is superb. It lasts many, many times longer than anything I imagine you have used. You owe it to yourself to try out what I show here. I think that you will be so impressed that you will not go back. It is not expensive. The sander was around $25. The Abranet mesh stays sharp, and you can jump grits as I do.

    I try to do as much with a plane as possible. If it was possible, all would be done with a plane. Sometimes a scraper is added. Rarely is a sander (I have a Festools ROS in a cabinet that has not been used in a decade. Indeed, mine is called a Festo, the name that predates Festool). The Mirka/Abranet combo is a new addition to the tool chest, purchased at the end of last year, and the plan was to use it for this very situation.

    The situation is having to refine a curved drawer front. A flat drawer front is a different kettle of fish - a plane has no difficulty maintaining registration with the grain over an end. The problem with a curved face is refining the ends of the drawers without rolling the edge. I want crisp ends. Think of a handplane on a curved surface being like a round bottomed spokeshave on a flat surface. It is difficult to maintain registration. It is even harder to smooth drawer ends with a scraper.

    A flat and long sander can cover the ends and does not lose registration. The ends of the drawer stay crisp.

    Regards from Perth

    Derek

Posting Permissions

  • You may not post new threads
  • You may not post replies
  • You may not post attachments
  • You may not edit your posts
  •