Originally Posted by
Derek Cohen

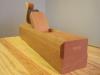
Vintage mortice chisels are often a little rusty in the wild. They get cleaned up, but the attention is typically given to cleaning off the rust and ensuring the back of the bevel is flat. What is missed is that the back of the blade is used for about 2" of its length, and that the lands shave the side walls of the mortice when the chisel is worked back-and-forth. It is not advisable to restore the lands by honing the sides of the blade, as this will alter its dimensions. Some light work on a diamond plate can be done to smooth away irregularities, but mainly the work is done by flattening and polishing the first 2" of the back of the blade. This is what I do with the modern mortice chisels I have (all mine are based on the Oval Bolstered design). All I can add is that the difference between a mortice chisel with sharp lands and one with dull lands is like night and day.
Derek, I agree with you that it's better not to mess with the lands too much, if it can be helped…but I've had several chisels where width was actually a bit less at the tip than up an inch or two. Obviously, a chisel like that will be bind, and has to be fixed. It's usually not that big a deal to alter the dimensions, since old pigstickers are rarely dead-on .250", .375", or whatever dimension we were hoping for! As I'm sure you have encountered! 
My 5/16" mortise chisel started as 3/8 chisel. The width was tapered the wrong way, and it had a hunchback of Notre Dame-like bulge halfway up. I heated it to orange, forged it flat, annealed it, rehardened and tempered it (the tempering took two tries), then reground all four sides.
I would not recommend this course of action to anyone! ")
"For me, chairs and chairmaking are a means to an end. My real goal is to spend my days in a quiet, dustless shop doing hand work on an object that is beautiful, useful and fun to make." --Peter Galbert


 Reply With Quote