Looks nice Derek,hope you get it finished this year.You have put so much work into this one.Evetually your going to have to let it go.
Beautiful piece.
Aj


 Contributor
Looks nice Derek,hope you get it finished this year.You have put so much work into this one.Evetually your going to have to let it go.
Beautiful piece.
Aj
Contributor
Beautiful work and thanks for sharing it Derek.
Bob
Member
Great work, that top works well with the rest of the chest.
 Contributor
Excellent results!!! Nice work!!!
Jerry
 Member
Excellent Work! Thanks for Sharing
Gary
 Member
Well, it's about time you finished it!
Just kidding, nice work, Derek.
Jeff
 Member
Looks great Derek, congratulation on reaching the finish line. The catch is top shelf for sure (pardon the pun).
Best,
C
"You can observe a lot just by watching."
--Yogi Berra
Member
Well done. I like the lid stay. What did you use for finish?
In your camera you can change the white balance. Normally the Auto white balance does a pretty good job, however in situations like this you end up with too blue of a hue as you have noticed. You will want to select the type of lighting that you are using, whether it's Incandescent or Fluorescent before taking the photos.Originally Posted by Derek Cohen

It's also easily corrected afterwards, regardless if you shoot in RAW or not. Most basic photo editing programs can do this, and have 2 sliders to control it. One slider goes orange-blue and the other goes green-magenta. I'd bump the orange-blue one towards the orange side a bit until it looks correct to your eye.
 [OP]
Contributor
[OP]
Contributor
Thank you all for the kind words, and suffering through my many posts over so long (as you remind me, Jeff!). The real reason this has dragged out is because my next project is the paint the house and build new kitchen doors ...
Jeffrey, the finish for the Makore caracase was Livos oil (from Germany) and the Jarrah drawers (inside and out) was UbeautWhite Shellac (from Australia). All then waxed.
Using Photoshop Essentials, I removed the blue rinse on a few pics, and this came up ...
Regards from Perth
Derek
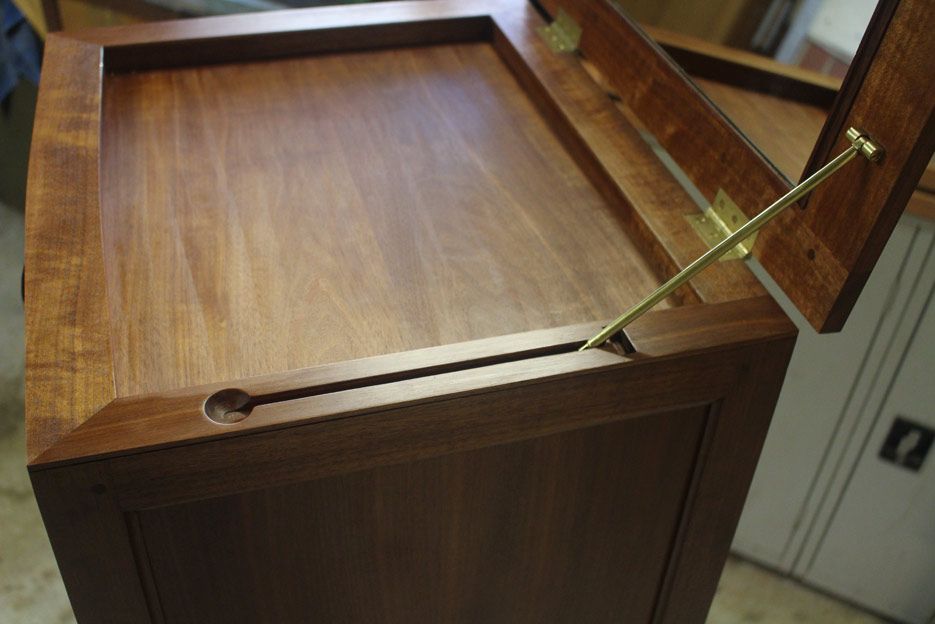
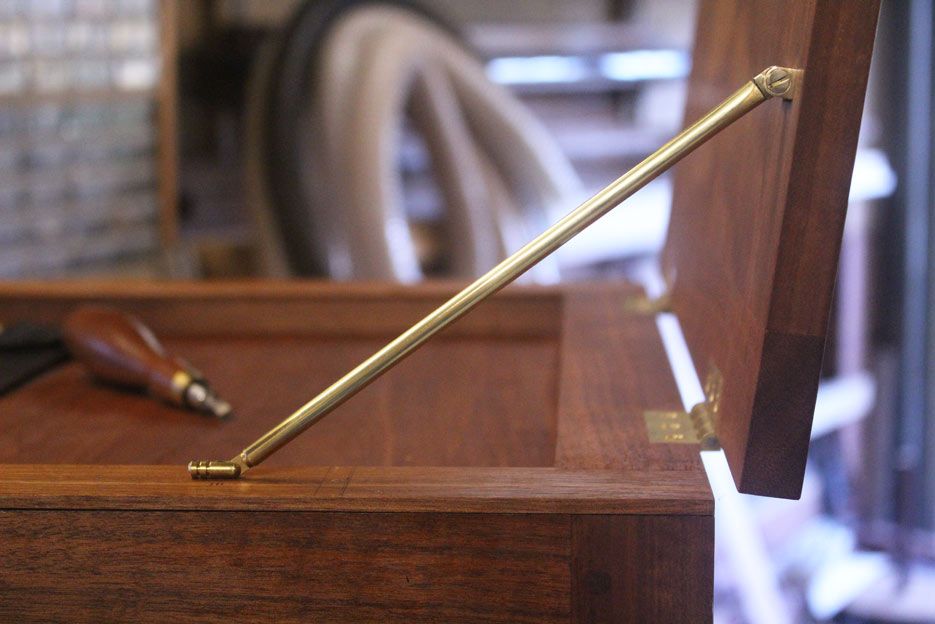
The hinges for the top are heavy-duty Brusso butt hinges that have a built-in stop at 95 degrees. Holding up the top and mirror is not a problem - my concern was to ensure the lid did not fall down! I searched for months for a suitable brass stay, but could not find one anywhere. The problem was that it needed to fit into a narrow space, and all the ones I looked at needed more room than I had. In the end I designed and built my own.
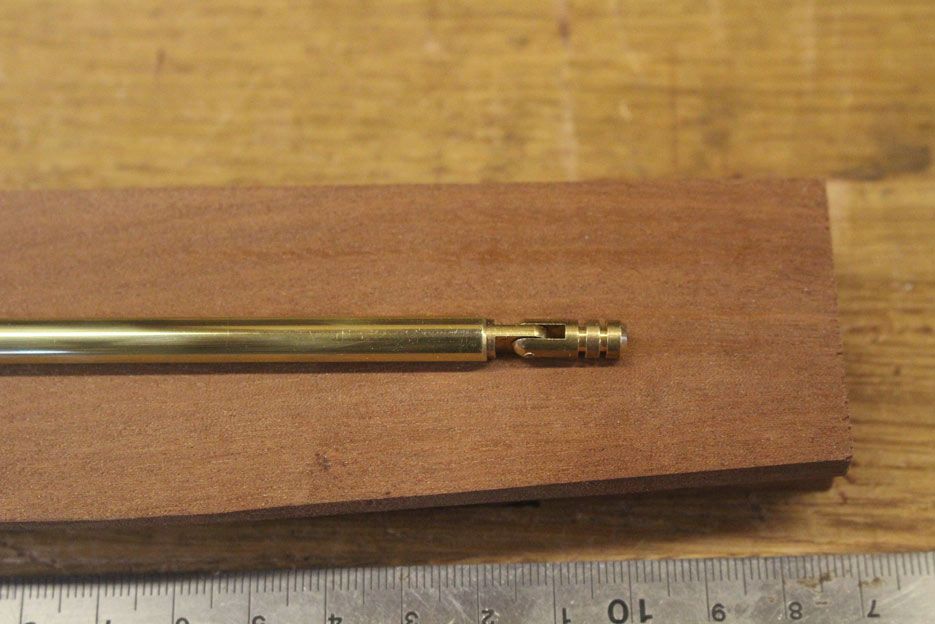
A brass bits-and-pieces, reshaped, fitted together ...
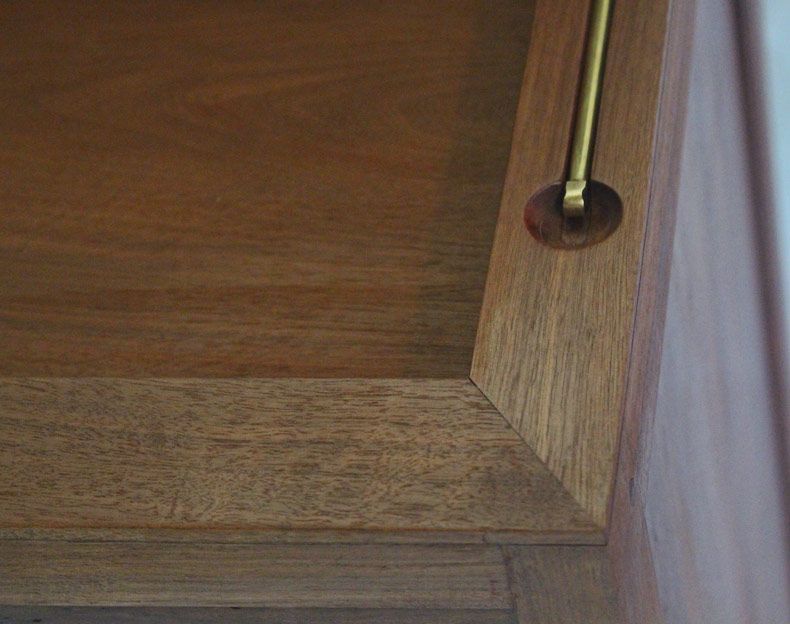
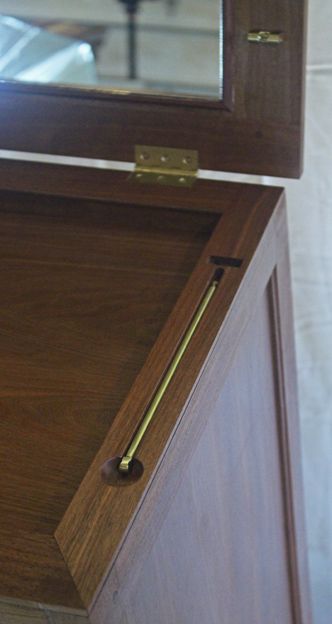
The stay and catch are french fit into the top. There is a finger hole to access the head, then swing it over and into the catch. It works really well.
And one last photo. Apologies for the gruesome person in the background
I am now working on the last part of the Lingerie Chest: sliding jewellery trays in the top drawer.
Regards from Perth
Derek[/QUOTE]
Derek,
This is a truly gorgeous piece. Your work is always superior, but IMHO, all the elements of this piece are exceptional, both individually and how they fit together: design/form, selection of wood figure/Grain for each piece and of course the execution. I'm sure Lindy will be very happy and I'm personally inspired to aim for a higher standard.
BTW, I love the way you casually toss off: "I searched for months for a suitable brass stay, but could not find one anywhere. The problem was that it needed to fit into a narrow space, and all the ones I looked at needed more room than I had. In the end I designed and built my own". Really? I just couldn't find what I needed so I built my own! Dude that is totally next level!!!
In all sincerity, I've learned a ton from you and your work and I'm grateful you share your work here on SMC and on your website.
That said, I've been married for 30 years and at the risk of being completely impertinent, I'm thinking "Lingerie chest" - Fantastic idea – couldn't be a better win/win! I need to put one of these the top of my project list!
Best, Mike
[OP]
Contributor
Thanks Mike. That is praise indeed.
I probably have the largest range of brass stays in the history of mankind, collected in the course of research ... Oh, I think that will do it! Cha-ching (sound of me paying for another stay) .... Damn, too large to fit!
Originally, I had planned to situate the stay to the right side and inside the tray. This has a depth of about 1 1/2". It was this that was too shallow for all the stays I come across. Here is what I came up with ...
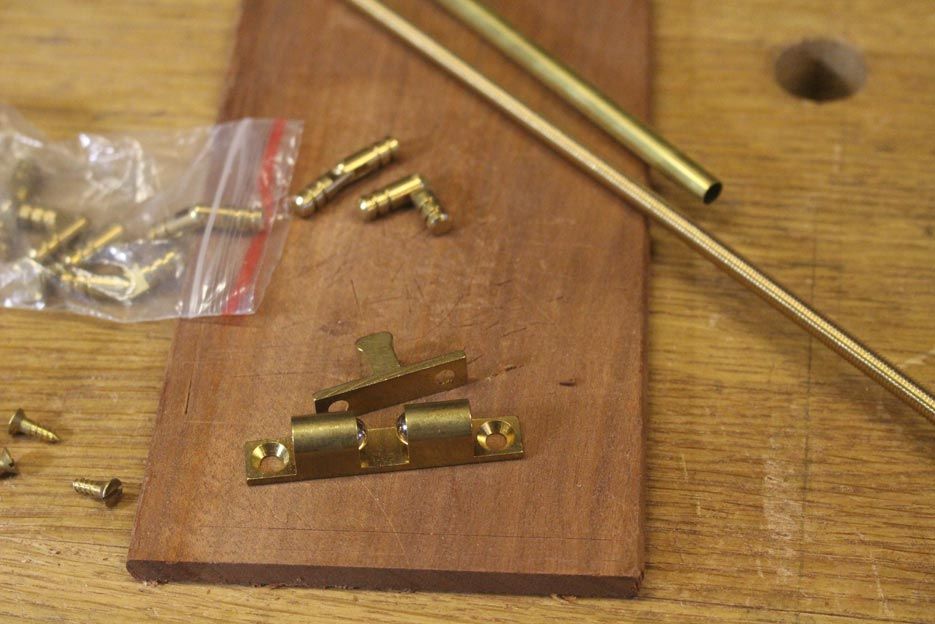
I was wandering around the local hardware store looking for inspiration when an idea formed around these door closers (front) and (at the rear) box hinges ..
I managed to find brass pipes with a 5mm hole and 5mm brass thread. The brass thread fitted the pipe to create a strong brass rod.
The "catch" (female) was modified: the wings with screw lugs were removed (needed to reduced the width and make a neater fitting), a screw hole was drilled in the centre, the springs were removed and shortened (re reduce tension), and the case ground back by about 2mm each side.
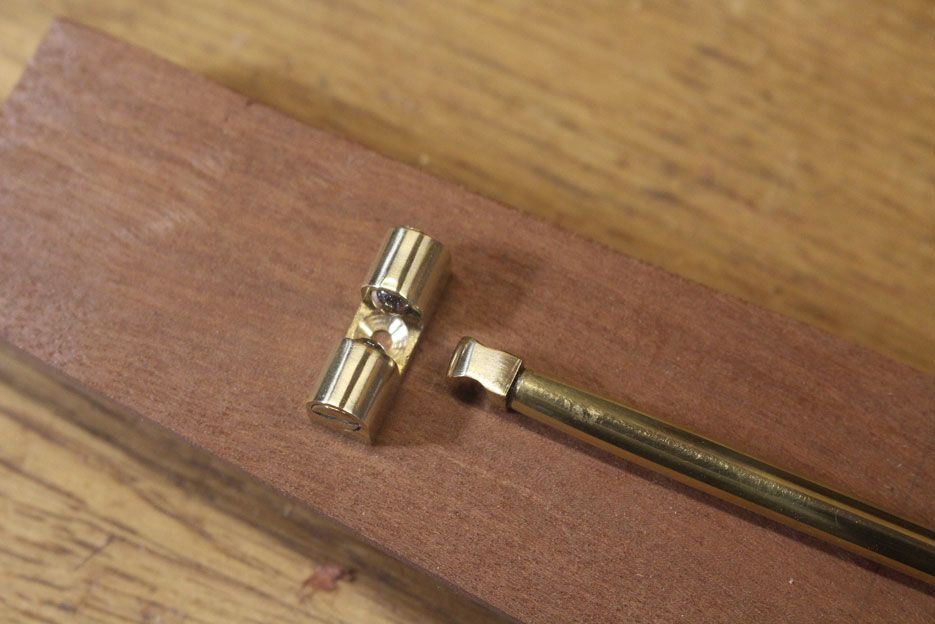
The "lug" (male) was also modified: shortened and rounded (as it needed to fit at an angle. The existing square shape only permitted entry if all parts were square with one another). The brass thread was tapped into the lug ....
Here is the end with the box hinge ...
This was also 5mm diameter .... see how it was meant to be?
Once the lower section was epoxied together, the lid was morticed for the catch (to prevent it moving on the single screw) ...
Once this was done, the stay was attached (clicked in), and the position for the pivot could be marked for drilling ...
And the rest (drilling, grooving and morticing for the stay) is, as they say, history.
Regards from Perth
Derek
Last edited by Derek Cohen; 06-08-2016 at 4:11 AM.
 Posting Permissions

 Reply With Quote