Page 8 of 18 FirstFirst ... 456789101112 ... LastLast
Results 106 to 120 of 265

Thread: 2nd Build (first) - CNC Router

  1. #106
    Join Date
    Jan 2012
    Location
    NW Louisiana
    Posts
    894
    Quote Originally Posted by Bruce Page View Post
    Is the case steel or aluminum? If aluminum, those holes would be a perfect job for a Unibit.
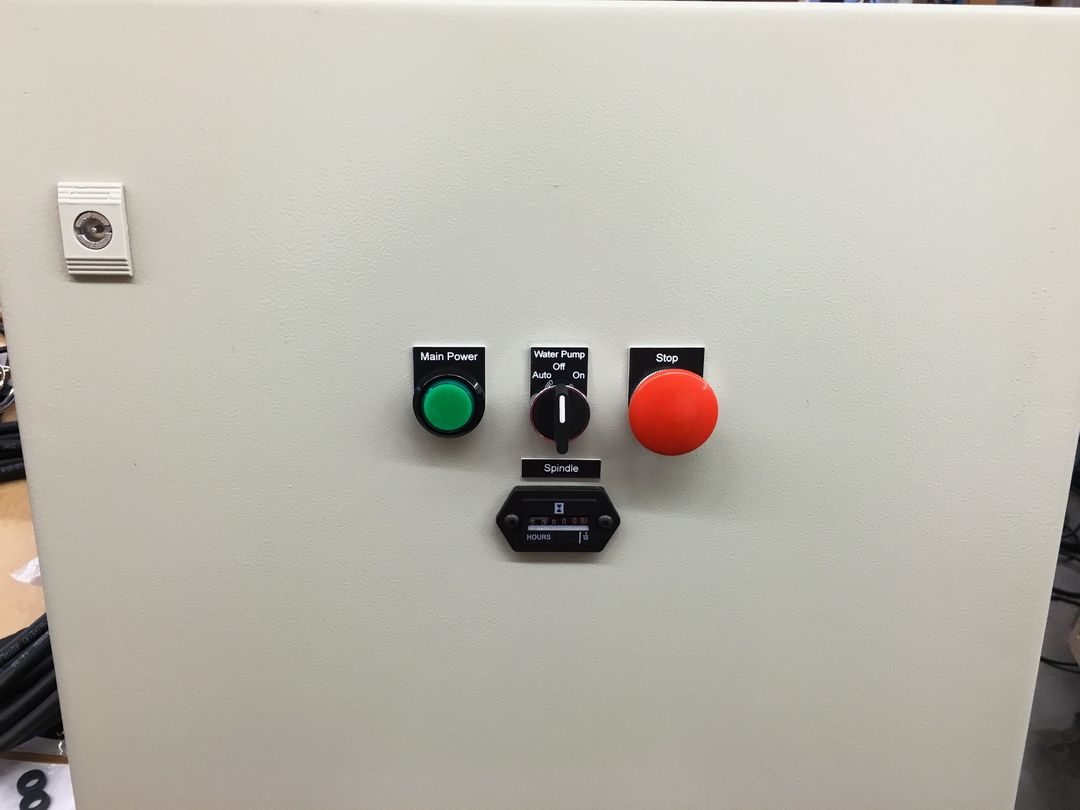
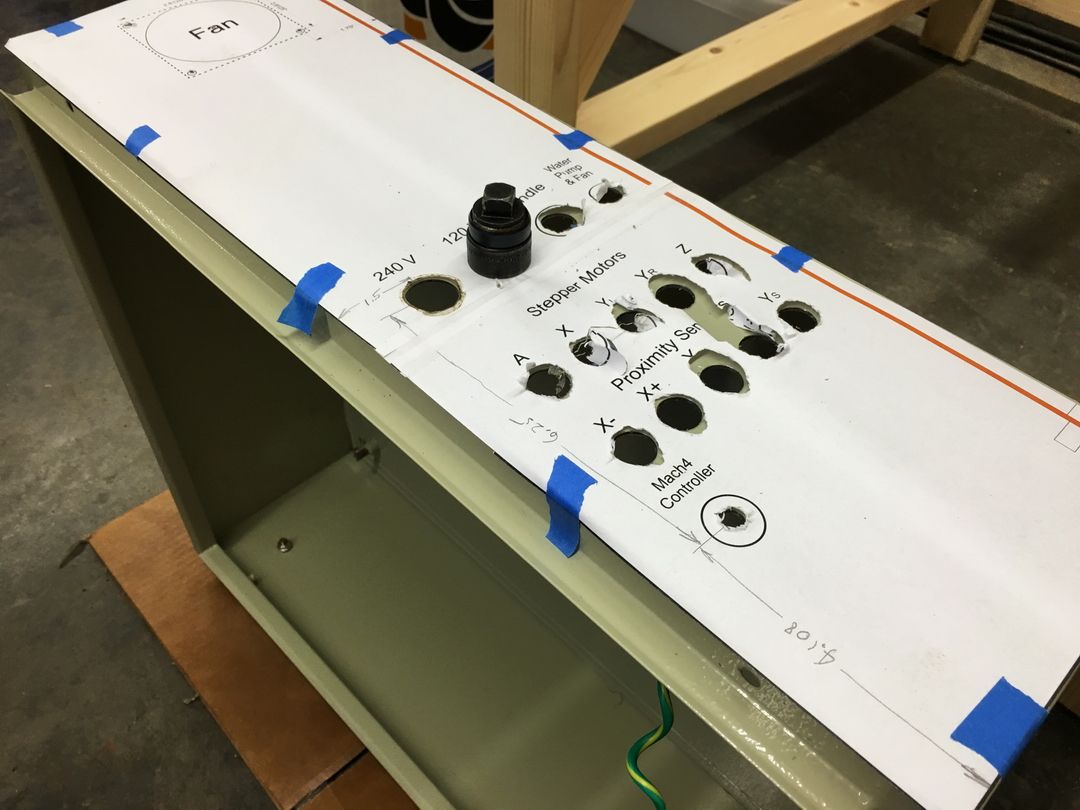
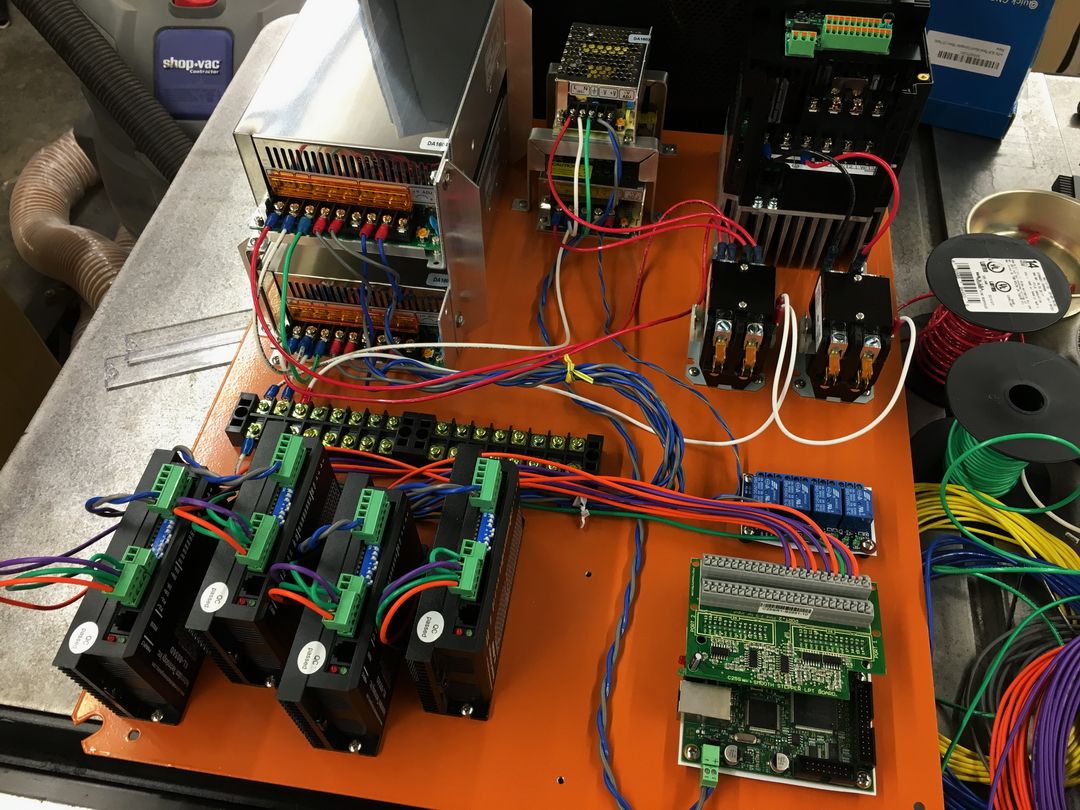
    No, ugh!! It's 16 gauge steel, so 1/16" thick and fairly hard, at that. I wish it was aluminum, though. I have a set of Greenlee punches for the 1/2" conduit holes (7/8" dia.) but the holes for the 4 and 5 pin connectors are 5/8" so I'm going to have to get creative on those.
    David
    CurlyWoodShop on Etsy, David Falkner on YouTube, difalkner on Instagram

  2. #107
    Join Date
    Jan 2012
    Location
    NW Louisiana
    Posts
    894
    I used a homemade 5/8" brad point drill bit to cut the holes for the 4 and 5 pin connectors and drilled a 3/8" hole to use the Greenlee chassis punch on the 1/2" conduit holes (7/8" dia.). The friend who brought his engine lift over to lift this onto the stand has the Greenlee hydraulic kit and that's pretty nice. For these small holes I just used my manual Greenlee although I have the ball bearing version so it's a piece of cake on this 16 gauge steel. I have some larger holes to make for switches in the door and will probably use the hydraulic punch on those.

    Greenlee hydraulic punch -


    Greenlee manual punch -


    All connectors set into place -


    More later - thanks for following and commenting!!
    David
    David
    CurlyWoodShop on Etsy, David Falkner on YouTube, difalkner on Instagram

  3. #108
    Join Date
    Feb 2003
    Location
    In the foothills of the Sandia Mountains
    Posts
    16,647
    You should get some label decals made up for the box. That would be cool.
    That punch is way better than any Unibit!
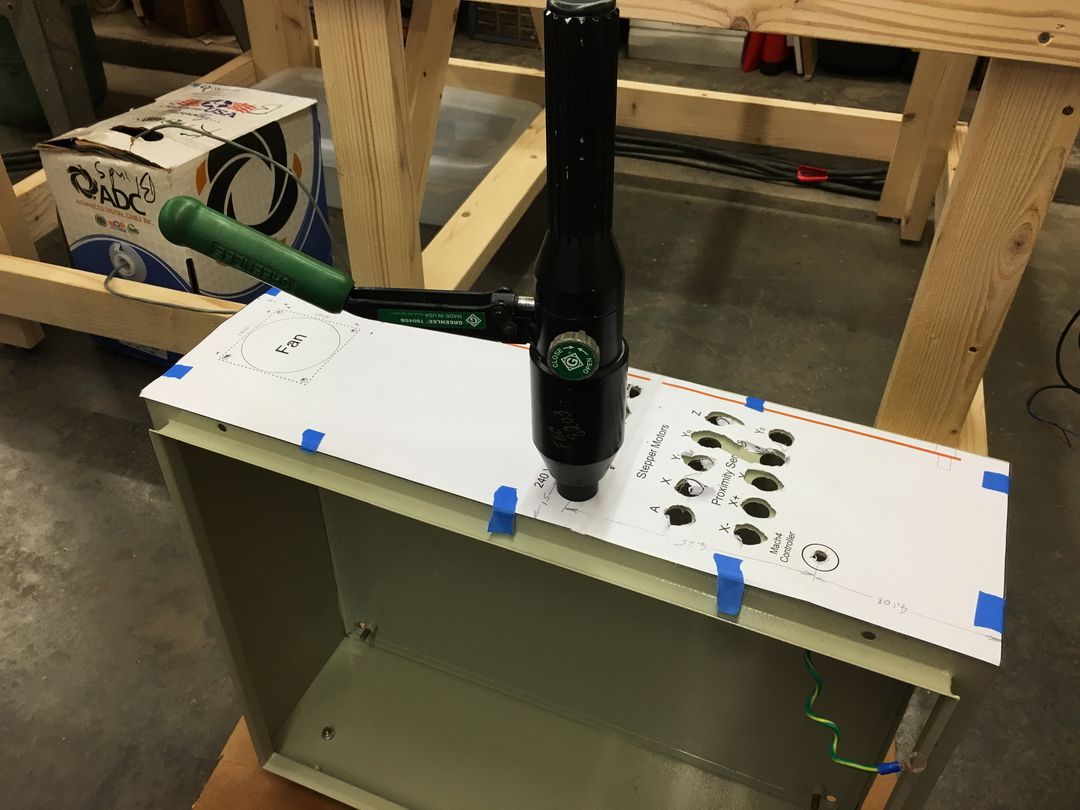
    Please help support the Creek.


    "It's paradoxical that the idea of living a long life appeals to everyone, but the idea of getting old doesn't appeal to anyone."
    Andy Rooney


  4. #109
    Join Date
    Jan 2012
    Location
    NW Louisiana
    Posts
    894
    Quote Originally Posted by Bruce Page View Post
    You should get some label decals made up for the box. That would be cool.
    That punch is way better than any Unibit!
    Yes, that punch is definitely next level stuff! Initially I will use matte finish clear labels that I print on my laser printer but may do something else later. For the switches on the front panel (door) I'm having custom legend plates cut by a laser shop. I'll probably get those done next week.
    David
    CurlyWoodShop on Etsy, David Falkner on YouTube, difalkner on Instagram

  5. #110
    Join Date
    Jan 2012
    Location
    NW Louisiana
    Posts
    894
    Spent a little time on this Labor Day making a bracket and mounting a box for the main E-stop switch. I don't have any metal working tools other than a drill press so I'm pleased with the results of this little foray into metal working. This is a wet location single outlet box from Lowe's and since I had some Ferrari yellow I thought that would be a good color to paint the box. Then I baked it in the oven for a while at 170° and let it set - seems pretty tough. And I got suitably dressed down for smelling up the oven so I promised not to let it happen again (today)...

    At some point after I get the CNC up and running I'll make little aluminum spacers to replace the 6 washers I used to space the bracket out far enough so it doesn't hit the proximity sensor. It's in close 'proximity' to the sensor but doesn't touch it...

    I'll have a second E-stop mounted in the same type box but the second one will be on a cable and free to move around.

    Bracket back side slides over bolts that can be removed to put sand into the frame if I needed additional weight (like 500 pounds isn't heavy enough!!) or if I need to control resonance in the stepper motors -


    I mounted this high enough that I don't think I'll accidentally lean into it with my hips or bump it walking by and because it's square 1/16" wall tubing it is very stout, doesn't budge when I hit it -


    I'll bring the cable up from the open bottom of the tubing and into the box through this grommet to protect the cable from the aluminum edges.


    Back side of the bracket and switch -
    David
    CurlyWoodShop on Etsy, David Falkner on YouTube, difalkner on Instagram

  6. #111
    Join Date
    Oct 2006
    Location
    Bloomington, IL
    Posts
    6,009
    For folks that like the greenlee hydraulic punch setup - The harbor freight hydraulic setup uses the greenlee punches right out of the box and is 1/4 the price.

    Dave - you conside a VistaCNC P2S CNC pendant (cheaper on Ebay than their site BTW) by chance? Built in E-stop, a MPG (Machine Pulse Generator), as well as software and job control all on pendant.
    Last edited by Mike Heidrick; 09-05-2016 at 10:58 PM.
    Glad its my shop I am responsible for - I only have to make me happy.

  7. #112
    Join Date
    Dec 2004
    Location
    Richmond, TX
    Posts
    409
    David,

    Everything is looking very nice. A question about the bolt access for belt adjustment for the X axis, it looks like the z axis is in the way. Is there access to this bolt?

    Regards!
    Ed

  8. #113
    Join Date
    Jan 2012
    Location
    NW Louisiana
    Posts
    894
    Quote Originally Posted by Mike Heidrick View Post
    For folks that like the greenlee hydraulic punch setup - The harbor freight hydraulic setup uses the greenlee punches right out of the box and is 1/4 the price.

    Dave - you consider a VistaCNC P2S CNC pendant (cheaper on Ebay than their site BTW) by chance? Built in E-stop, a MPG (Machine Pulse Generator), as well as software and job control all on pendant.
    I've seen a few people using a pendant but haven't really embraced that yet, Mike. I have also seen some people using a PlayStation or Xbox type of wireless control and I would prefer wireless over wired but not planning on using either at this time - I just need to get this machine running! Ugh, every time I turn a corner I have to order something else or run to Lowe's. LOL! When I walk into Lowe's they say, 'Hi, David, welcome back!'

    Quote Originally Posted by ed vitanovec View Post
    David,

    Everything is looking very nice. A question about the bolt access for belt adjustment for the X axis, it looks like the z axis is in the way. Is there access to this bolt?

    Regards!
    Ed
    Good catch, Ed. When the machine arrived it had an SHCS bolt and no, it wasn't accessible at all. But Nate sent a hex head bolt when he realized I wouldn't be able to get an Allen wrench into the SHCS bolt and has made the change on all the Saturn models at this point. It's easy now with either an open end or box end wrench.
    David
    CurlyWoodShop on Etsy, David Falkner on YouTube, difalkner on Instagram

  9. #114
    Join Date
    Jan 2012
    Location
    NW Louisiana
    Posts
    894
    Started wiring the control panel - FINALLY!! I did a fair number of searches on proper wiring color code for the different voltages and flavors of electrical current on this panel - AC hot, AC switched hot, AC hot from another source, neutral, ground, DC, DC common, 120/240 single phase, three phase, etc. - and I'm here to tell you there are many, many different 'standards' depending on the type of panel, industry, environment, and lots of other variables. So I did the best I could for code, meaning I kept searching until I found one that closely matched the wire colors I had on hand and then modified 'the code' to fit the exact colors I had on hand.

    So yes, to those who may want to send me their version of 'proper', I am aware a small portion of what I've done may not be perfect so I can post the photos in B&W if that's better...

    Somewhere under all this is a table saw that hasn't been used in a couple of weeks because it has become an electrical workbench -


    Probably a little past half finished; ignore the temporary ties but I needed to keep some of these sort of grouped for running the other wires. The AC hot wires are 14 AWG, the DC and control wires are 18 AWG, and the wire ends have been tinned where they go into the C25S board on the ESS -
    David
    CurlyWoodShop on Etsy, David Falkner on YouTube, difalkner on Instagram

  10. #115
    Join Date
    Jan 2012
    Location
    NW Louisiana
    Posts
    894
    After getting all the wiring completed for power on the panel it was time to test and see if all was good. Obviously there is still a lot to do; still have to wire the stepper motors, proximity sensors, fans, etc. but at this point I needed to know that my latching circuit held the contactor closed and that all the power supplies were at the right voltage and that the stepper drivers and ESS powered up ok.

    So rather than just tell you that it worked I videoed the first power up so if something blew either I or the investigators could go back and see what happened (really was the first, no 'pre-test' before the video). Since the video I have adjusted all the power supplies to their correct voltage.

    David
    CurlyWoodShop on Etsy, David Falkner on YouTube, difalkner on Instagram

  11. #116
    Join Date
    May 2007
    Location
    Don't Mess With My Texas!
    Posts
    128
    In my world, I would have called that a "suicide" power up.

    Too late for you, but I never hooked power supplies up unless they have been checked with nothing connected to the outputs. Just a lesson I've learned.
    Paul
    These words are my opinion, WYLION. Any resemblance to truth or fiction is accidental at best.
    "Truth lies dormant in our future history." ― Paul Lawrence LXXI


  12. #117
    Join Date
    Jan 2012
    Location
    NW Louisiana
    Posts
    894
    Quote Originally Posted by Paul Lawrence View Post
    In my world, I would have called that a "suicide" power up.

    Too late for you, but I never hooked power supplies up unless they have been checked with nothing connected to the outputs. Just a lesson I've learned.
    And it's a good lesson, Paul. I actually did put power to the PSU's right when they came in to make sure they weren't DOA but that was a couple of months ago. So I knew they would power up but this was the first time I had wires connected. It was a fairly well planned initial power up although I couldn't get past jumping when the contactor closed, partly because it was darker in the shop than it looked and I was blocking what little light there was coming in and partly because I knew it would startle me. I tested it later and put the wire in place before I powered it up so that was a bit safer and no jumping on my part.
    David
    CurlyWoodShop on Etsy, David Falkner on YouTube, difalkner on Instagram

  13. #118
    Join Date
    May 2007
    Location
    Don't Mess With My Texas!
    Posts
    128
    I actually did put power to the PSU's right when they came in to make sure they weren't DOA
    David, you sell yourself short in the video. Everything looks good!

    The only thing that would be a negative now is if you bundled your wire with that spiral plastic crap the auto companies use. Not conducive to mistakes or repairs. Just use plastic ties ever-so-often. It won't really matter if the bundle bulges a little in places.
    Paul
    These words are my opinion, WYLION. Any resemblance to truth or fiction is accidental at best.
    "Truth lies dormant in our future history." ― Paul Lawrence LXXI


  14. #119
    Join Date
    Jan 2012
    Location
    NW Louisiana
    Posts
    894
    Quote Originally Posted by Paul Lawrence View Post
    David, you sell yourself short in the video. Everything looks good!

    The only thing that would be a negative now is if you bundled your wire with that spiral plastic crap the auto companies use. Not conducive to mistakes or repairs. Just use plastic ties ever-so-often. It won't really matter if the bundle bulges a little in places.
    Thanks, Paul!

    So I guess I need to take back the fluorescent green and orange spiral wrap, huh?

    For a short while I considered a mix of old and new by using the black lacing from days gone by and then thought about using Panduit but finally decided instead to use black ties.
    David
    CurlyWoodShop on Etsy, David Falkner on YouTube, difalkner on Instagram

  15. #120
    Join Date
    Jan 2012
    Location
    NW Louisiana
    Posts
    894
    Well, I finally made it to the switches for the door of the enclosure so I took my CorelDRAW file and headed over to my favorite laser shop, Bud's Trophy Case in Bossier City. They do excellent work and are so easy to work with - it's always a fun visit! I needed three switch plates cut and one label for the spindle hour meter. It took all of 10 minutes from loading the file to holding the finished items in my hand. There are a lot more things I could add to the door but for now this will work just fine.

    If you've never seen a laser running then you'll enjoy the short video.

    Next will be mounting the door and then wiring the switches. More later!!


    David
    CurlyWoodShop on Etsy, David Falkner on YouTube, difalkner on Instagram

Posting Permissions

  • You may not post new threads
  • You may not post replies
  • You may not post attachments
  • You may not edit your posts
  •