Originally Posted by
Stew Denton

Hi Michael,
This is the third time I have tried to respond to your post, having typed a complete response then hitting reply only to get "the website is not responding" and see it lost. For that reason, I will type one paragraph at a time and then save it. Well see.
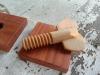
+1 on what John wrote on the handle. I would try solvent first, using the same ones he recommended and for exactly the same reasons. Give the solvent plenty of time to do it's job and don't be chency with it, use plenty. If the solvents don't do the job use a paint stripper, solvent type NOT water base. A small soft natural bristle brush, like the old natural bristle tooth brushes and a tooth pick are good for getting the old finish out of the cracks and crevices of the handle decorations. Use the solvent once, wiping it off with a paper towel after the old finish starts to get soft/liquefy. Repeat until it is completely gone, and then use paint thinner to clean the handle good afterword, at that point an old washcloth or part of an old towel is great for the last drying/cleaning. Putting it in a tray of the solvent and going after it with the soft brush is good. Allow it to dry thoroughly at this point.
Only then should you use sandpaper, and then only a SMALL piece of very fine, 220 at the most coarse end, and I use 320 some. You only use the sandpaper on the rough spots that need to be smoothed down or cleaned up. I use the small piece in hand and very lightly and STAY AWAY away from the handle decoration. A little very careful sanding goes a long way and you can't undue the damage done by a heavy hand.
Sometimes, however, a light sanding in necessary for the whole handle if it is badly weathered. If you don't you can end up with a handle that has the finish soaked into the weathered wood, and it can look almost black. Again USE a VERY LIGHT touch, I can't emphasize that too much, again if you damage the decoration on the handle with a heavy handed sanding approach, you can never put the wood back.
Once you are satisfied that the handle is ready to finish, again clean it with paint thinner, or as a second choice lacquer thinner, not mineral spirits. Wipe it dry with an old towel or wash cloth again. Let it dry THOROUGHLY.
At that point you can go with new finish. Spray lacquer or shellac are easier, but not as durable as polyurethane. I redid my first carpenters, a D-8, over 40 years ago, refinishing the handle with polyurethane, and the handle is still in looking really good. Tough stuff that polyurethane. I have used spray lacquer at times because it is easier.
On the blade, it is tough to get the pits clear of the black color. I took the advise of another poster, who wrote about using a small wire brush on the pits, using a very light touch and lots of strokes. His picture of a brush he had used for a couple of years showed NO BROOMING out of the bristles....use a touch that light. I took his advise on my planes, and use a lot of strokes back and forth. The idea is to let just the very tips of the bristles do the work. On a given pitted area, I go 100 back and forth strokes in one direction, then 100 back and forth strokes at 90 degrees to the first strokes, followed by 100 strokes at each of the two remaining 45 degree angle directions. You are beginning to get the idea that it is not a 15 minute job to restore a saw blade to make it look really nice again, at least if you do almost all of it by hand like I do. Even with the above, I can't get the black color out of the deepest pits. For that reason, I don't buy ones with very deep pits, if I want the saw to look good. For me its better to spend a few bucks more to save hours of cleanup time.
Some of the guys, like Steven, use a grinder with a brass bristle grinder brush, and this may be just as good or better, and it is a lot faster if you have such a set up, I don't.....yet. I also have a Dremel and tiny metal brushes, and have thought about trying it, but have not tried it yet so can't give a report as to how well the Dremel approach works.
One approach that I haven't tried but intend to is to use metal polish, from an auto parts place, work it down into the pits, and then work it over with a soft natural bristle brush, like a natural bristle tooth brush, if I can still find one. I plan to use plenty of the metal polish.
The metal polish is also a good way to spruce up the saw nuts in the handle.
I do use some sandpaper, but use it on one of the small hard rubber sanding blocks so the sandpaper won't cut into the etch as much. You want the sandpaper to hit the metal above the depth of the etch, but not to get down INTO the etch. Sanding is risky, however. Again, very fine sandpaper, I like 220 and finer. I also like the reddish brown Scotch Brite pads, but stay away from the etch with the Scotch Brite, it will get down into the etch and do damage. One thing I do while doing this process is to protect the Scotch Bright and sandpaper from the saw teeth, and I do this by putting the saw blade on a 2X10 or 2X12 plank, and clamp a piece of soft thin lumber right over the edge of the teeth, so the teeth can't hit the pad or sandpaper. This leaves the teeth dark, but after a little use, and a few sharpenings they will look fine.
After getting the blade looking acceptable with the above I use metal polish as the last step. A poster suggested using a wad of aluminum foil to scrub the blade with after you put a dollop of metal polish on the blade, and then rub it back and forth until the polish is almost or is actually dry and you are starting to see the metal shine behind the aluminum foil as you rub back and forth. The shine will just be in tiny spots that have been rubbed clean of the polish. I do that, and the metal polish will help it no end.
I have done a few saws, and if you are willing to put in the time you can have the saw look really nice. If it isn't pitted much it can give a nice silver color shine, and give a great reflection.
Is it worth it to do this, maybe only if you want the saw to look great. If you are only interested in having a good user, you can quit far short of some of the steps listed.
Stew


 Reply With Quote