Page 1 of 3 123 LastLast
Results 1 to 15 of 32

Thread: issues with Yeti and cermark

  1. #1
    Join Date
    Feb 2010
    Location
    New Albany, Indiana
    Posts
    47

    issues with Yeti and cermark

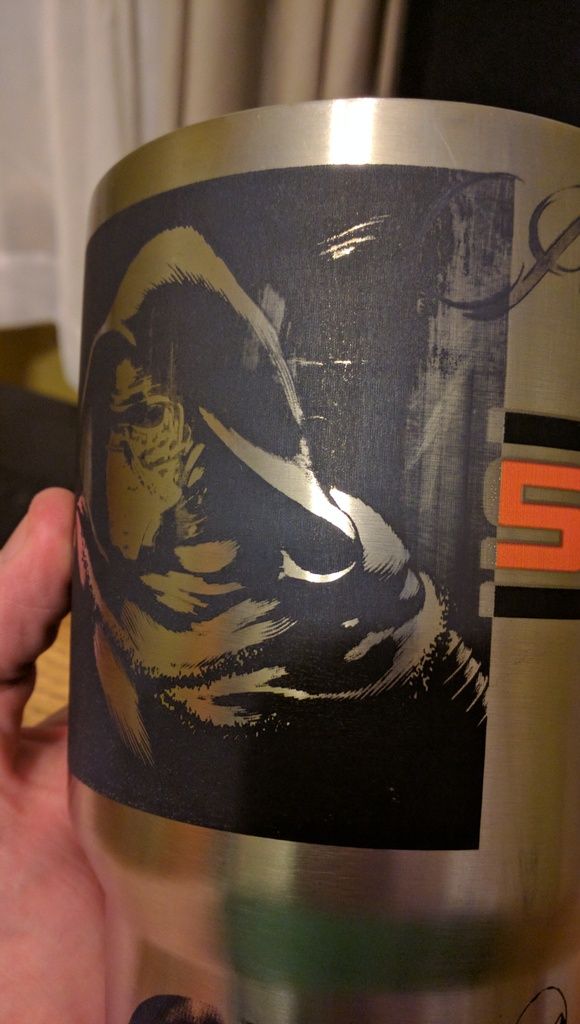
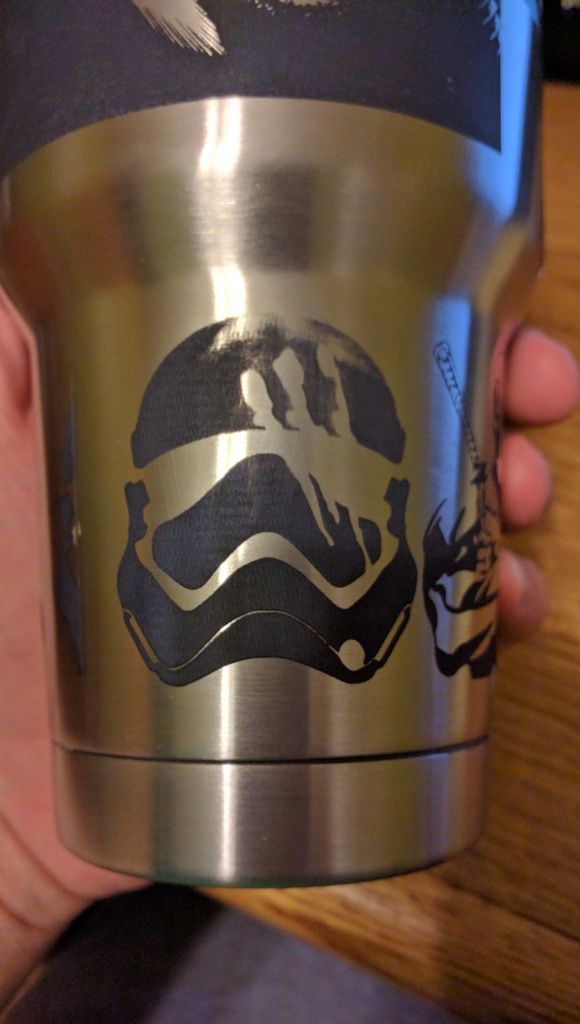
    I've been experimenting with cermark on a yeti cup and I'm it's rubbing off. I'm using a 30watt VLS2.3 and before I sprayed on the cermark from the spray can I cleaned the surface with isopropyl alcohol.

    First I followed I tried 100% power, 25 speed, 350 ppi. The images turned out well but when I rub on it, it begins to rub off


    So I started to read through the forums and saw most people typically go slower then what I was using and use higher ppi.
    This one is 100% power, 14 speed, 660ppi and I still get wipe off


    Is this something that can happen if I'm applying to much cermark?

  2. #2
    Join Date
    Jul 2014
    Location
    South Elgin, IL
    Posts
    217
    First let me say I have not done these mugs yet so I can't comment on your settings, however I wanted to mention something about your cleaning prep...
    You mentioned Isopropyl alcohol. This has less cleaning ability than Denatured alcohol. I would try Denatured alcohol on another spot, and see if that helps any. Also after cleaning avoid any finger/skin contact with the stainless steel in areas that will be cermarked and engraved. Also make sure the spray can is well mixed?
    Just covering the basics here...
    Materials Conversion Specialist
    I take perfectly good large pieces of stuff & turn them into smaller pieces having dubious value

    LASER: Trotec Speedy 300 30 Watt, CNC: Shopbot PRT, Vinyl Cutter: Summa Sign Pro T750
    Old School: a tool box full of brand new sign painting brushes from the 60's


  3. #3
    Join Date
    Aug 2006
    Location
    Suwanee, GA
    Posts
    3,686
    Do a search here and you'll find many threads that say the same thing about Cermark and how to get the best marks. It all comes down to preparation, application, and power/speed/dpi.

  4. #4
    Unless you have a 50W or better machine, you need to be @ 10 speed and 100 power. (and 300 or better resolution) Even @ 10 power the cermark will blacken like it's workign but wash off completely clean.

    When I apply Cermark by airbrus,h its a thin, even coat that is just a hair's width on this side of opaque. Doing this, I can't remove it. Period. I've sanded for ages and the mark is deep i the steel.

    I de-grease with acetone, then DNA because Yetis are too expensive to screw up.

    -Mak
    Epilog 40w Helix
    Hottronix MAXX 16x20
    WAYYYY Too much Siser HTM
    Tons of "will it laser?" scraps...

  5. #5
    On our 45W ULS laser, using the rotary, we engrave them at 100% power, 30% speed, 1000 PPI, and Image Density of 5. It won't come off at all. Trust me, I've tried Make sure your PPI is at 1000. If you are at 30W, you probably do need to be between 10-20% on the speed. A 2% change in speed can make the difference in sticking or not sticking, so you have to dial it in very well. Start with 15%, 100% power, PPI 1000, Image Density of 5 and see how that works and go up or down by 2% on speed from there.
    Lasers : Trotec Speedy 300 75W, Trotec Speedy 300 80W, Galvo Fiber Laser 20W
    Printers : Mimaki UJF-6042 UV Flatbed Printer , HP Designjet L26500 61" Wide Format Latex Printer, Summa S140-T 48" Vinyl Plotter
    Router : ShopBot 48" x 96" CNC Router Rotary Engravers : (2) Xenetech XOT 16 x 25 Rotary Engravers

    Real name Steve but that name was taken on the forum. Used Middle name. Call me Steve or Scott, doesn't matter.

  6. #6
    Suggesting speed numbers for someone to try is totally moot because every machine, even identical machines, are different.

    That said, this much is true: If Cermark isn't sticking, you're going too fast. Won't suggest a number, just keep going slower...

    And THAT said, in looking at your pictures and the marks I'm seeing, I'm inclined to think you're running these in halftone or error diffusion? If that's true, this is most likely your problem. ULS (and some others) do a great job with halftone engraving, but how it works is by reduciing the power on the fly to create the lighter areas. This simply doesn't work with Cermark, because the reduced-power areas won't fuse.. You can only get good Cermark results by running in black/white mode where the laser power never varies.

    If you ARE running a photo in halftone, you'll need to create a 2-color bitmap and run the machine in black/white.

    If you're already running in black/white, my only other suggestion in addition to slower speed would be to up the X-axis dots per inch resolution...
    ========================================
    ELEVEN - rotary cutter tool machines
    FOUR - CO2 lasers
    THREE- make that FOUR now - fiber lasers
    ONE - vinyl cutter
    CASmate, Corel, Gravostyle


  7. #7
    Join Date
    Apr 2015
    Location
    Austin, TX
    Posts
    590
    Only think I can think of other than the previous suggestions of: clean the surface, apply cermark correctly, and laser at the proper speed/power ratio is .... focus.

    Sometimes it's easy to forget to make sure the cup surface is level across all areas you plan to engrave; and to make sure you focus after everything is all set.

    Other than that, I'll just repeat what the others have said. If you are doing things properly cermark will not wipe off a Yeti or RTIC style cup.
    60W, Boss Laser 1630
    75W, Epilog Legend 24EX
    Jet Left Tilting table saw and Jet 18" Band saw
    Adobe Creative suite and Laserworks 8

  8. #8
    Spray (assuming the rattle can) means it goes on thick. This means you need to slow it down quite a bit. Foam brush or airbrush allow for a thinner application. This actually results in a better mark and better yield.
    Equipment: IS400, IS6000, VLS 6.60, LS100, HP4550, Ricoh GX e3300n, Hotronix STX20
    Software: Adobe Suite & Gravostyle 5
    Business: Trophy, Awards and Engraving

  9. #9
    Join Date
    Feb 2010
    Location
    New Albany, Indiana
    Posts
    47
    First off, thank you everyone for all the help, I honestly didn't think it would be this difficult to do things with cermark. I'm lasering a new one right now, its looking like a at least an hour and half to complete the engraving. Here are the steps I did this time.

    Used rubber gloves the entire time.
    -cleaned with lacquer thinner
    -cleaned again with denatured alcohol
    -shaked the cermark can for a solid minute
    -sprayed the lightest coat I could (unlike before I didn't have any runs)
    -Let it dry for a good 15 minutes
    -Although my other attempts were using 1 bit black and white files, I turned the driver to black and white only.
    -Power: 100
    -Speed: 4
    -PPI: 1000
    -image density: 6

  10. #10
    I would double check your artwork and make sure everything is solid black all the way thru. I'd also make sure the alignment is perfect from the L to the R. Last, check your can's serial# with the place of purchase, we had a bad batch from Laserbits/Cermark that wasn't bonding to the surface very similar to your finish.

  11. #11
    Join Date
    Mar 2014
    Location
    Iowa USA
    Posts
    4,485
    Frankly instead of practicing on a $35 mug find a sheet metal shop or other source of Stainless steel scrap and practice on that. If you go to right shop with a box of donuts in the morning they might let you have the shear or saw drops for free.
    Retired Guy- Central Iowa.HVAC/R , Cloudray Galvo Fiber , -Windows 10

  12. #12
    Quote Originally Posted by Jeremy Brown View Post
    First off, thank you everyone for all the help, I honestly didn't think it would be this difficult to do things with cermark. I'm lasering a new one right now, its looking like a at least an hour and half to complete the engraving. Here are the steps I did this time.

    Used rubber gloves the entire time.
    -cleaned with lacquer thinner
    -cleaned again with denatured alcohol
    -shaked the cermark can for a solid minute
    -sprayed the lightest coat I could (unlike before I didn't have any runs)
    -Let it dry for a good 15 minutes
    -Although my other attempts were using 1 bit black and white files, I turned the driver to black and white only.
    -Power: 100
    -Speed: 4
    -PPI: 1000
    -image density: 6
    Where did you come up with the 4% speed number? That's painfully slow. 90 minutes run time? I hope you aren't selling them! No need to engrave for 90 minutes. Do a 1/4" square with the settings. Adjust, do again, until you find the fastest possible setting where it sticks. Once you have that, you can engrave the whole image. 4% seems way too slow.
    Lasers : Trotec Speedy 300 75W, Trotec Speedy 300 80W, Galvo Fiber Laser 20W
    Printers : Mimaki UJF-6042 UV Flatbed Printer , HP Designjet L26500 61" Wide Format Latex Printer, Summa S140-T 48" Vinyl Plotter
    Router : ShopBot 48" x 96" CNC Router Rotary Engravers : (2) Xenetech XOT 16 x 25 Rotary Engravers

    Real name Steve but that name was taken on the forum. Used Middle name. Call me Steve or Scott, doesn't matter.

  13. #13
    Quote Originally Posted by Jeremy Brown View Post
    First off, thank you everyone for all the help, I honestly didn't think it would be this difficult to do things with cermark. I'm lasering a new one right now, its looking like a at least an hour and half to complete the engraving. Here are the steps I did this time.

    Used rubber gloves the entire time.
    -cleaned with lacquer thinner
    -cleaned again with denatured alcohol
    -shaked the cermark can for a solid minute
    -sprayed the lightest coat I could (unlike before I didn't have any runs)
    -Let it dry for a good 15 minutes
    -Although my other attempts were using 1 bit black and white files, I turned the driver to black and white only.
    -Power: 100
    -Speed: 4
    -PPI: 1000
    -image density: 6
    I highlighted the part where you 'turned the driver to black and white only'. I'm hoping that will help, I'm assuming then it WAS in halftone mode...

    As to your settings, 6 (max) density, if you're driver is like mine, is twice the lines per inch than 5 density, which means double the engraving time of 5...

    My old 25w ULS- 1997 machine- had a very narrow Cermark sweet-spot. It liked 100 power, 22 speed (22% of slow is pretty slow ), 5 on the density, and 800 on the PPI.
    This SS plate (one of 100+) was engraved at exactly these settings... there's no reason your machine can't get the same crisp, consistent results
    DSC01212.jpg
    ========================================
    ELEVEN - rotary cutter tool machines
    FOUR - CO2 lasers
    THREE- make that FOUR now - fiber lasers
    ONE - vinyl cutter
    CASmate, Corel, Gravostyle


  14. #14
    Join Date
    Feb 2010
    Location
    New Albany, Indiana
    Posts
    47
    Quote Originally Posted by Bill George View Post
    Frankly instead of practicing on a $35 mug find a sheet metal shop or other source of Stainless steel scrap and practice on that. If you go to right shop with a box of donuts in the morning they might let you have the shear or saw drops for free.

    I've learned that lesson the hard way. I did go out and buy 2 cheap yeti knock offs from walmart for 9.75 a piece but I will get me some scrap...thats a good idea


    Quote Originally Posted by Scott Shepherd View Post
    Where did you come up with the 4% speed number? That's painfully slow. 90 minutes run time? I hope you aren't selling them! No need to engrave for 90 minutes. Do a 1/4" square with the settings. Adjust, do again, until you find the fastest possible setting where it sticks. Once you have that, you can engrave the whole image. 4% seems way too slow.

    Actually it was 3 hour and 31 minutes to run. After wasting a cup before, I wanted to make sure it would work. I knew it was overkill but I needed to know if I could do it.
    This did give me some data
    -I know know my coverage before was just to much
    -I know that its not practical to do things this slow
    -I did a basic clip art on 1 side and a very fine detail on the other. I now know that fine detail is lost at those speeds and density
    -I also was concerned that the slight slope of the cup might make a difference due to the ULS rotary can not adjust for that and it didn't seem to affect it


    My next trail will be smaller squares with different setting to find my machine sweet spot

    Quote Originally Posted by Kev Williams View Post
    I highlighted the part where you 'turned the driver to black and white only'. I'm hoping that will help, I'm assuming then it WAS in halftone mode...

    As to your settings, 6 (max) density, if you're driver is like mine, is twice the lines per inch than 5 density, which means double the engraving time of 5...

    My old 25w ULS- 1997 machine- had a very narrow Cermark sweet-spot. It liked 100 power, 22 speed (22% of slow is pretty slow ), 5 on the density, and 800 on the PPI.
    This SS plate (one of 100+) was engraved at exactly these settings... there's no reason your machine can't get the same crisp, consistent results
    DSC01212.jpg
    Yeah, I wanted to go for broke and I followed your instructions and upped the density but I didn't realize how much it affected it time wise. my next will be just tring small squares with different setting to find my sweet spot

  15. #15
    Look around your shop. Surely you have some tools you could mark with your name or initials for practice. In 1997 I had a new 25 watt ULS machine and was able to do Cermark items with about the same settings Kev mentioned.
    Mike Null

    St. Louis Laser, Inc.

    Trotec Speedy 300, 80 watt
    Gravograph IS400
    Woodworking shop CLTT and Laser Sublimation
    Dye Sublimation
    CorelDraw X5, X7

Posting Permissions

  • You may not post new threads
  • You may not post replies
  • You may not post attachments
  • You may not edit your posts
  •