Results 1 to 9 of 9

Thread: Help me get organized and efficient in this LARGE project

  1. #1

    Help me get organized and efficient in this LARGE project

    Hello,

    I'm a relatively new woodworker though I have recently built a set of wall cabinets for my kitchen that came out quite nice. I'm into a more complex project now, the kitchen island. The wall cabinets were more simple in that I used pre milled wood and it was painted rather than stained.

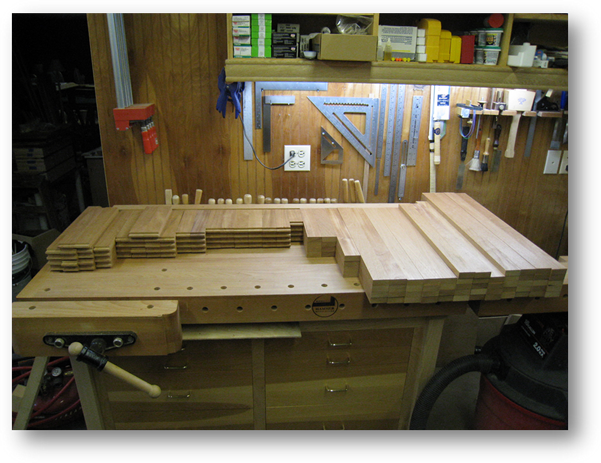
    I now have a hundred plus board feet of 1" S4S lumber in my shop ranging from 8-10" in width and 96+" long. With that I have over 90 pieces to make, those being 2" stiles and rails. Then there are the drawer fronts, the doors and the end panels to make. I'm wasting a lot of time bouncing around the shop.

    Where do you start? What is an efficient work flow for one guy?

    Let's talk about the rails and stiles first if that makes sense?

    I have straight lined about half of my boards and then ripped the other side to yield clean parallel edges on the two long sides. My thoughts are that the following steps are:

    Plane the boards down to a 1/16 of the finished dimension of 3/4".

    Cross cut the boards to proper lengths.

    Rip the boards to proper with, all of which are 2" wide.

    Cut dado's, tenons etc.

    Dry assemble and sand them.

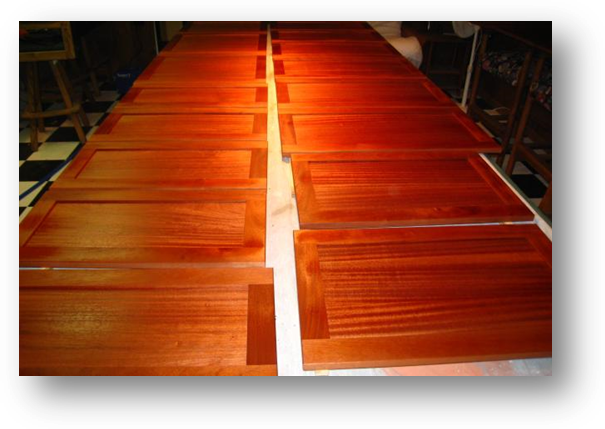
    Pull apart, stain and varnish one coat.

    Assemble and varnish additional coat(s).


    As for the panels:

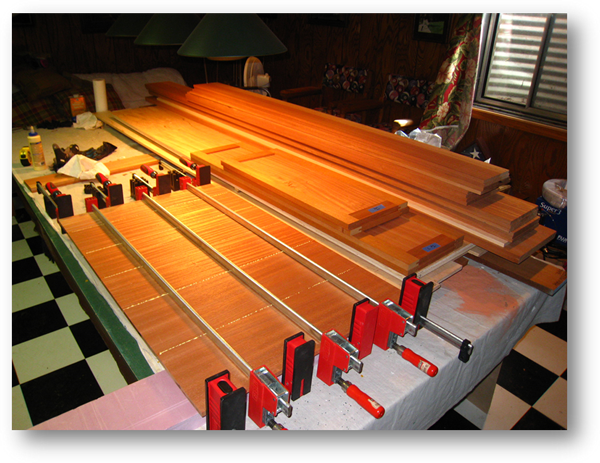
    Just as 2" stock straight line and rip the opposite edge.

    Cut to length + extra 3" on each end.

    Joint edges

    Glue up panels then plane to 1/16 over finished thickness.

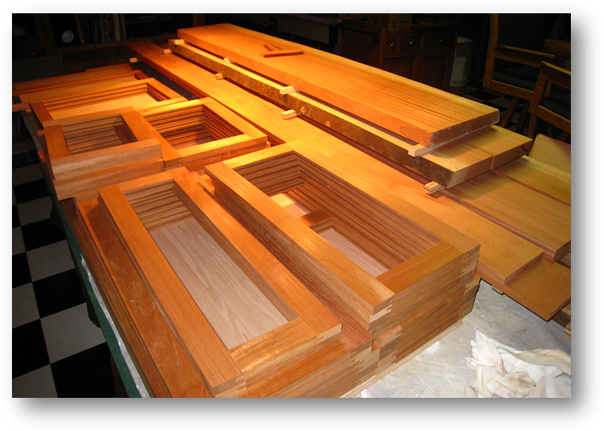
    Add detail to panels on router and sand.

    Test fit rail and stiles. Stain, varnish assemble, add final coats.

    Thoughts?

  2. #2
    Frame parts and drawer fronts: rip oversize, let settle, then s4s.
    Panel stock: do the same prior to gluing for width. Allow enough thickness for levelling after glueup. If you are careful with assembly 1/32" should be sufficient thickness allowance.

    Don't crosscut until necessary. Crosscutting later reduces handling. You may want to crosscut early to minimize twist and eliminate defects, but beware of using twisted rough stock for door frames or other parts not secured to a box. 1" is enough allowance for rough crosscuts.


    Sand panels and inside edges of frames, and stain/ seal panels (or at least panel edges) prior to assembly. Take care to keep inside edges square. Then glue up face frames and frame and panel work and proceed with sanding/finishing.

  3. #3
    Join Date
    Apr 2013
    Location
    Issaquah, Washington
    Posts
    1,320
    Build your boxes first.

  4. #4
    Join Date
    Oct 2015
    Location
    Winnipeg, MB
    Posts
    40
    Cut your longest/biggest parts first.

  5. #5
    What Chris said. I'm not much of a wood-worker - usually just utility stuff that I need. But I'm a life-long model-builder which means I've worked with a lot of sticks. You ALWAYS cut the biggest pieces first. If you cut short pieces then you may have a lot of scraps left that aren't big enough to make the longer pieces even though by volume you have more than enough wood.

    Learning to do production work is a lot easier if you've spent any part of your life working in a factory.

    The only other advice I have is to make jigs as necessary. If you're drilling the same holes in a lot of parts for example, then set up a fence with a stop on your drill press. Drill all of one hole in each part then setup for the next hole.

    Test your setups on scraps and double-check them before you make the same mistake on a bunch of pieces.

  6. #6
    Join Date
    May 2014
    Location
    Alberta
    Posts
    2,162
    What Bill said. Then step two for me would be to look over the wood carefully and select my drawer fronts and door panel stock based on grain and appearance before you cut all your pieces. Good luck, Mike.

  7. #7
    Join Date
    Feb 2003
    Location
    McKinney, TX
    Posts
    2,067
    I endorse picking out your panel and drawer front stock first. Stain grade careful stock selection will make all the difference.
    Steve Jenkins, McKinney, TX. 469 742-9694
    Always use the word "impossible" with extreme caution

  8. #8
    There's a lot of ways to go about the process of milling wood for cabinets. What I do is make a list of all the pieces required, and their dimensions. From this I decide the best way to go about getting them down to their final dimensions.

    I usually thickness plane the boards first to minimize snipe.

    Next I'll do the crosscut work. (If the wood is gnarly, I'll do the crosscuts first and work the pieces down to dimension slowly.) The advantage for me is the shorter pieces are easier to joint and rip. If you joint longer boards that have large bends in them you will lose a lot of wood on the ends. With shorter pieces width loss is minimized.

    For face frame cabinets, I make the frames first. This sets the dimensions for the carcase. The face frames have to be perfect so they get top priority.

    For door rails and stiles, I use the router table to do all the milling. I have several cabinet profile router bit sets and I find them easier to use. This is for Shaker style doors:


    For panels, I start an "assembly line" of clamping. I crosscut lengths for a given panel height and start gluing them together. After the glue dries I'll rip off the dimensions I need for panels until I run out of width. Then I put the leftover piece back in the assembly line and repeat the process.


    Dry fit the doors before final assembly

    Glue and spray the finish

    And enjoy
    “Travel is fatal to prejudice, bigotry, and narrow-mindedness..." - Mark Twain

  9. #9
    Join Date
    Apr 2017
    Location
    Michigan
    Posts
    2,780
    Start with excess wood of the best quality you can justify and watch the grain carefully. Last thing you want is the look wrecked by wild grain.

Posting Permissions

  • You may not post new threads
  • You may not post replies
  • You may not post attachments
  • You may not edit your posts
  •