When it came back from Chisel & Forge, I lapped the sole. Did NOT see any need to have it ground. never have, either.
Most planes will do fine without much work done to the sole. Where having flatness perfection matters is when you want to make super thin shavings. So save it for the smoothers.
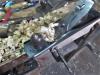
The cutting edge is still not quite parallel to the throat, but I was able to minimize the issue by moving the blade as far to one side as it would go in relation to the chipbreaker.
Was this done with the lateral adjustment lever?
You may find a little rotational adjustment to the frog will alleviate the problem.
jtk
"A pessimist sees the difficulty in every opportunity; an optimist sees the opportunity in every difficulty."
- Sir Winston Churchill (1874-1965)


Originally Posted by steven c newman


 Reply With Quote