Page 3 of 3 FirstFirst 123
Results 31 to 33 of 33

Thread: Recommendations on what to do next for my tiny workshop in the basement

  1. #31
    Join Date
    May 2005
    Location
    Highland MI
    Posts
    4,526
    Blog Entries
    11
    Welcome to the creek!!! Some of my most enjoyable projects were things for my shop. First you need some type of workbench, what type will be dictated somewhat by whether or not you will gravitate to hand tools or will be a power tool kind of guy, I am the latter. Table saw first, you have that covered. Next I would set up a router table with a lift. I really enjoyed building this one just before tackling my first major furniture project, a computer hutch. Plans were from a Wood magazine cover story https://www.woodstore.net/Tilt-Top-R...p/gr-00064.htm . As others have stated, dust collection should be a priority. If you are serious about that, and you should be, do it right the first time and get a 3 hp cyclone. Not cheap, but it may turn out to be the most important piece in your growing tool collection.
    Attached Images Attached Images
    NOW you tell me...

  2. #32
    Join Date
    May 2005
    Location
    Highland MI
    Posts
    4,526
    Blog Entries
    11
    Quote Originally Posted by Mike Kreinhop View Post
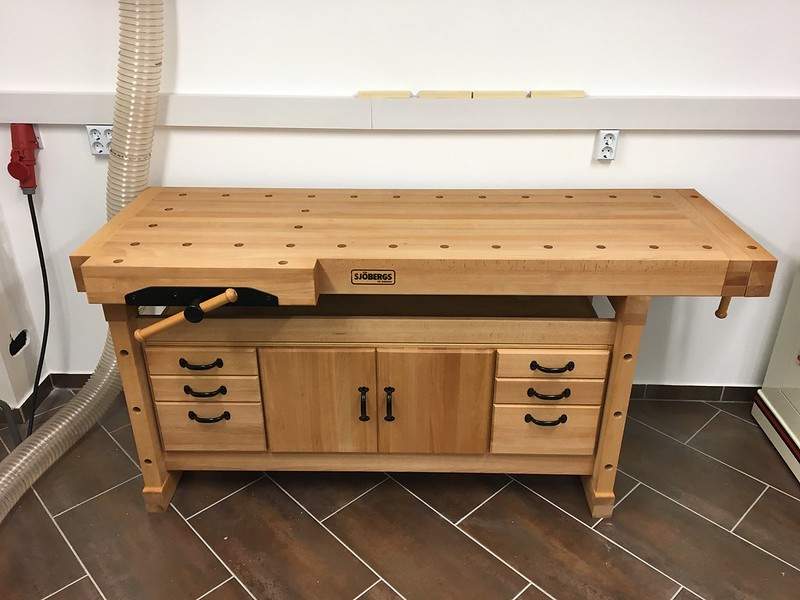
    My Sjöbergs Elite 2000 workbench arrived this afternoon. The workbench arrived in two cartons and the cabinet insert was in a third carton. I moved everything to the basement except for the worktop, and assembled the frame. The frame went together in about ten minutes. The uprights are already assembled, so it was a simple matter of gluing the dowels into the stringers, attach then to the uprights, and install the four bolts and captive nuts. I didn't glue the dowels into the uprights in case I want to disassemble it.

    I waited for a friend to arrive so we could take the worktop down the stairs. It weighs at least 200 pounds and was not fun to move. The uprights have one large dowel each that mates with the front edge of the worktop and gravity does the rest. The worktop is not fastened to the uprights and the only connection are the two large dowels. The worktop was pre-assembled with the two vices, but the front vice can be moved to the other side of the table for a right-hand configuration.

    The optional cabinet is a flat pack design and rests snugly between the uprights and stringers. There are four cleats (on the cable duct) that attach to the top of the cabinet and lock it into place between the top stringers. Unfortunately, there is no mention of this in the workbench instructions, and I didn't see it until I started assembling the cabinet. I have to wait until later this week for my friend to come back so we can lift the worktop off, screw in the cleats, and put the worktop back on.

    Overall, I am very happy with this workbench. It came with four 1-inch bench dogs, but there are other clamps available separately. I have to figure out where the bench will eventually be, as I have to shuffle some of my equipment around. The flexible hose and power cable to the left of the bench go to the Minimax SC2. To the right of the bench is a Jet JSG-96 disc/belt sander that will be moved to a new space.

    That is sweet! I only wish I had room for a bench like that in my 350 sf basement shop.
    NOW you tell me...

  3. #33
    Join Date
    Dec 2017
    Location
    Washington, DC
    Posts
    31
    Hi Anderson, thanks and I am enjoying the forum immensely especially when I am trying to stay awake at work.

    I am thinking of just open a few windows and doors, run fans, and wear a top of line mask respirator with P100 filters. That way I can work without having to worry about my poor lungs or wallet hatching moths. Eventually, I'll set up a proper dust collection system.

Posting Permissions

  • You may not post new threads
  • You may not post replies
  • You may not post attachments
  • You may not edit your posts
  •