
One of the clients I've been doing CNC work for recently asked me to help him fabricate a top for a dining table that he wants to present to his daughter and son-in-law for their new home. He's one of those folks who finds really unique material for his charcuterie boards that sets them apart and in his travels, he picked up a couple of large black walnut slabs for the table. They originally were 11' long but that dimension wasn't going to work for the space the table needs to live in. This is a build thread for the table top, although it will hopefully include the end result for a fabricated steel base that he had me draw up from some photos he supplied to accompany the top.
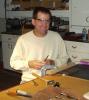
The first step was to layout what 8+ foot section of the boards would be used for the actual table top. The natural edge contours and some cracks pretty much dictated that. Since these started out at about 2.5" thick and were uber-heavy, the natural place to trim things down was on the driveway outside of my shop. The client provided physical labor to help with that since at that point, no way could I lift one of these things by myself...it was a struggle for two people!
IMG_5500.jpg
The ends were cut off using my trusty old 1970s era Black and Decker circular saw followed by the Festool jigsaw with a long blade to get the last half inch or so. A simple board clamped to the slab served as a guide. These were cut about 6" longer than final to allow for best match at the join and to allow for potential snipe off the wide belt that they would pass through before final finish sanding.
IMG_5501.jpg . IMG_5502.jpg
At that point, they were taken to Bucks County Hardwoods to get properly flattened on their Lucas mill with a router. I just am not setup to do that for something this large, so subcontracting it made sense. Client cheerfully paid for it...When I picked them up on Friday morning, they were "perfectly" flat and at a hair over 2". Bucks County Hardwoods does this for their own slab processing which is a pretty extensive part of their business these days. (They are one of the suppliers to Nakashima) Next for me was straight line rip the edges to be joined, keeping the slabs as wide as possible. A chalk line was struck to help line things up on my slider. Prior to doing this, I made an auxiliary support table that attaches to the slider wagon as the slabs were too wide not to have that.
IMG_5558.jpg
Each slab was put on the saw, aligned for the cut-line, clamped down and then cut. The edge was perfectly straight and perpendicular to the faces, requiring no additional treatment before gluing. I'm thankful for that because while I could now lift one of these by myself, it was unwieldy. In fact, I had my CEO (Professor Dr. SWMBO) help with moving things around to avoid any accidents.
IMG_5577.jpg . IMG_5578.jpg
After ripping, the slabs went back to the bench to line things up and position the locations for a few 14mm Dominos that would serve to keep things aligned and level during glue-up.
IMG_5579.jpg . IMG_5580.jpg

 Reply With Quote
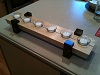

 ).
).