


Hi all,
I have benefitted from the collective wisdom on this site and I believe in sharing the good, bad, ugly, and the projects that end up as firewood. Here is look at a project in progress. At its core it is just a box, but, aside from from a few practice dovetails in the late summer and fall and tormenting some wood with my growing number of planes, saws, and chisels, this is my first real attempt to put it all together.
This started with rough sawn poplar from a local sawmill. (I did not take take pics of the rough lumber or the dimensioning process, but it was ~5/4 thick and ~12" wide.) Initially, I aimed for 7/8" final thickness, but I had to settle for something in between 7/8 and 3/4. The initial dimensioning was a fascinating deep dive for me. I spent far too much time at this stage of process, but I learned a great deal about sharpening, maintaining a sharp edge on a plane iron, and just using my planes. While I do not have pics of the dimensioning stage, I offer this as "proof."
Poplar shavings.JPG
After initial dimensioning and rough cutting to length, I glued the disparate pieces into panels. In this case, they ended up 19.5" wide (2@ 46" inches long, 2 short ends at 19 inches long. (Odd dimensions, but I aimed to to use every piece of this poplar with minimal waste. Those dimensions were what I ended up with. The grain match is horrid, but I always intended to paint the box/chest.
I then built a crude shooting board to square up the edges. (Crude is an apt descriptor. It probably caused more headaches than it solved, but it was a learning process. A new one will be built before the next project.)
After some fiddling, I landed on a 14* slope angle. As for the number of tails, I used dividers until I found the number of tails that looked right to me with the amount of space I wanted for the pins. (Once I determined the spacing and count I liked, I locked the dividers down and set them aside for later use.)
After marking the dovetails, I thought really long and hard and finally worked up the courage to cut. Despite all of my dithering and false starts, the actual process of cutting the dovetails was not nearly as menacing as I thought it would be. Yes, mistakes were made. Some I noticed immediately, others I am still unaware of.
My dovetails are not good, but not bad (in my opinion) either. There are some gaps, they need to be trimmed flush, and other issues, but nothing a little bit of saw dust and glue cannot remedy. Upside, they are snug, but go together with only a heavy palm strike.
box-16.jpgbox-7 rotated.jpg
Once I decided to start cutting, it really did not take that long with my freshly sharpened Veritas carcass saw. (All were cut and chopped in less than 4 hours--not setting any records, but not as slow as I thought either.) I filed the saw too aggressive, so starting the cut was a pain to begin with. (First time sharpening a saw, so the fact that it would still cut after I sharpened it must be considered a win. It also does not help that I have a tendency to hold hand saws with a "gorilla grip." A light touch truly does make a world of difference. I had to constantly remind myself to relax my grip and let the saw do the work. I think I got a little better with each cut.)
Cutting to the line, well, that is a work progress. By the end, I was at least in the ballpark. To remove the bulk of the waste, I used a cheap BORG coping saw with a new blade. Why a new blade? I actually managed to break the one that was on the frame while removing waste for tail #2. I have never actually broken a coping saw blade. It was fortunate that I broke it though. Not only was it worn out, but it allowed me to experiment. I put the coping saw blade on the pull stroke and it gave me more control of the saw. I am not sure why and it may be in my head, but I was able to remove the waste for the pins and tails by going dangerously close to the line without going past the line. This made chopping the remaining waste fairly straight forward and relatively fast. (Chopping dovetail waste before 6am is now strictly verboten...did not seem all that loud to me!)
At the end of the day, this is what I am left with: A square, topless, bottomless rectangle, with surprisingly snug dovetail joints. The bulldog is the project manager)
box-10.jpg box-14.jpgbox-13.jpgbox-10.jpg
There is still a ton left to do. Disassembling the dry fit and cutting the stopped rebates for the bottom is next on my to-do list. Cleaning up the the dovetails will also happen at roughly the same time. I am going to do something decorative with the bottom on each side. Then a top of maple will be added. Why maple on a poplar box? Because I have it sitting in the shop. Also, I initially thought this box would live in the garage. I was pleasantly informed tonight that once completed it would live in one of the guest bedrooms! (Not the "good" guest bedroom, but one of the other ones!) Wait, what? Now the pressure is on to make it look reasonably respectable. Before, I would have been content with a rough-around-the-edges test piece that double as a storage box.
More pics to come

 Reply With Quote
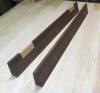


") )
)


