Page 1 of 2 12 LastLast
Results 1 to 15 of 27

Thread: Mandala Flower Of Life

  1. #1
    Join Date
    Jul 2015
    Location
    Pleasant Valley MD. U.S.A.
    Posts
    567

    Mandala Flower Of Life

    CARVING FLOWER OF LIFE

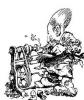
    Hello once again everyone I've just about carved the third circle 36 triangles so far. They have only been carved straight through at 90 degrees to the base as of yet. I will do this to all of them before starting to add the curves. This gives you control over the shape so they look uniform to each other. This wood (Red Elm) is very hard and very close to White Oak, so the carving has to go slow and the cuts have to be sliced thin each time.
    Attached Images Attached Images
    Last edited by Bruce Jones; 06-06-2023 at 1:47 PM.


    My Handle is Splinterz25 on most forums.

    Jack Of All Master Of None

  2. #2
    Join Date
    Feb 2003
    Location
    Hayes, Virginia
    Posts
    14,776
    Looks like it going to be another beauty Bruce.

  3. #3
    Join Date
    Jul 2015
    Location
    Pleasant Valley MD. U.S.A.
    Posts
    567
    Thank you very much Keith.
    In response to a persons comment on another site about me carving these triangles with a knife. I have always done all of my work this way, but I use a Dremel with a few different bits and burs to remove the larger sections first to save time. I will let the photos do the talking but if you still have questions please just ask I will do my best to answer them. I should add each project is done in a different manner depending on the shape I'm trying to achieve. Here's a sequence of photos of me doing one triangle and the tools used.
    Attached Images Attached Images


    My Handle is Splinterz25 on most forums.

    Jack Of All Master Of None

  4. #4
    Join Date
    Jul 2015
    Location
    Pleasant Valley MD. U.S.A.
    Posts
    567
    And here's the rest of the phots.
    Attached Images Attached Images


    My Handle is Splinterz25 on most forums.

    Jack Of All Master Of None

  5. #5
    Join Date
    Sep 2012
    Location
    Tampa Bay area
    Posts
    1,106
    Thank you for the pictorial of how you start the carving on this masterpiece in the making. As I follow along on your projects I frequently wonder how you begin.

  6. #6
    Join Date
    Jul 2015
    Location
    Pleasant Valley MD. U.S.A.
    Posts
    567
    Quote Originally Posted by Robert Hayward View Post
    Thank you for the pictorial of how you start the carving on this masterpiece in the making. As I follow along on your projects I frequently wonder how you begin.
    Thank you Robert, I'm getting a really big response over this post on all sorts of sites.


    My Handle is Splinterz25 on most forums.

    Jack Of All Master Of None

  7. #7
    Join Date
    Jul 2015
    Location
    Pleasant Valley MD. U.S.A.
    Posts
    567
    Hello once again everyone I have now completed about 50 of the triangles. Then went back and cleaned them up with my detail knife last night all but three are smooth, I then cleaned up the layout lines on the outside for the next go around. These next 30 triangles will have to be cut mostly from the out side only, because of the undercut lip on the bowl. The wood is also thicker here. You can see in the photos I will not be taking the pattern all the way to the rim, I have left a 5/16" band around the bowl this will have a detail of some kind added later. still a lot of carving on this part, but I'm looking at the Carnations on the rim these will have to be rough carved before I finish the center section for strength reasons while carving by hand.
    Attached Images Attached Images


    My Handle is Splinterz25 on most forums.

    Jack Of All Master Of None

  8. #8
    Join Date
    Jul 2015
    Location
    Pleasant Valley MD. U.S.A.
    Posts
    567
    Okay everyone I have had a few that do not understand what I've been talking about when I said I was going to round over the ovals. The piece is strong enough for me to show where I'll be taking this project. I've also started carving through he curved section of the bowl. Here are some photos of the flowers on the outer side in various stages of carving & refining, and a view of the rough inside. You can also see where I have a line about 5/16 above the rim this will most likely get a pyrography stippling band.
    Attached Images Attached Images


    My Handle is Splinterz25 on most forums.

    Jack Of All Master Of None

  9. #9
    Join Date
    Mar 2013
    Location
    Trenton SC, in the CSRA
    Posts
    511
    Really nice. I like it.

  10. #10
    Join Date
    Jul 2015
    Location
    Pleasant Valley MD. U.S.A.
    Posts
    567
    Thank you Eugene;
    "CARVING FLOWER OF LIFE"
    Hello once again everyone I've made some progress on this project. I have started carving through on the sides of the bowl. This has to be done almost all with knives and gouges, after I drill a hole in the widest place of the triangle. You will see the tools I'm using for this process in the photos, I've also rounded inside and most of the outsides flower peddles.
    Attached Images Attached Images
    • File Type: jpg 0.jpg (97.5 KB, 11 views)
    • File Type: jpg 1.jpg (120.1 KB, 9 views)
    • File Type: jpg 2.jpg (119.0 KB, 8 views)
    • File Type: jpg 3.jpg (202.8 KB, 7 views)
    • File Type: jpg 4.jpg (134.1 KB, 9 views)
    • File Type: jpg 5.jpg (146.0 KB, 7 views)
    • File Type: jpg 6.jpg (111.8 KB, 9 views)


    My Handle is Splinterz25 on most forums.

    Jack Of All Master Of None

  11. #11
    Join Date
    Sep 2012
    Location
    Tampa Bay area
    Posts
    1,106
    Excellent work so far! Please keep showing us the progress.

  12. #12
    Join Date
    Jul 2015
    Location
    Pleasant Valley MD. U.S.A.
    Posts
    567
    Quote Originally Posted by Robert Hayward View Post
    Excellent work so far! Please keep showing us the progress.
    Thank you Robert I will, There is still a great deal of work on this piece.


    My Handle is Splinterz25 on most forums.

    Jack Of All Master Of None

  13. #13
    Join Date
    Jul 2015
    Location
    Pleasant Valley MD. U.S.A.
    Posts
    567
    "FLOWER OF LIFE"
    Hello once again everyone I have now carved, rough filed & sanded 95% of the bowl section. I still will need to go back over everything with 220 & 320 grit. I will do this while carving the flowered rim to give myself a break from carving. It will be nice to be carving a different wood for a change. The Pommele Sapele is no where near as hard as the Red Elm. The center section inside the bowl will be one of the last things carved.
    Attached Images Attached Images


    My Handle is Splinterz25 on most forums.

    Jack Of All Master Of None

  14. #14
    Join Date
    Mar 2013
    Location
    Trenton SC, in the CSRA
    Posts
    511
    I can only say, "Ahhhhhhhhhh" with admiration.

  15. #15
    Join Date
    Jul 2015
    Location
    Pleasant Valley MD. U.S.A.
    Posts
    567
    Thank you Eugene.
    [COLOR=var(--secondary-text)]THE FLOWER OF LIFE[/COLOR]

    [COLOR=var(--primary-text)]Hello everyone I have moved on with the carving of this project. I have carved a few flowers in various stages so you can get a better understanding of my process. You can see in the photos if you zoom in the first stage outlining cutting 1/16 "- 1/8" deep. This is very important to stop over cutting areas you do not wan cut. I have also shown the tools and files and sanding tools I use. I would have had even more carving done but I went back and have been refining the bowl section rounding, smoothing and sanding with220 grit[/COLOR]
    Attached Images Attached Images


    My Handle is Splinterz25 on most forums.

    Jack Of All Master Of None

Posting Permissions

  • You may not post new threads
  • You may not post replies
  • You may not post attachments
  • You may not edit your posts
  •