Results 1 to 11 of 11

Thread: Power and Hand together (9): It's beginning to look like a nightstand!

  1. #1
    Join Date
    Feb 2004
    Location
    Perth, Australia
    Posts
    9,497

    Power and Hand together (9): It's beginning to look like a nightstand!

    The first 8 chapters of this build are on my website (bottom of this Index Page). I was posting to the Hand Tool forum - because I have always done so - but not one comment or attempt at discussion for the last two chapters and I can take a hint that no one is interested in builds any more. So here we are ...

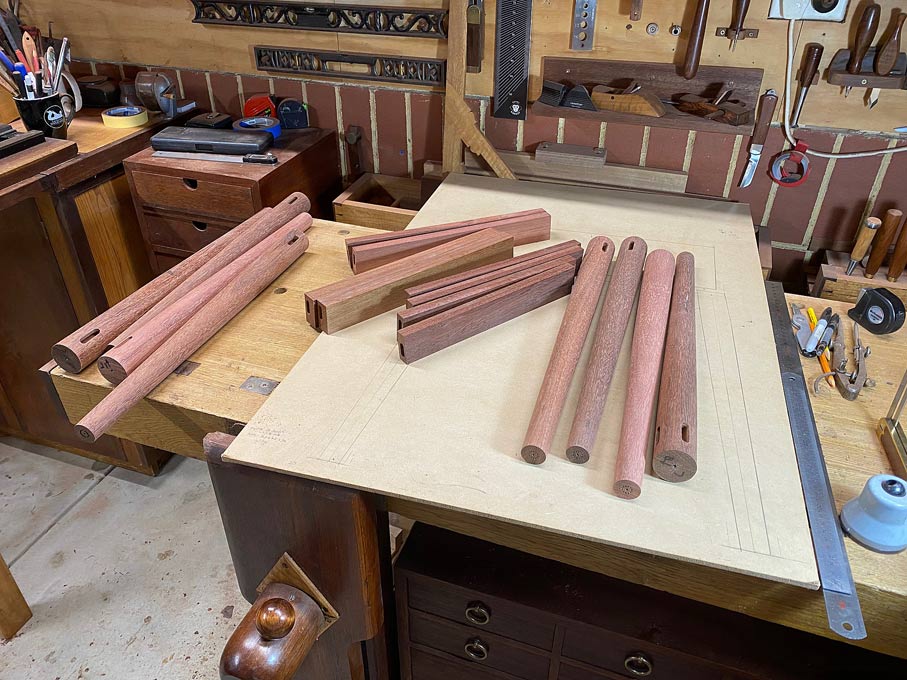
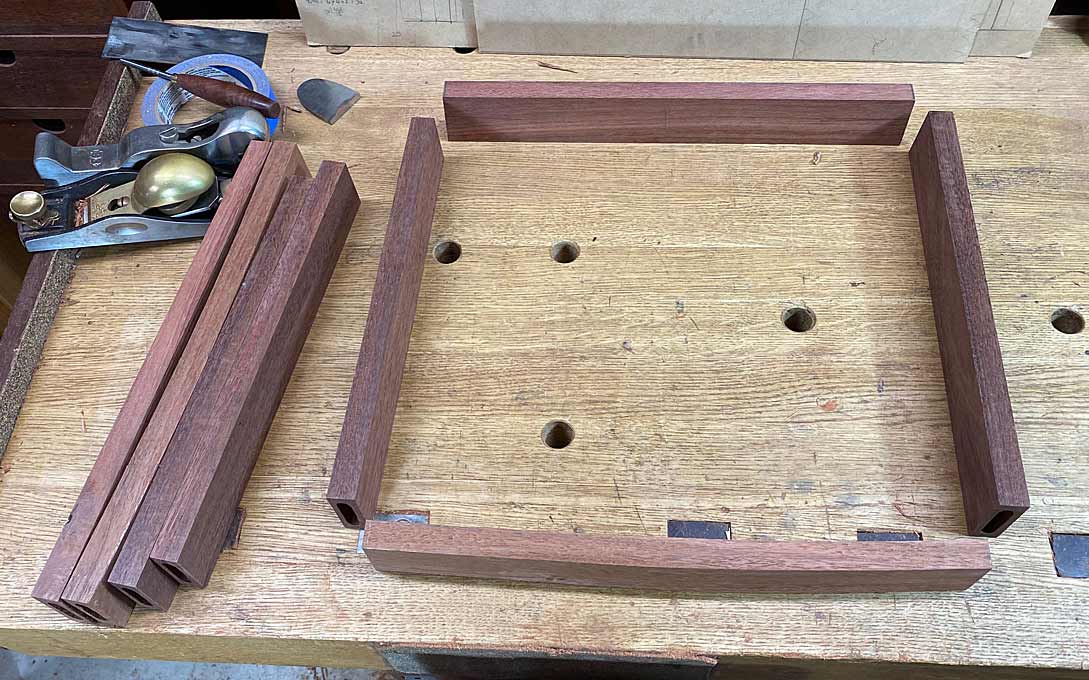
    The project ended last time with all the parts cut and shaped for the two bases ..


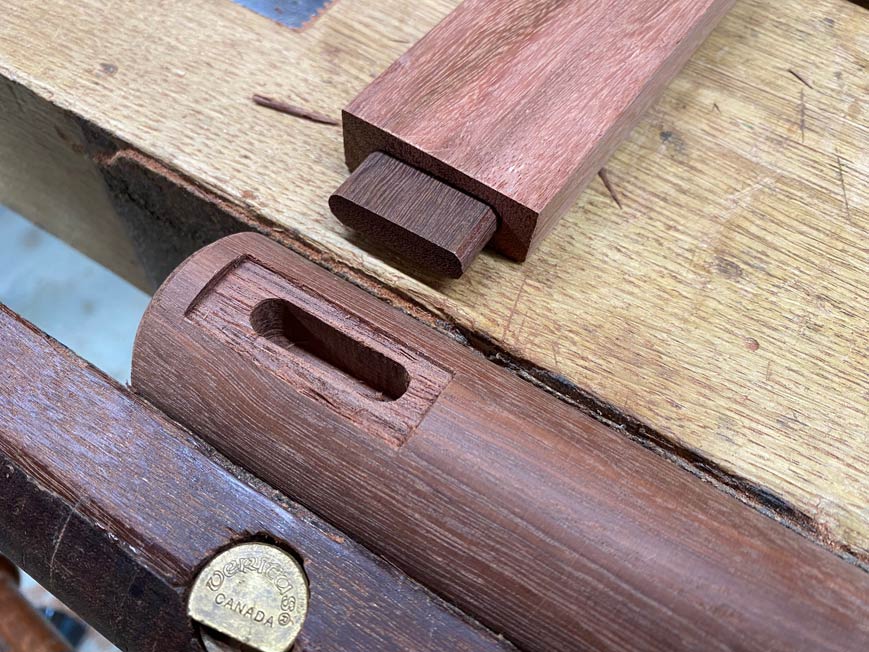
    Square peg into a round hole? Not quite, but the square ends of the aprons must join flush with the round legs ...


    The choice was either to cope the end face of the apron to match each leg, or to shape the leg to match the end of the apron. I decided on the latter as each leg had a taper and the ends of the aprons were angled at 3 degrees. Matching the legs seemed much simpler. Still, it would prove to be a fair amount of work.

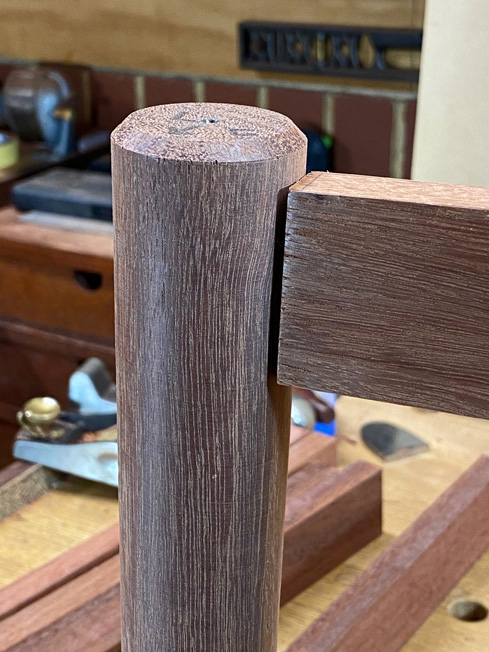
    Step 1 - mark out the recess:


    Step 2 - chop out the waste with a chisel:


    The fit is decent ...


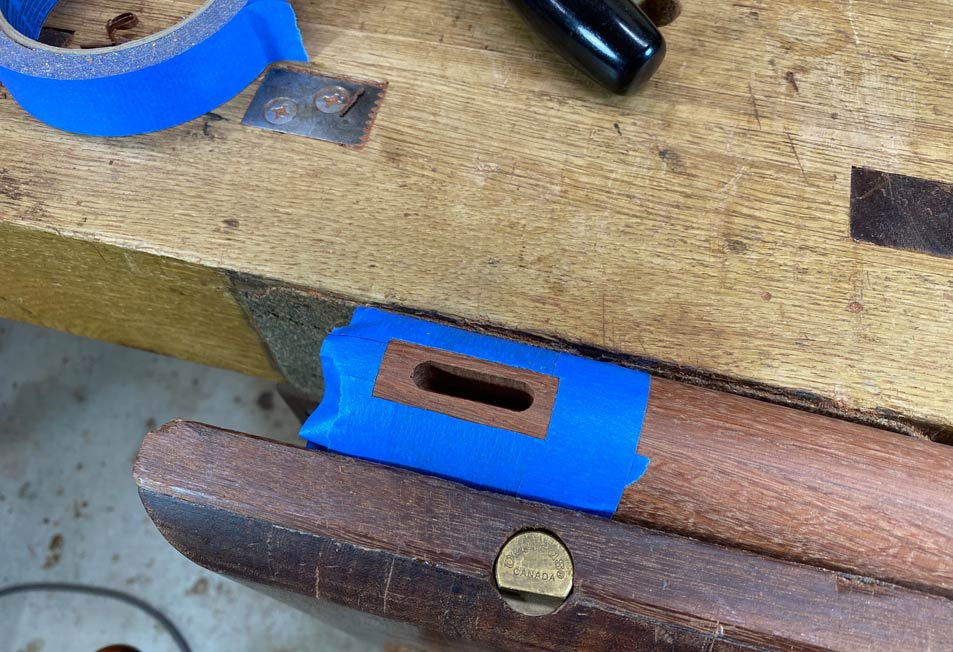
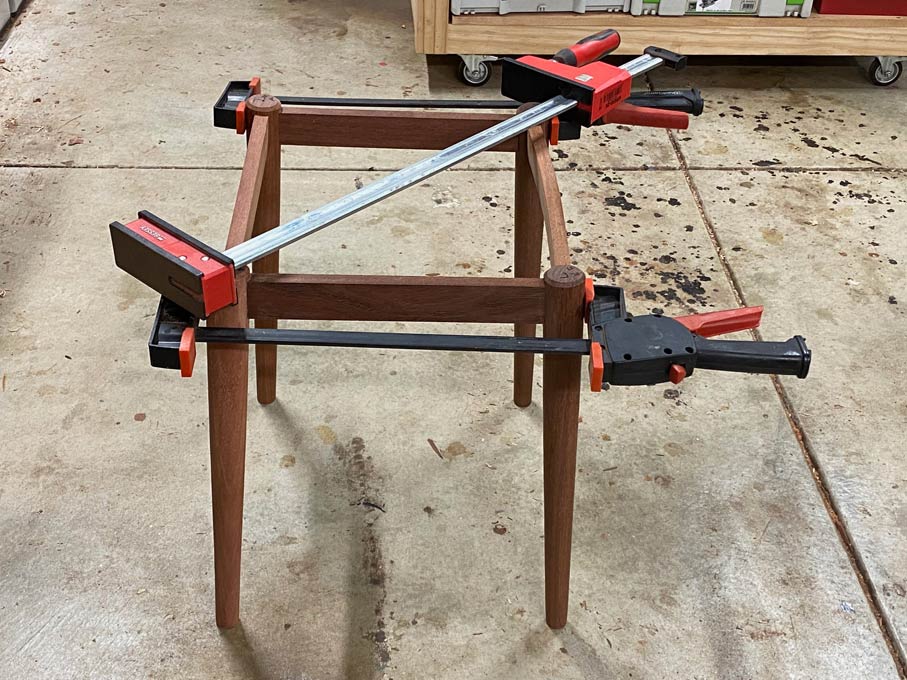
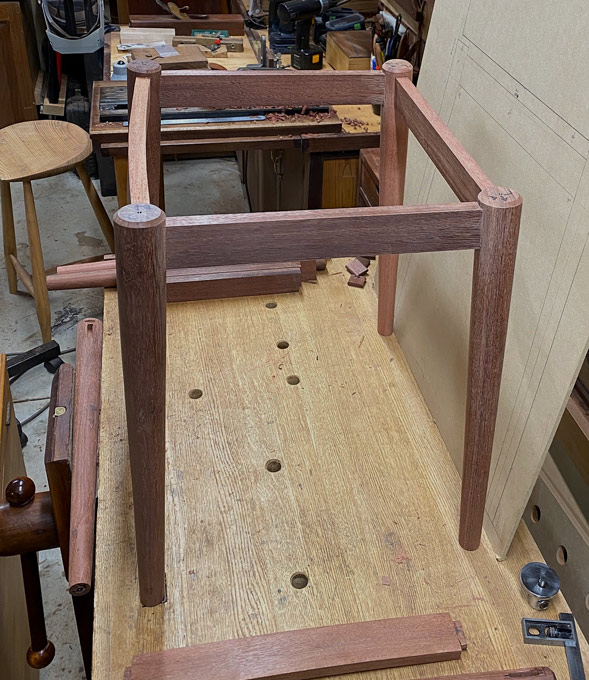
    Eight joints later, and the first stage of the first base is at glue-up stage ...


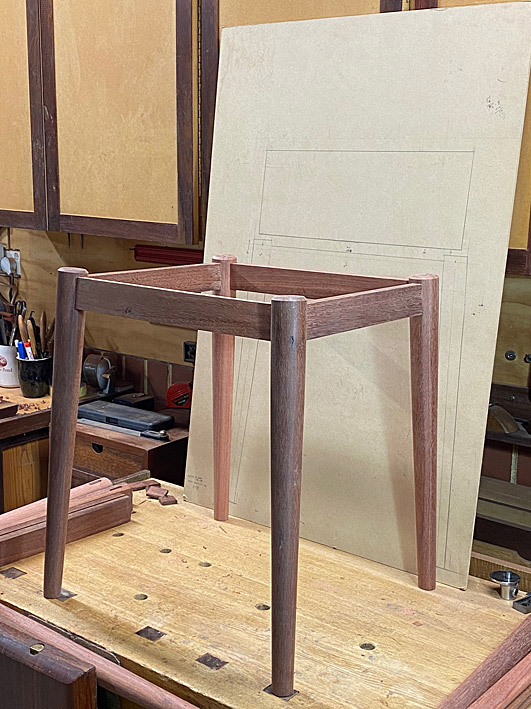
    Tapers round legs splayed at 3 degrees ...


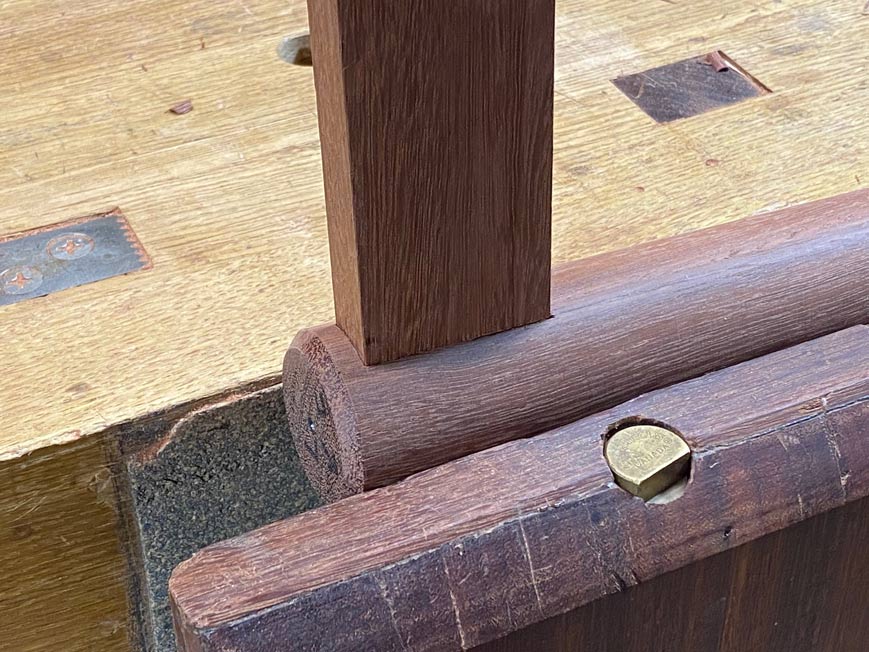
    The rounded front can be seen here ...


    Close up off joints ...


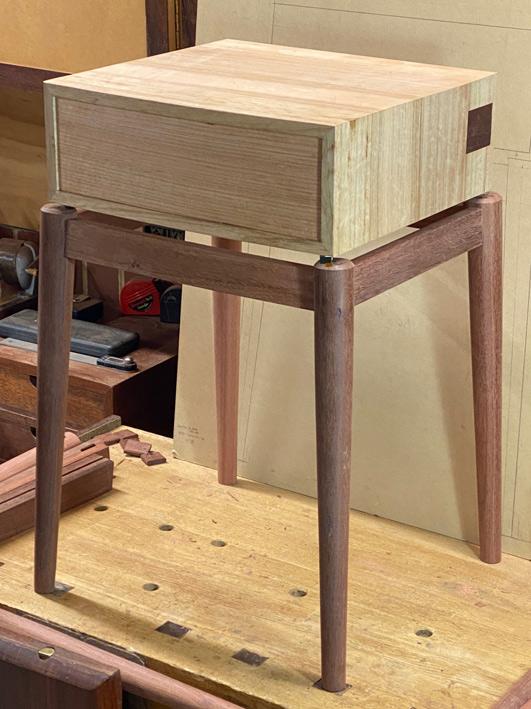
    I couldn't resist a little mock-up (but lots still to do - not only that this is one of two) ...


    Regards from Perth

    Derek

  2. #2
    Looking nice Derek
    I did comment on the last chapter (on another forum) and now for this one.
    I think you could have established the mortise face before you turned the piece, leaving only some fine tuning but the joints looks good and tight.

  3. #3
    Join Date
    Jan 2013
    Location
    FINGER LAKES AREA , CENTRAL NEW YORK STATE
    Posts
    259
    smashing work...... very nice
    calabrese55
    Let your hands tell the story of the passion in your heart

  4. #4
    Join Date
    Feb 2004
    Location
    Perth, Australia
    Posts
    9,497
    Quote Originally Posted by Edward Weber View Post
    Looking nice Derek
    I did comment on the last chapter (on another forum) and now for this one.
    I think you could have established the mortise face before you turned the piece, leaving only some fine tuning but the joints looks good and tight.
    Edward, in retrospect, I think that you have a good point. I will try it that way next time.

    Regards from Perth

    Derek

  5. #5
    Join Date
    Jul 2003
    Location
    Winterville, NC (eastern NC)
    Posts
    2,366
    Great solution to attach square rails to round legs. I'll have to keep that in my solutions folder.

  6. #6
    Join Date
    Mar 2003
    Location
    SE PA - Central Bucks County
    Posts
    65,893
    I like that method for joining the rails to the rounded legs...clean and strong when done correctly as you have.
    --

    The most expensive tool is the one you buy "cheaply" and often...

  7. #7
    Quote Originally Posted by Derek Cohen View Post
    Edward, in retrospect, I think that you have a good point. I will try it that way next time.

    Regards from Perth

    Derek
    Derek, I always try to machine as much as I can while the stock still has at least one square face/corner to reference from, it's not always possible.
    I think you did well to square the faces the way you did it but for me it's more difficult that way.

  8. #8
    Join Date
    Feb 2020
    Location
    Camarillo, CA
    Posts
    423
    I’m curious about chopping the mortises. How did you control the depth so that the base came out square?

    It seems like you can get good results just by eyeballing or referencing off a specific point of each leg.

  9. #9
    Join Date
    Feb 2004
    Location
    Perth, Australia
    Posts
    9,497
    Edward, I do make it a rule to do as much as possible when all parts are square and still have a registration side. This is definitely easier in the case of the mortices. I have been asked whether I plug up the mortices when turning to round, and my answer us that I do not experience much, if any, spelching. If there had been, it would be hidden by the beauty shoulders of the aprons. I did not consider doing it your way as, frankly, it did not occur to me at the time. On reflection, I would probably stay with what I ended up doing as, although a little trickier to mark (not really much more), any spelching when turning would ruin the clean connection between leg and apron. Jarrah (and Tasmanian Oak, used in the case) are brittle and apt to splinter (I will demonstrate this a little later).

    Ben, once the perimeter if the recess is marked - and blue tape makes it highly visible - the removal of the waste begins by excavating the ends, and then levelling the centre section. Work carefully halfway from each side, and then form a slight chisel wall, and finish the job. A test fit will help determine if more waste needs to be removed. It get faster the more one does.

    Regards from Perth

    Derek

  10. #10
    Quote Originally Posted by Derek Cohen View Post
    Edward, I do make it a rule to do as much as possible when all parts are square and still have a registration side. This is definitely easier in the case of the mortices. I have been asked whether I plug up the mortices when turning to round, and my answer us that I do not experience much, if any, spelching. If there had been, it would be hidden by the beauty shoulders of the aprons. I did not consider doing it your way as, frankly, it did not occur to me at the time. On reflection, I would probably stay with what I ended up doing as, although a little trickier to mark (not really much more), any spelching when turning would ruin the clean connection between leg and apron. Jarrah (and Tasmanian Oak, used in the case) are brittle and apt to splinter (I will demonstrate this a little later).

    Ben, once the perimeter if the recess is marked - and blue tape makes it highly visible - the removal of the waste begins by excavating the ends, and then levelling the centre section. Work carefully halfway from each side, and then form a slight chisel wall, and finish the job. A test fit will help determine if more waste needs to be removed. It get faster the more one does.

    Regards from Perth

    Derek
    Hey Derek,
    It does depend a lot on the species for sure. There is no real need, even with splintery wood to plug the mortises while turning. Turning up the speed and a sharp gouge usually is enough.
    I don't know how often you make this type of connection but here is a link to Ishitani making the tenon face rounded. (much harder)
    https://www.youtube.com/watch?v=s8MvKkyY9BE
    Ii would depend on the look of the piece to decide on which method to use.
    This also has use of the tenon cutter mentioned in a recent thread.

  11. #11
    Join Date
    Feb 2004
    Location
    Perth, Australia
    Posts
    9,497
    Quote Originally Posted by Edward Weber View Post
    Hey Derek,
    It does depend a lot on the species for sure. There is no real need, even with splintery wood to plug the mortises while turning. Turning up the speed and a sharp gouge usually is enough.
    I don't know how often you make this type of connection but here is a link to Ishitani making the tenon face rounded. (much harder)
    https://www.youtube.com/watch?v=s8MvKkyY9BE
    Ii would depend on the look of the piece to decide on which method to use.
    This also has use of the tenon cutter mentioned in a recent thread.
    Thanks Edward.

    Agreed … turn up the speed and the open mortices will be fine.

    I have done this type of joinery in a couple of ways. The other way was for this Hans Wegner chair I built …


    The mortice and tenon was sawn and chopped by hand …


    The tenon was coped, again with chisels ..


    The joins look the same as the table legs above …


    Regards from Perth

    Derek

Posting Permissions

  • You may not post new threads
  • You may not post replies
  • You may not post attachments
  • You may not edit your posts
  •