Page 1 of 2 12 LastLast
Results 1 to 15 of 22

Thread: Second attempt at guitar body

  1. #1
    Join Date
    Dec 2006
    Location
    Warwick, RI
    Posts
    804

    Second attempt at guitar body

    I usually like the hand tool forum the most but I'm back to building instruments. Having built 3 F5 mandolins, I'm now trying to build a dreadnought guitar. The neck came out great but the body ended with an unfixable flaw. I sanded through one of the sides. So now I'm building box #2 and I thought that I would share the process here.

    Here's a few photos of the neck with the firewood body.
    20210911_131850_copy_800x360.jpg
    20210919_092610_copy_360x800.jpg20211004_152309_copy_800x715.jpg

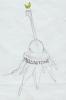
    Here's the start of the new body.

    363344680_10210306874186153_502546703552181511_n.jpg

    clamp fixture.jpg
    Attached Images Attached Images
    Last edited by Lee Schierer; 08-06-2023 at 9:24 PM. Reason: Added photo

  2. #2
    Thanks for posting

  3. #3
    Join Date
    Dec 2006
    Location
    Warwick, RI
    Posts
    804
    Your welcome. I'll try to keep it going to the end.

  4. #4
    Join Date
    Mar 2003
    Location
    SE PA - Central Bucks County
    Posts
    65,896
    I also appreciate the effort and will enjoy seeing your entire process. One of these days I may take on an acoustic, or at least partially acoustic instrument myself.
    --

    The most expensive tool is the one you buy "cheaply" and often...

  5. #5
    Where is the sand-through? Is it possible to turn that into a sound port? I'll soon be on my second acoustic; they're a blast to build!
    David
    CurlyWoodShop on Etsy, David Falkner on YouTube, difalkner on Instagram

  6. #6
    Join Date
    Dec 2006
    Location
    Warwick, RI
    Posts
    804
    Quote Originally Posted by David Falkner View Post
    Where is the sand-through? Is it possible to turn that into a sound port? I'll soon be on my second acoustic; they're a blast to build!
    No, it's on the bottom of the lower bout. I could probably make some kind of patch but I just don't want to. Moving works for me.

  7. #7
    Join Date
    Dec 2006
    Location
    Warwick, RI
    Posts
    804
    Getting read to glue up the top and back. I have an old window that someone was throwing away and it's perfect for checking the seams. The shooting board didn't work so well so I stuck the plane in the vise and tried that. It was better but not quite perfect. As hard as I try, I can never get them perfect off the plane so I stuck some 240 grit on the glass and got it perfect. I'll keep trying with the hand planes on future guitars.

    20230803_073339 (WC).jpg20230803_070841 (WC).jpg20230803_071546.jpg20230803_075515.jpg20230803_073452.jpg

  8. #8
    Join Date
    May 2015
    Location
    NJ
    Posts
    1,416
    Richard, nice work and thanks for sharing this. Just fyi, if you're going to use your hand plane in a vise that way, you may want to seat it further down so you're clamping part of the sole and not just gripping the "wings". To avoid the cast iron snapping off.

  9. #9
    Join Date
    Dec 2006
    Location
    Warwick, RI
    Posts
    804
    Thanks for the tip. I don't plan on doing it this way next time. I feel like I've had better luck in the past clamping the wood in the vise.

  10. #10
    Join Date
    Nov 2021
    Location
    Mid West and North East USA
    Posts
    2,942
    Blog Entries
    2
    Looks excellent! I will enjoy following along!

  11. #11
    Join Date
    Dec 2006
    Location
    Warwick, RI
    Posts
    804
    ClampingTop (2).jpg

    I came up with a new idea for clamping the top and back halves. I was going to make board to do this when I spotted the table-saw. Bingo, this works great and zero extra fixtures cluttering the shop. I may save the shims.

    Last edited by Richard Hutchings; 08-04-2023 at 9:01 AM.

  12. #12
    Join Date
    Dec 2006
    Location
    Warwick, RI
    Posts
    804
    For some reason, I can't seem to add any photos now.

  13. #13
    Join Date
    Dec 2006
    Location
    Warwick, RI
    Posts
    804
    I won the battle of the potato chip rosewood back. I still can't post pictures.
    20230806_070556.jpg
    BackandTop.jpg
    Last edited by Richard Hutchings; 08-07-2023 at 6:50 AM.

  14. #14
    Join Date
    Dec 2006
    Location
    Warwick, RI
    Posts
    804
    That didn't work so well for the top so I cut it apart and re-glued by just making the space between the miter slot and the fence slightly less than the width of the boards. the boards made a little tent when place between them and I just forced it down with a weight. This worked perfect and was much easier.

    The back pieces were a real challenge as they were very warped from improper storage. My bad. I made 2 attempts at this as well. I had to make a crazy fixture, really just a bunch of loose boards, clamped in every direction with the final clamps running across the joint. As you can see from the second photo, it worked very well. I hope I never have to do it this way again but if I do, I know how.

    BackGlueJiog.jpgBack_n.jpg

  15. #15
    Join Date
    Dec 2006
    Location
    Warwick, RI
    Posts
    804
    I don't know where my posts are going, I'm sure I posted something here yesterday. I had a bear of time getting this potato chip pieces together. I got it done though and I'm moving forward.

    BackGlueJiog.jpg
    Back_n.jpg

    I overslept and didn't get anything done before work this morning other than locating these jigs for inlaying the rosette. The one on the left I've never used, I found it at a yard sale. I think I'll stick with the known to work jig that I built. That's all I've got for today. It's a little disappointing, I was on a roll.

    CircleJigs (WC).jpg

Posting Permissions

  • You may not post new threads
  • You may not post replies
  • You may not post attachments
  • You may not edit your posts
  •