Rob, here is the development ...
Japanese double gauges - mine is a Kinshiro - cut fantastically, but can be a bugger to set up for the offset. This is how you do it ...
Mark across the width with the mortice chisel, as shown below.

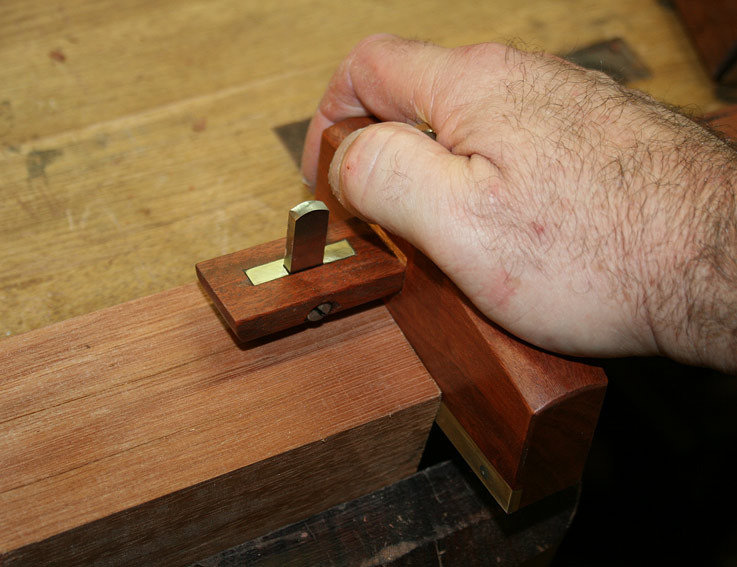
This is going to aid in setting up the mortice gauge. Simply place the ends of the knives (or points) in the ends of the cut. This sets up the cutting width.

Now slide the head of the gauge against the work piece to set its depth. This completes setting up the mortice gauge.

Mark the mortice lines.
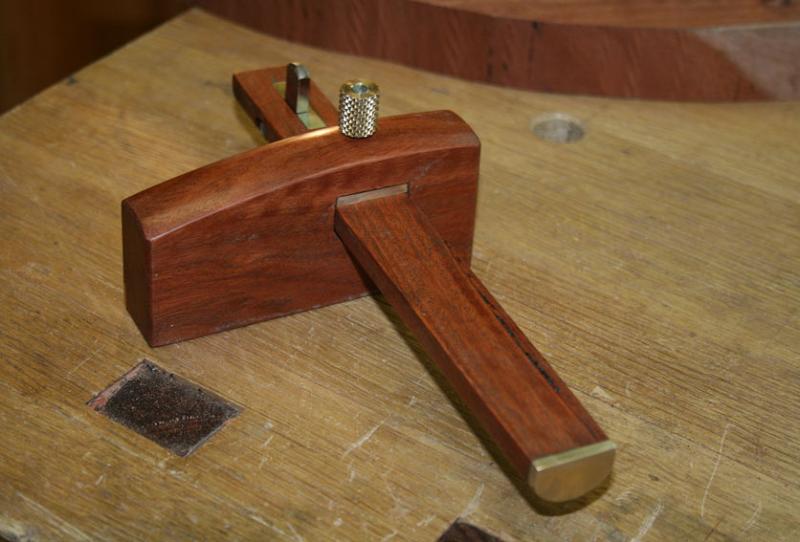
My mortice cutting gauge is my design (2015), aimed at the best of all worlds: knives plus fixed positions, so that setting the offset is a simple matter.
It is based on the Kinshiro profile, but has a Western arm. It is made from some scrap Fiddleback Jarrah and brass. The fence is 4 ½" long x 2 ½" high ...
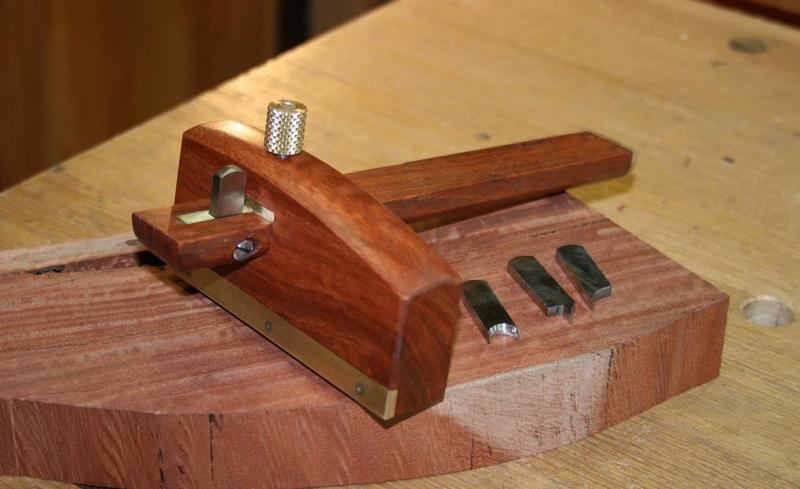
The novel feature here is that the blade is a fixed width, but is exchangeable for other fixed width blades ..
The knives are made from 4mm thick HSS (they should not need resharpening for a while!). So far I have made double-sided knives for a 1/4", 3/16" and 3/8" mortice-and-tenons, and two straight knives (I made a second when I realised that the first would score 3/8" away from the fence). The idea for these knives came from dovetail planes. Hone the blades on the inside faces only.
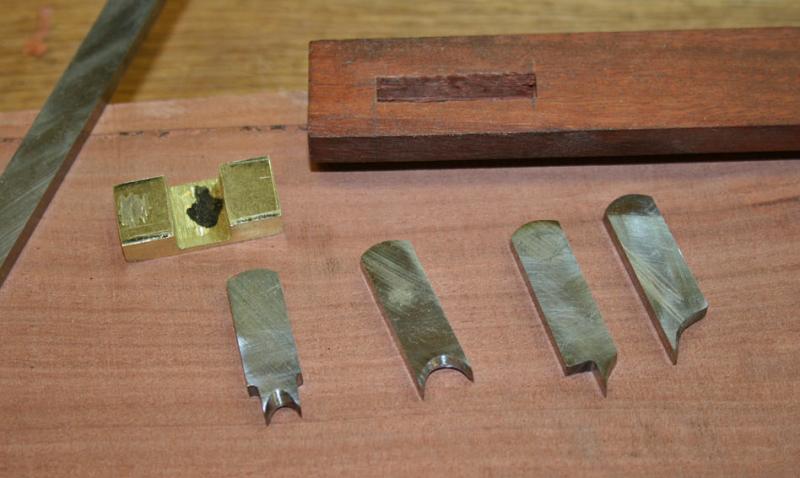
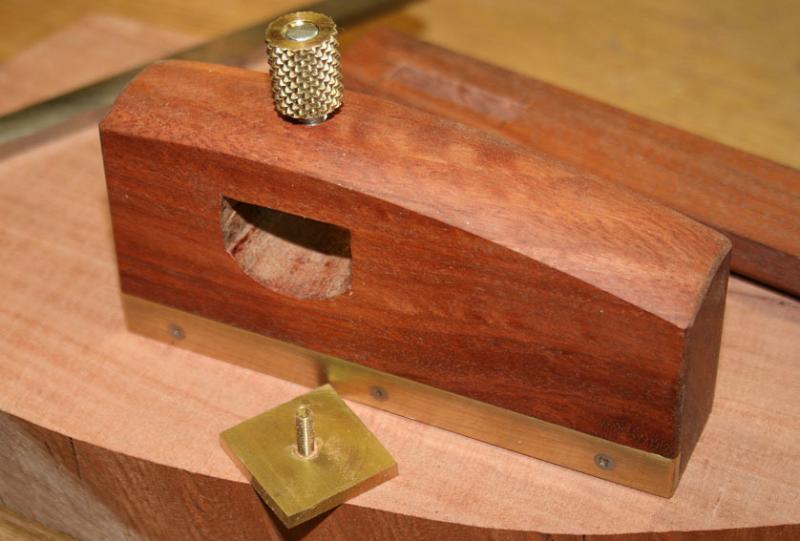
The knives sit in a brass "cassette". This is fitted permanently in the arm ...
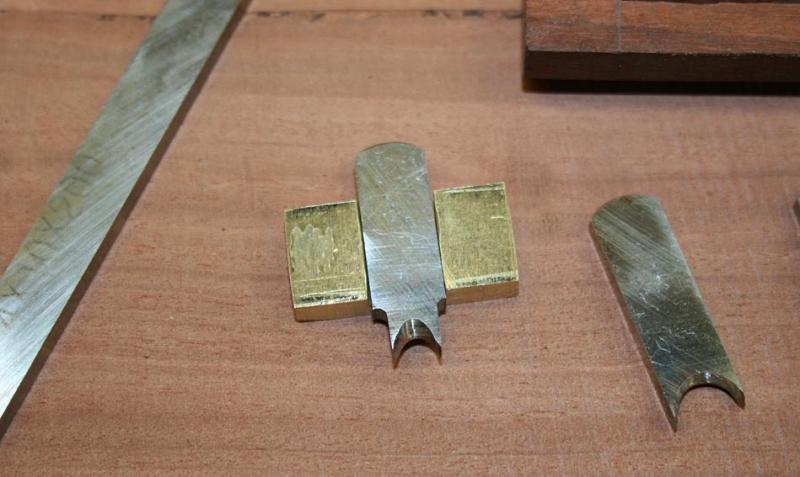
As seen in the first image, each knife may be dropped in or out and is held with a setscrew. As mentioned earlier, I have not seen a similar system on a marking gauge before.
One of the advantages of using HSS is that you can heat it without fear of ruining the hardness.
I used a Dremel to shape the centre semicircle, and then a thin, round stone on the drill press to round the inside into a curve.
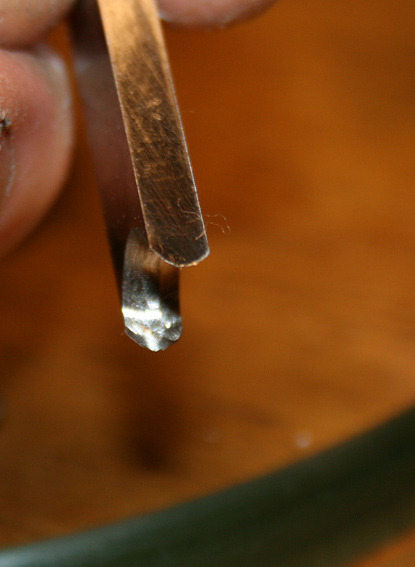
Once the external size is done, leave it alone. Sharpen only from the inside.
The second design feature is a rounded lower section to the arm ..
The reason for this is twofold:
Firstly, this is a very strong design that locks the arm very securely. Just a little downforce and there is no sideways movement at all.
Secondly, the rounded lower section offers better visibility that either a square section or a cutaway at the knife.
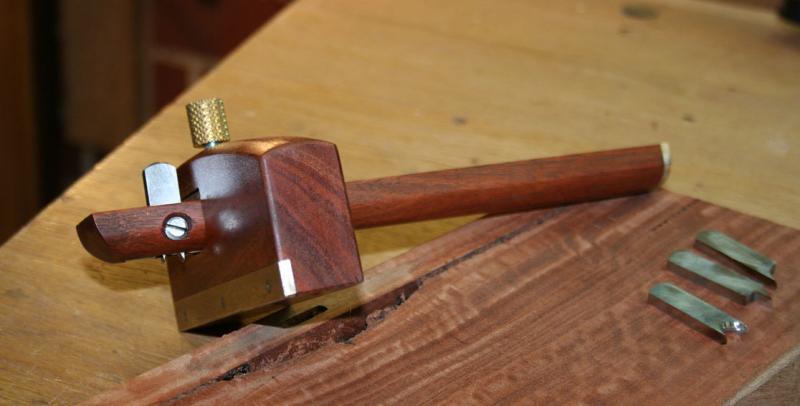
In practice, this is very comfortable to use, and the knives cut clean lines both with and across the grain.
The full article is here:
https://www.inthewoodshop.com/ShopMa...ingGauges.html
Thinking out aloud: is this worth sending to FWW?
Regards from Perth
Derek


 Reply With Quote