Results 1 to 5 of 5

Thread: Phar out finishing techniques

  1. #1
    Join Date
    Oct 2019
    Location
    Lexington, KY
    Posts
    103

    Phar out finishing techniques

    I've just begun collaborating with a local artist who wants to make a fairly large mural out of wood. The idea we've come up with is to design impressionistic type pieces based on arranging square wood blocks into the larger image. The plan is to develop different finishing techniques for the blocks to give them different color intensities, contrasts between the grain, and overall color. The blocks will be used as 'pixels' if you will in the larger image, so the smaller the wood block the higher the resolution of the final image. I would imagine the blocks will be between 1 and 2" square. The idea is mine but I'd never be able to do this without an artist. She'll be doing the true 'art' part and I'll just be providing as wide a variety of finishes on these blocks as possible. The wider her variety of wood blocks to choose from the better the end result will be.


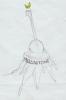
    So as an example, here's an art piece I found on Etsy. It seems the artist here has either baked or burn treated these pieces. I'm taking this idea as inspiration on how I can vary the finishes on these wood blocks. But I'd like to have as many coloring/finishing options as possible, which is the purpose of writing here.

    wood wall art.jpg


    What I need now are both wood species suggestions and finishing techniques. Just brainstorming so everything's on the table.

    I need different wood grain size options. Need both wider and narrower grained species.

    Would be nice to have a species where both the fast and slow growth rings take dye stain so they have the same hue.

    Need coloring / technique suggestions. I've used General Finishes water based dye stains before so that's one idea for generating color.

    Thanks for your ideas.
    Last edited by brad hays; 01-13-2024 at 9:22 PM.
    If the end of the world ever comes move to Kentucky, because everything there happens 20 years later. ~ Mark Twain
    History began on July 4, 1776. Everything before that was a mistake. ~ Ron Swanson
    The economy of what you say lends more to it's meaning than the depth of it's exclamation.
    If you need a tool and don't get it, you paid for not having it and you still don't have it.

  2. #2
    Join Date
    Nov 2021
    Location
    Mid West and North East USA
    Posts
    2,946
    Blog Entries
    2
    That is interesting and will be challenging. I make my own color stains by mixing artists oil paint, the expensive kind that comes in tubes, with boiled linseed oil. Some colors need to be warmed to dissolve well. Then I add the paint /oil mixture to Minwax natural wood stain in varying concentrations, along with a little Japan drier. End grain and soft woods stain and contrast well, as can be seen in your sample. That looks like varying amounts of scorch.

    Good luck and best wishes, Maurice

  3. #3
    Join Date
    Sep 2013
    Location
    Wayland, MA
    Posts
    3,668
    Charring the wood and then filling the grain with a colored/metallic gilding wax can produce some amazing effects.

  4. #4
    Join Date
    Oct 2019
    Location
    Lexington, KY
    Posts
    103
    Thanks Maurice. Appreciate the stain recipe and procedure.

    Roger, I'm interested in this gliding wax thing. Never heard of it. Do you wire wheel out the soft grain after burning and before applying the wax? Any pictures by chance?
    If the end of the world ever comes move to Kentucky, because everything there happens 20 years later. ~ Mark Twain
    History began on July 4, 1776. Everything before that was a mistake. ~ Ron Swanson
    The economy of what you say lends more to it's meaning than the depth of it's exclamation.
    If you need a tool and don't get it, you paid for not having it and you still don't have it.

  5. #5
    Join Date
    Jan 2024
    Location
    United States
    Posts
    33
    Quote Originally Posted by roger wiegand View Post
    Charring the wood and then filling the grain with a colored/metallic gilding wax can produce some amazing effects.
    This mural idea sounds incredible!


    For your wood choices, I'd recommend mixing softwoods like Pine for wider grains and hardwoods like Oak for tighter grains. These woods react amazingly to this "Shou Sugi Ban" or "Yakisugi" charring. They also take and absorb dyes differently for a good contrast.


    You can also consider oil-based stains for deeper penetration. Also, try playing with different sanding methods before staining for varied textures to the blocks. Good luck on your project

Posting Permissions

  • You may not post new threads
  • You may not post replies
  • You may not post attachments
  • You may not edit your posts
  •