Mid afternoon the plane till got hung with the assistance from a woodworker living 2 streets away. The project is done, my bench is clear for the first time in recent memory, and at least half of the horizontal surfaces in my shop now have room for other things. As you will see in the photos, the till is already filled and the first photo shows the obligatory end of project wine glass with the planes which won't fit in the till. These and other aquisitions will get another form of storage out of sight which befits their very occasional use. The goal of the till was to put often used tools within easy reach of the bench. Thanks to all of you here for bearing with me as this project moved along. I still haven't figured out how I want to hang the spokeshaves on the right hand ramp which is still empty. This one bears some thought and won't be entered into quickly. Note the lifted ramp in the last photo. The left hand ramp already stores my York Pitch frog for my L-N 4 1/2 and my complete Stanley #45 combination plane. I am truly glad this is done and I'm pretty well satisifed with the results.

 Reply With Quote
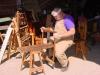

 Jr.
Jr.