Results 1 to 12 of 12

Thread: Workshop Layout - Squeezing It All In...

  1. #1
    Join Date
    Nov 2005
    Location
    San Jose, California
    Posts
    667

    Workshop Layout - Squeezing It All In...

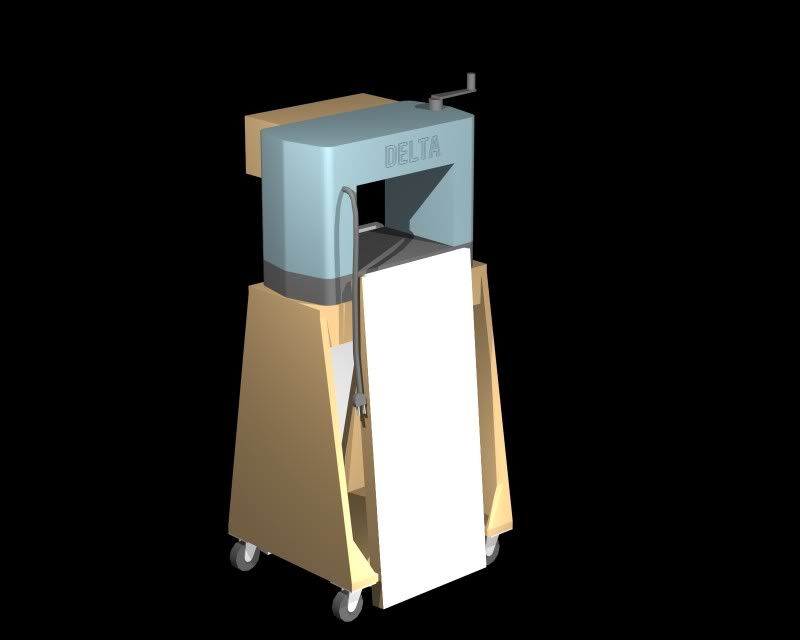
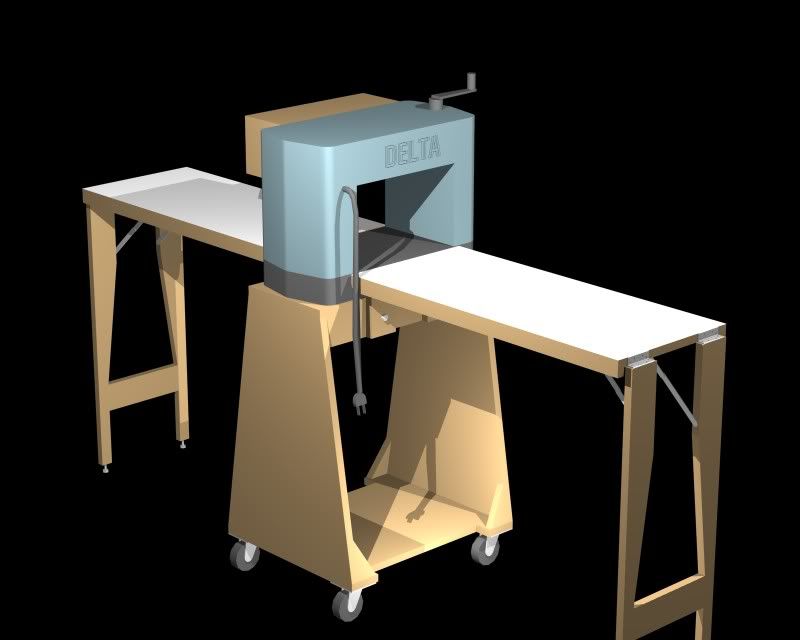
    Probably like many of you, my workshop is too small for the number of tools I have in it. I'm continually having to move machines around so I can get enough in/out feed clearance for the work. Also, my mortising machine and sliding combination miter saw have no real home - they get moved all over and get in the way. There is hardly enough space to walk between my machines/piles of wood/storage containers etc. and I'm always scraping my legs while moving around the workshop.

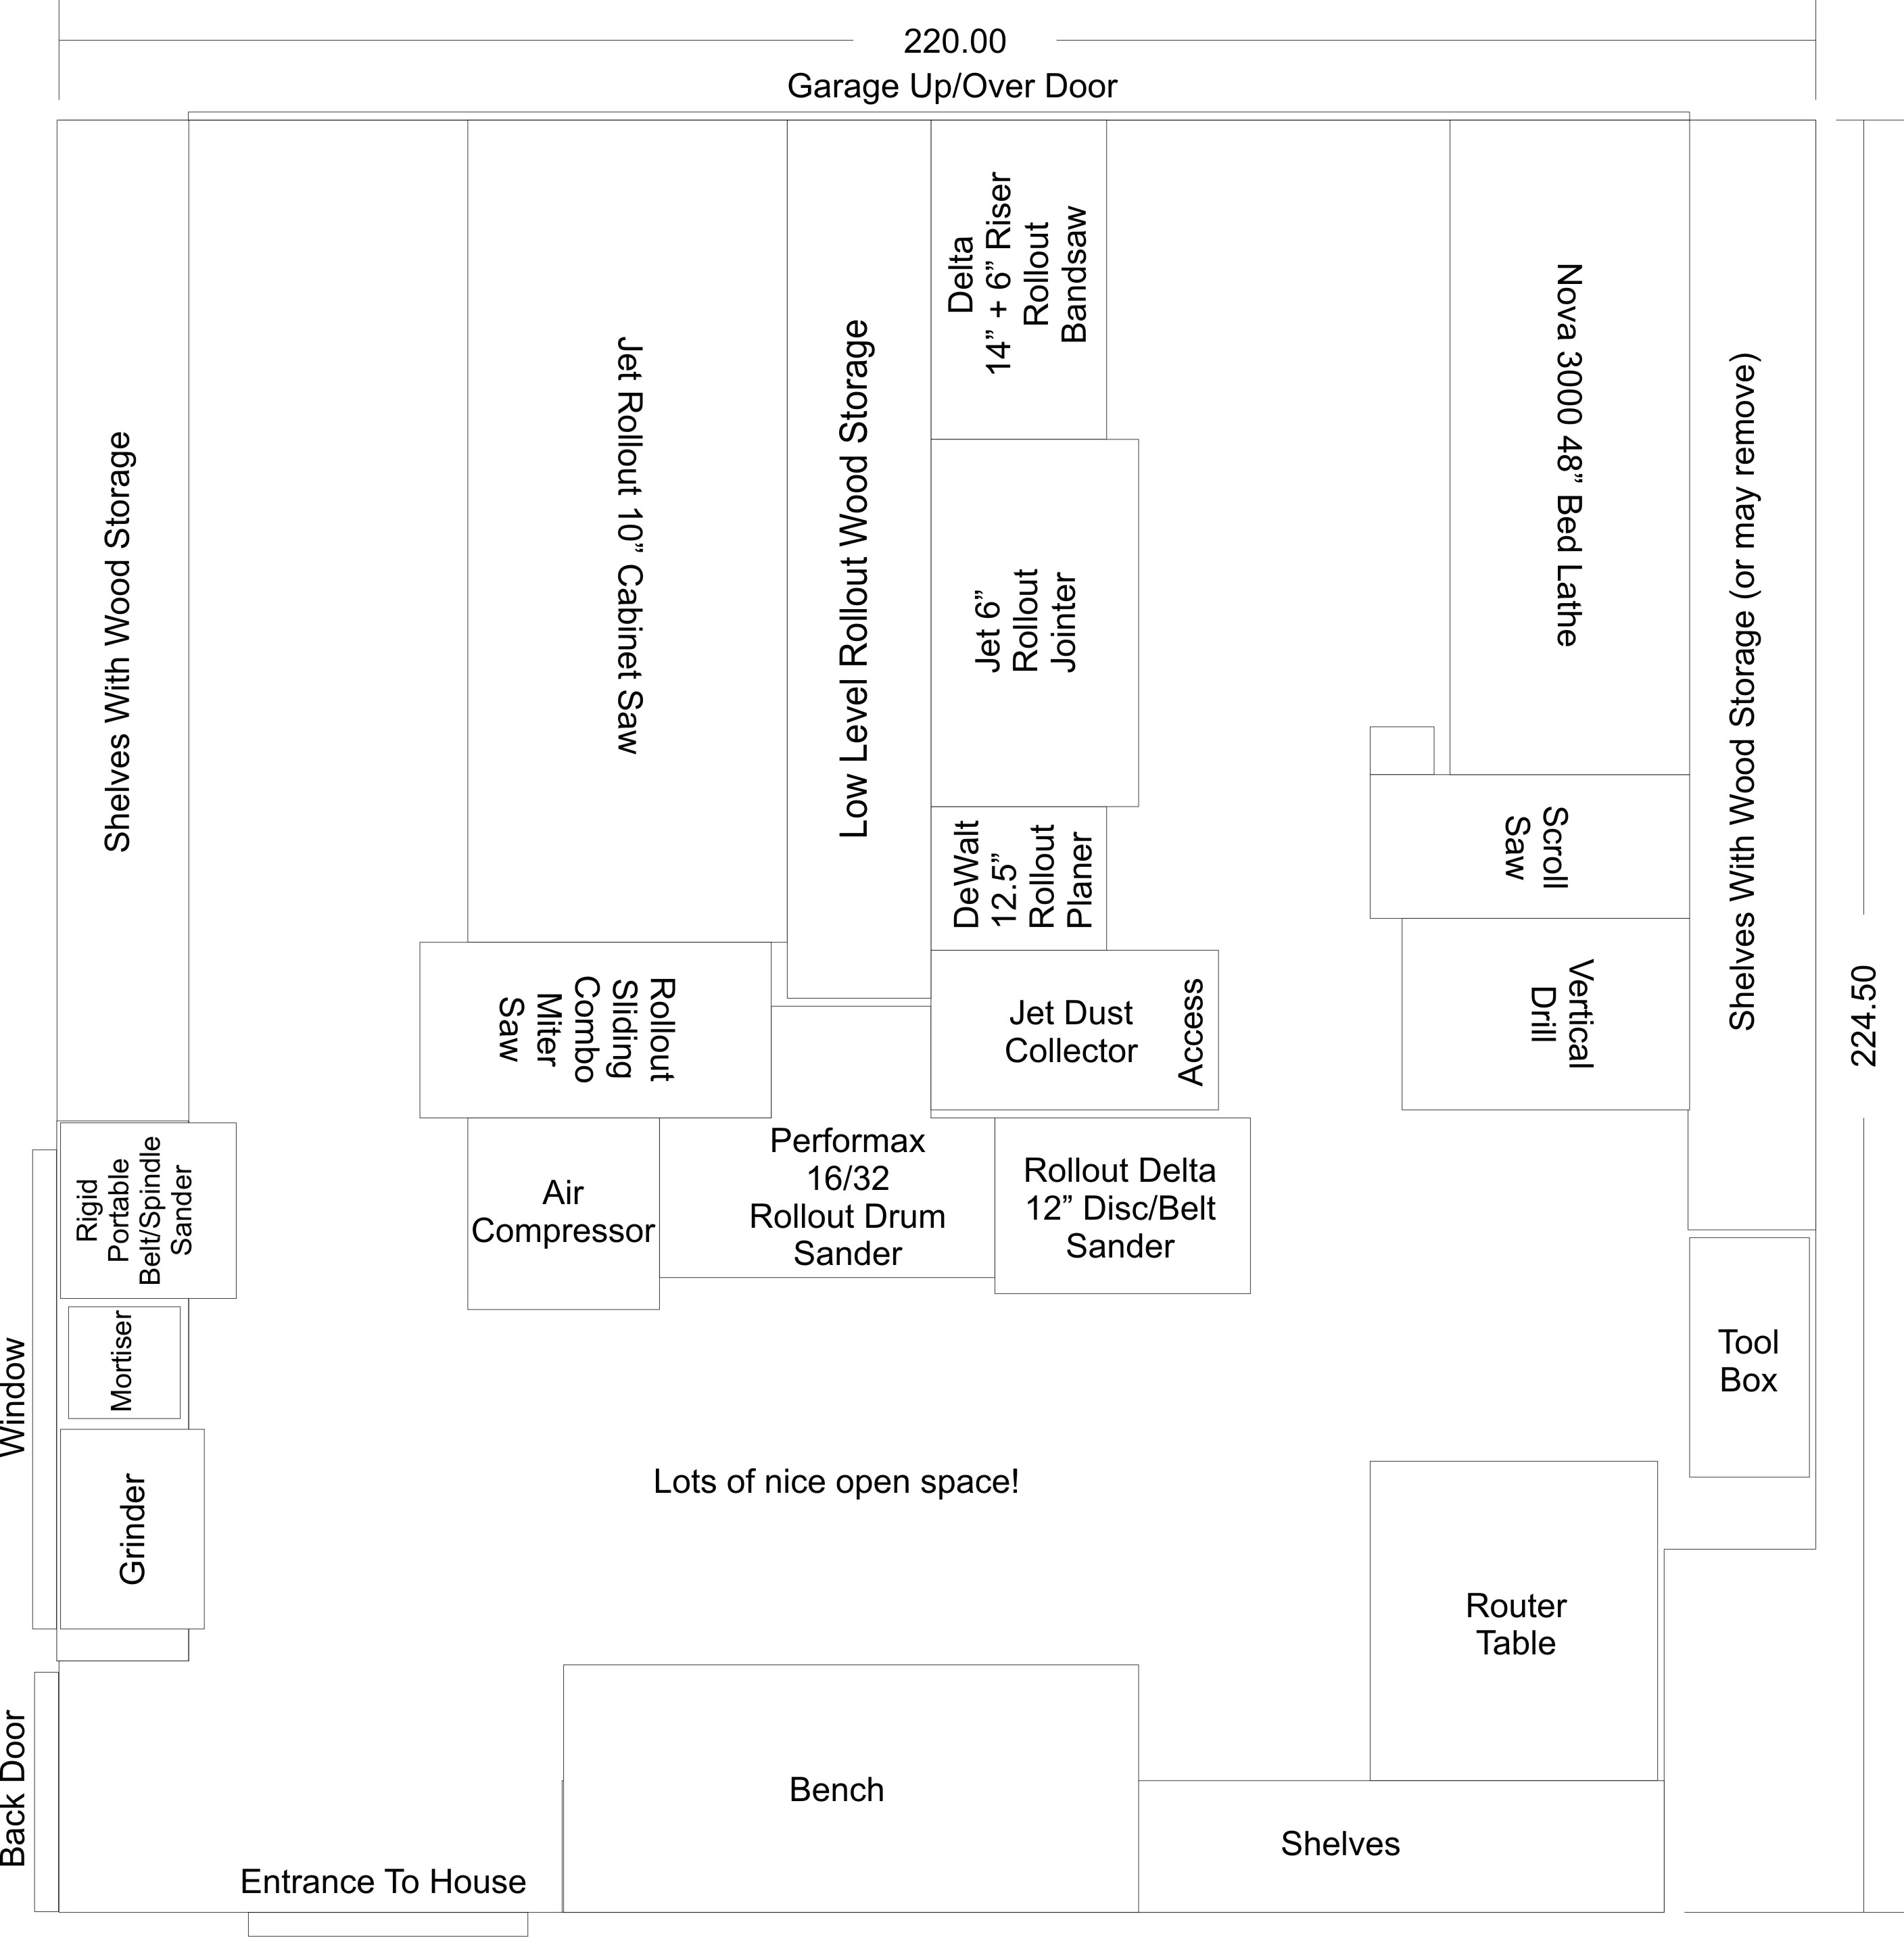
    Recently I decided I'd had enough! There has to be a better way to layout my 'shop. So, I measured everything carefully and entered it all into a Corel Draw (X3) drawing, using 1mm = 1" scale. For your amusement, here's a picture (click on it to see it bigger) of my current workshop layout and the Corel Draw X3 file.


    http://www.daveswoodenwonders.com/Layout_101506.cdr

    As you can see, the miter saw and mortiser don't have anywhere to go and there's no space for in/out feeds from many of my machines (e.g. jointer, planer, bandsaw). If I want to use my router table, or cut anything over about a foot long on my cabinet saw, I have to raise the front garage door (which then blocks the lights in the ceiling ).

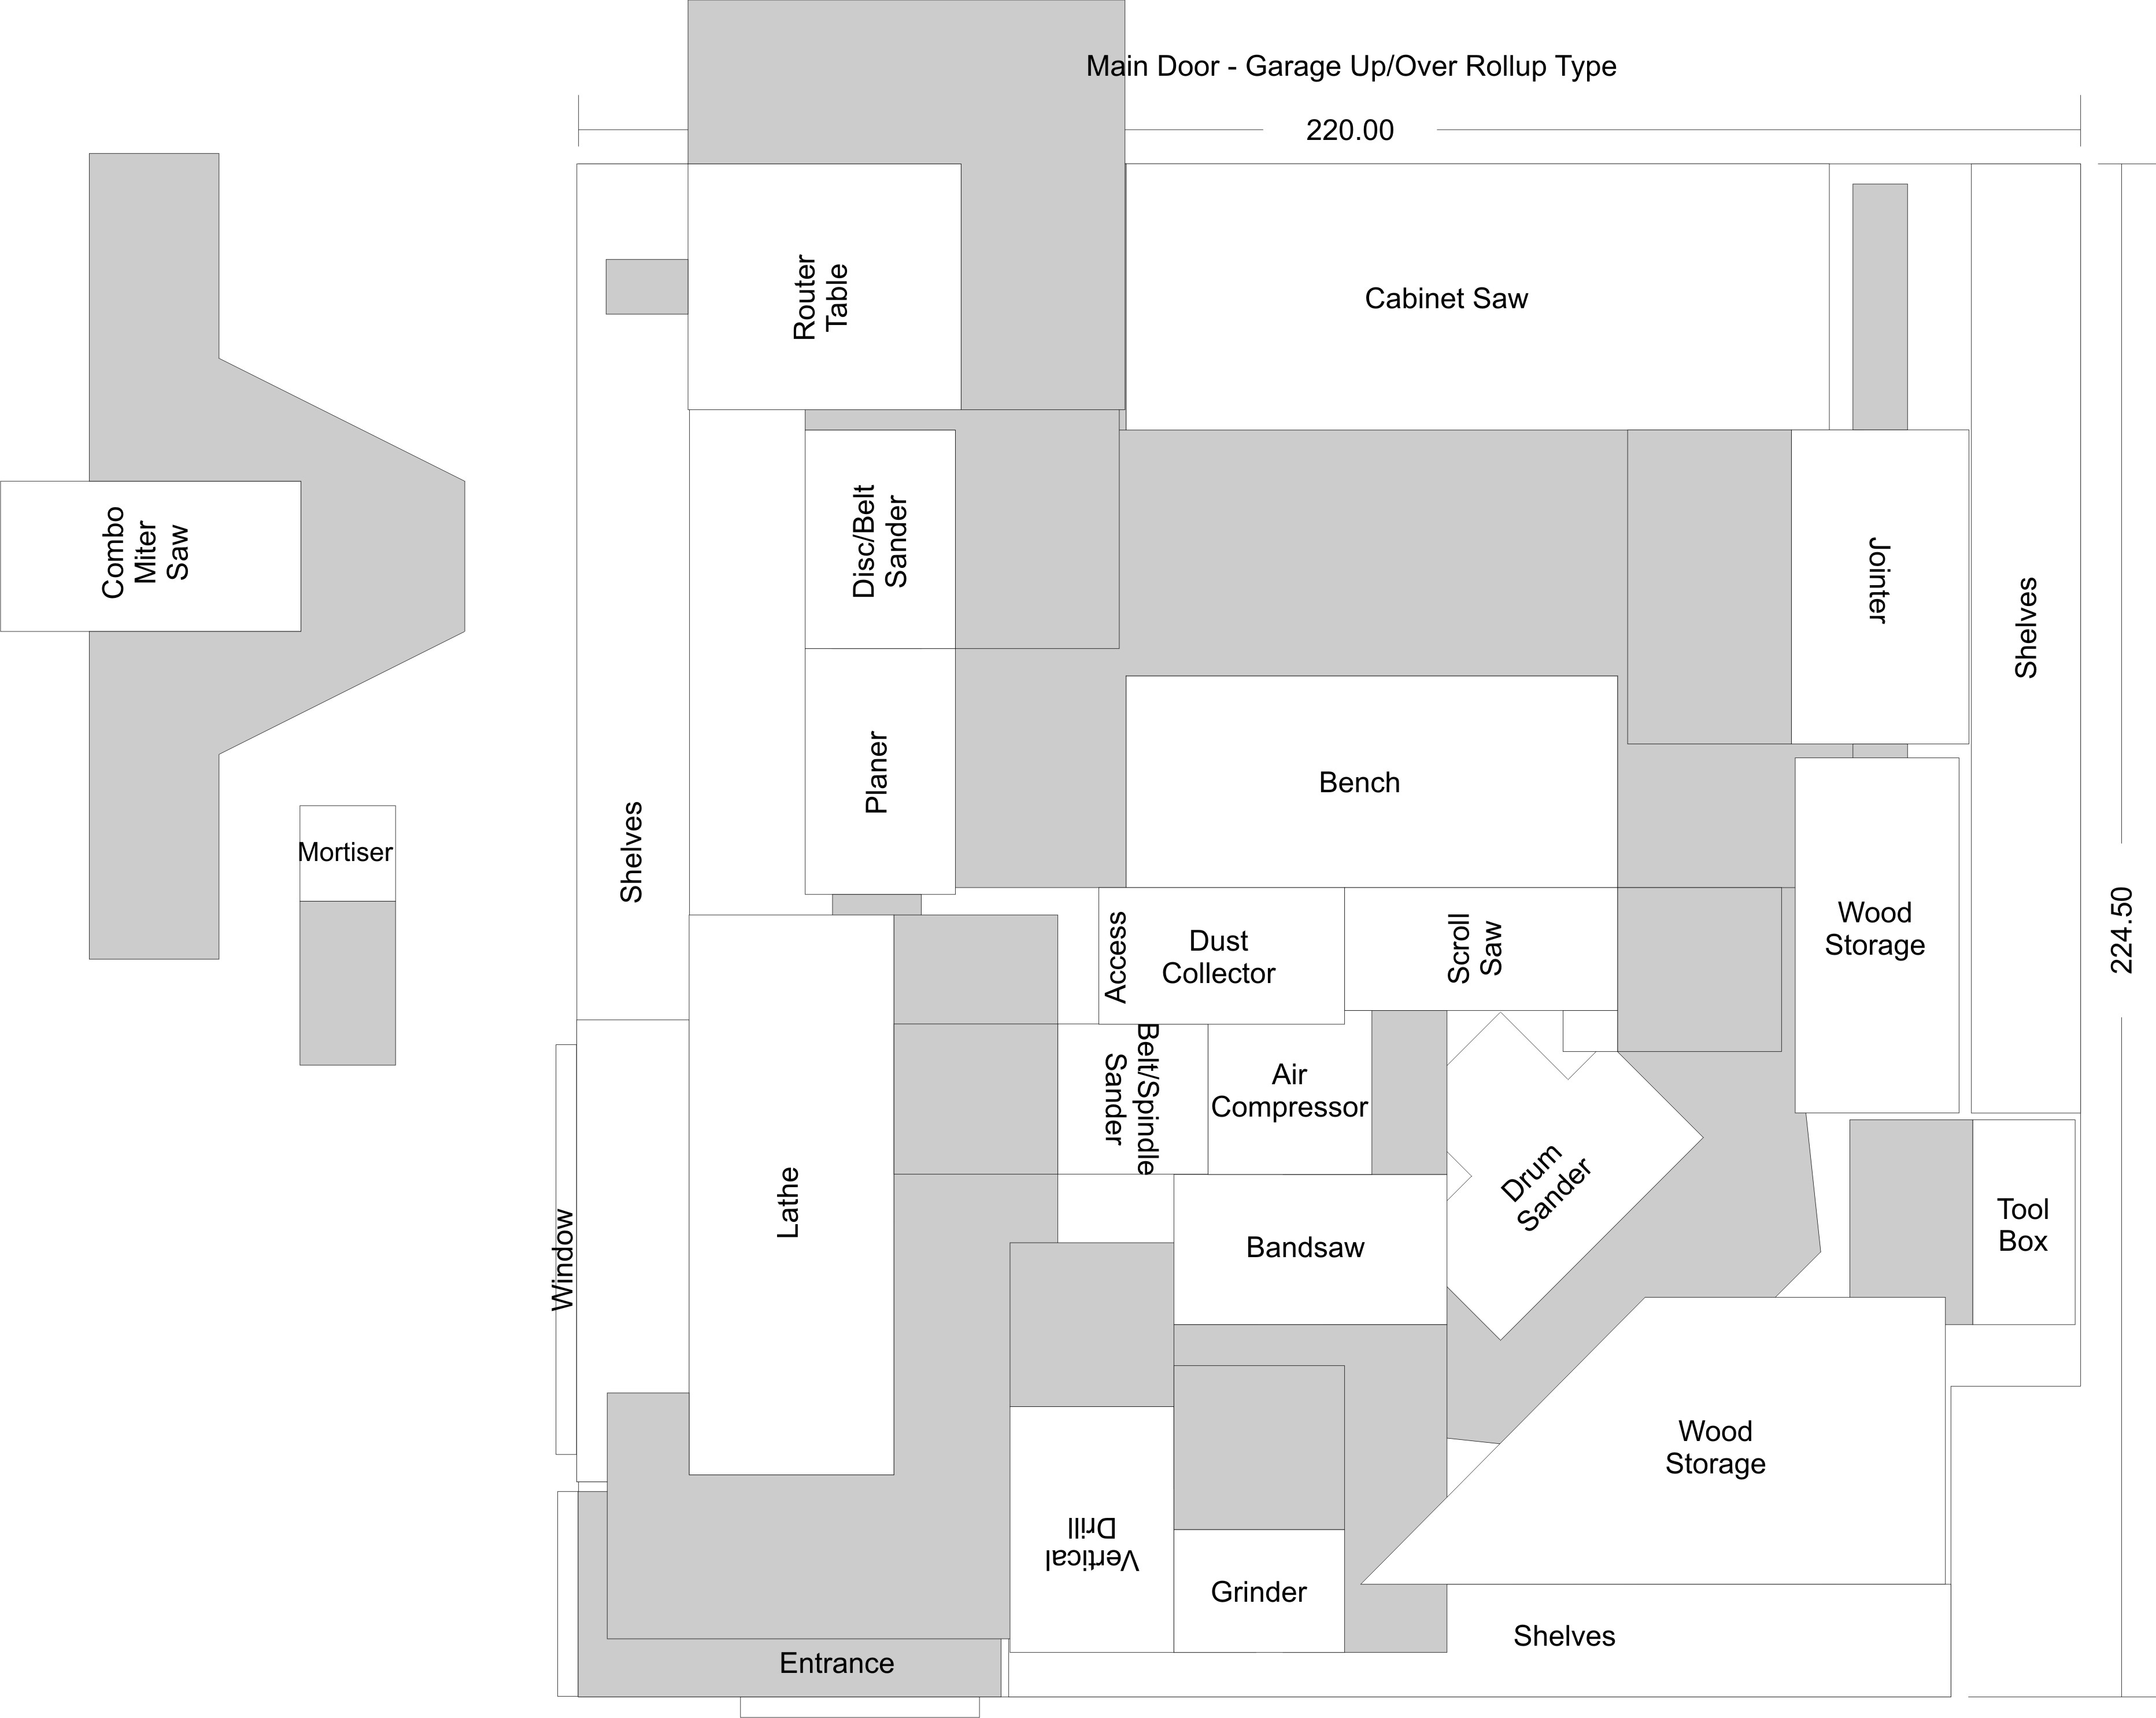
    I have a few ideas about how to juggle everything around and make it fit better, but I thought I'd poll the experts (that's YOU!) to see what changes you'd make. Feel free to play "jigsaw puzzle" with the Corel file and post your improved layout ideas (if you have Corel Draw that is). I can post a version 11 or earlier file if anyone wants one to play with.

    The shelves that go all the way round the garage are floor to ceiling except under the window by the back/kitchen doors. I am not averse to removing any or part of them. For instance, I may remove the bottom part and just leave a high shelf with machines under some of them and I may turn the shelf unit behind the lathe into a plywood sheet storage unit. Right now, I can't really get to many of the items on the shelves anyway....

    I'm looking forward to seeing what you come up with.

    Thanks for your help,
    ave F.

  2. #2
    Join Date
    Mar 2004
    Location
    Toronto, Ontario, Canada
    Posts
    3,789
    Dave, this looks like qite a challenge because you sure have a lot crammed in there.

    Could you provide a .bmp or .jpg version of the layout?

    What are the dimensions of your shop?

  3. #3
    Join Date
    Nov 2005
    Location
    San Jose, California
    Posts
    667
    Hi Frank,

    Thanks for the fast repy! If you right-click on the first picture and select "save target as..." then you will save the larger version of the .jpg picture.

    The 'shop dimensions are on the drawing, although they are difficult to see - it's 224.5" long by 220" wide, wall to wall, with a 45.5" x 19" incursion in the bottom right hand corner where the lounge chimney is built. Not very big is it?!

    Cheers,
    ave F.

  4. #4
    Join Date
    Dec 2005
    Location
    London, Ont., Canada
    Posts
    2,200
    Photos, Dave. We need Photos to get a better feel for things.

    For instance... is your planer a portable or a 15" floor model? If a portable, then someone might suggest making a flip-top tool stand and put the planer and something else like the grinder on it.

    I've seen a book where the author had more smaller tools, and he built a tall shelving unit, and put the portable tools (small scrollsaw, planer, grinder, etc) on boards that slid into the shelf. In that way he stacked up at least 4 tools in one vertical chunk of space.

    best,
    ...art

  5. #5
    Join Date
    Nov 2005
    Location
    San Jose, California
    Posts
    667
    Here's a "cut out and play" version of the .jpg file with all the tools moved outside of the 'shop. It's pretty obvious that the greyed areas are the necessary operating space and in/out feed space. The operating spaces can obviously overlap between machines, but a little more thought will have to go into the overlapping of the in/out feed spaces. My brain hurts....

    http://www.daveswoodenwonders.com/La...outandplay.jpg

    Thanks,
    ave F.

  6. #6
    Join Date
    Aug 2005
    Location
    Northern New Jersey
    Posts
    1,958
    I'm not sure if I can help with the layout, but as a hobbyist with a small shop, I offer the following:

    1. Put everything on wheels except for the dust collector;

    2. Workbenches and miter stands should be the same height as the table saw;

    3. Install plenty of outlets along the walls. Consider both 120V and 240V outlets. I recommend 6 foot spacing between outlets along the wall. Also, buy a short 25' 12 ga extension cord. Also make some 240V extension cords using a 240V plug and socket available at Home Depot or Lowes;

    4. Evenly spaced lighting is nice to have, but I also recommend task lighting for machines like the bandsaw, miter saw, sanders, scroll saw, and router table. The light moves with the machine. Halogen and incandescent magnetic base machine lights are readily available.

    5. I recommend installing a ducted dust collection system and a permanent location set aside for the dust collector machine. Moving a single stage dust collector is painful. Moving a cyclone is nearly impossible. Determine the best location for drops and use blast gates. Plenty of branches are fine. Buy some decent flexible duct (WoodCraft has some) that is soft and pliable. Some brands are very stiff and unwieldy. WoodCraft also sells band clamps that have a tool-less thumbscrew to quickly secure the duct to the machine.

    6. You mentioned plenty of shelf space. That’s good. Old cabinets are also good to keep settling dust to a minimum. It’s important to keep the floor space along the walls clear to store machines that are not used frequently.

    cheers, Jeff

  7. #7
    Join Date
    Mar 2004
    Location
    Toronto, Ontario, Canada
    Posts
    3,789
    Quote Originally Posted by Dave Fifield
    ...
    If you right-click on the first picture and select "save target as..." then you will save the larger version of the .jpg picture.
    ...
    Thanks for the tip, Dave. More than two years of looking at pictures on Saw Mill Creek and I did not know that we could do that.

  8. #8
    Join Date
    Nov 2005
    Location
    San Jose, California
    Posts
    667
    Photos tomorrow night Art....must....go....to....bed......need....sleeee epzzzzzzz......

    Planer is a 12.5" DeWalt portable that's sitting on top of an old B&D workmate right now, so yes, a mobile planer (plus miter saw maybe?) stand is in my future! Didn't Norm have a design for one of these on one of his old shows a while back?

    Bon nuit,
    ave F.

  9. #9
    Join Date
    Aug 2005
    Location
    Northern New Jersey
    Posts
    1,958
    I combined a portable planer with a miter saw in one mobile stand. It did not work out well. I always had to move stuff off the stand so I could use the planer.

    I did make a mobile stand for my portable planer with folding extensions. My planer has a fixed table, and a moveable head to allow this. It also has some valuable storage space within the cart for my small lathe head and tailstock.

    I'm also tight on space! -Jeff


  10. #10
    Join Date
    Dec 2005
    Location
    London, Ont., Canada
    Posts
    2,200
    Quote Originally Posted by Dave Fifield

    Planer is a 12.5" DeWalt portable that's sitting on top of an old B&D workmate right now, so yes, a mobile planer (plus miter saw maybe?) stand is in my future!
    Dave,

    Go to the advanced search, and search for "flip" in subject lines and you'll find four different threads on flip top tool stands:

    http://www.sawmillcreek.org/showthre...highlight=flip
    http://www.sawmillcreek.org/showthre...highlight=flip
    http://www.sawmillcreek.org/showthre...highlight=flip
    http://www.sawmillcreek.org/showthre...highlight=flip

    That should keep you busy for a while.

    You could also see if your library has a copy of "Danny Proulx's Toolboxes & Workbenches" which has some decent stuff in it.

    Another idea... Since youre space is so tight, what about getting rid of your workbench. Instead, build a top that slips over your table saw and use that for a work table. No vice, I know, but I'm trying to be creative here!

    best,
    ...art

  11. #11
    Join Date
    Nov 2005
    Location
    San Jose, California
    Posts
    667
    Thanks Jeffrey/Art - most useful info - I'm still mulling it all over, but I have been playing with the jigsaw puzzle some more and think I have a better layout that's going to work. See what you think.....


    Click on it to see the full sized version, or right click to download.

    I have fully embraced the idea that I will have to rollout machines to get the in/out feed clearance needed, but I won't have to rearrange things too much for any one operation.

    With the bench against the back wall, I can put a bunch of tools just above it within easy reach, the router table now has good access to the two sides I need, and there's plenty of space to move around in. The lathe will be easier to use (especially now that I'll be able to swing the head more easily). I'll have to build wheeled units for the miter saw and planer, but all the rest of my machines already have them. I will have to roll the cabinet saw out of the garage to do long stuff - no problem really - and for shorter work, the new low level rollout wood storage "bin" thingy can double as a cabinet saw extension table. I will have a nice clear path between the back doors and front door of the garage now too - my wife will appreciate that for bringing in the shopping etc.

    Anyone see any fatal flaws in this layout? If not, I think I know what I'll be doing this coming weekend!

    Cheers,
    ave F.

  12. #12
    Join Date
    Apr 2006
    Location
    Mpls, Minn
    Posts
    2,882
    I'm a disaster at designing anything, but I am finding that by building a cabinet on wheels for both the miter saw, and one soon for the smaller planer, I'll also have storage space underneath them, plus they are easily moved out of the way if need be.
    I have the 15" planer, table saw and jointer on mobile bases also.

    For me the key was mobile tool and storage cabinets.
    Al

Similar Threads

  1. Frank's Workshop Construction Project
    By Frank Pellow in forum General Woodworking and Power Tools
    Replies: 329
    Last Post: 09-23-2006, 10:36 PM
  2. Sketch-Up - First workshop tool layout models
    By Mike Williams in forum Design Forum
    Replies: 3
    Last Post: 06-04-2006, 1:55 PM
  3. Bill Grumbine workshop
    By Mike Cunningham in forum Turner's Forum
    Replies: 2
    Last Post: 03-25-2006, 8:01 PM
  4. Shop Layout
    By Robert Ducharme in forum General Woodworking and Power Tools
    Replies: 28
    Last Post: 01-26-2004, 7:20 AM
  5. New Shop! Layout comments please.
    By Matt Meiser in forum General Woodworking and Power Tools
    Replies: 17
    Last Post: 11-14-2003, 7:47 AM

Posting Permissions

  • You may not post new threads
  • You may not post replies
  • You may not post attachments
  • You may not edit your posts
  •